Start Your 3D Journey in Cinema 4D
Master the essentials of 3D modeling, lighting, and animation in C4D. Enroll in All-Access to unlock C4D Basecamp and 50+ other courses.

Learn how to design simple 3D characters!
Are you looking to design simple 3D characters in Cinema 4D? Having trouble building out your pipeline from creation to finished character? Today, we’re going to focus on creating a stylized character in Cinema 4D, and talking about the tools and techniques you can use to enhance the originality of your character!
Character design might sound intense, but it is a really fun process once you understand the tools you should use. We’ll provide you with an overview of some of our favorite apps, such as Cinema 4D, ZBrush and Substance Painter. We’ll cover not only how to use each application, but also why we use them for different aspects of creating characters.
In this tutorial, you’ll learn:
- How to Create a Simple base model
- How to add details to your model in ZBrush
- How to texture your character with Substance Painter
If you want to follow along or try these techniques out for yourself, you can download this sketch and working files.
{{lead-magnet}}
Creating a character should be fun, and you can use this process to establish a rhythm every time you set out to make something new.
Start with an initial sketch

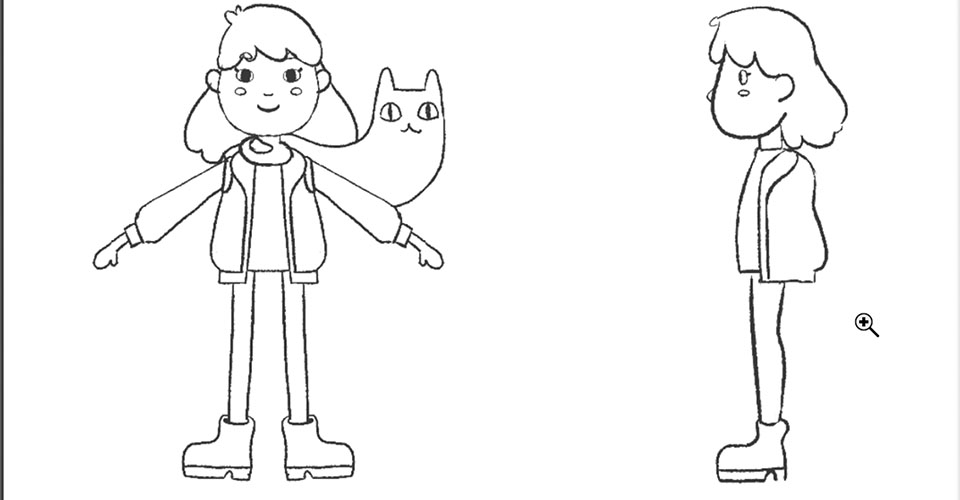
Before we jump into Cinema 4D, always sketch the concept design. It’s way easier to model your character based on a sketch as it informs what you will be required to model…versus jumping into a 3D app not quite knowing what you’re making.
We typically sketch out a character design on a notepad with several variations. Even with all the fancy gizmos and gadgets in our office, few things beat a traditional pencil and paper.
We also usually make a Pinterest board per project to gather inspiration. For this project, we gathered some 2D / 3D illustrations as inspiration for our character’s costume and tools.
Once you finish designing the concept, scan it into your computer (you can even take a picture with your phone if you don’t have a printer/scanner). Import it into Photoshop and then make front and side pose sketches to use as reference when you’re modeling in 3D.
Box Modeling and Sculpting
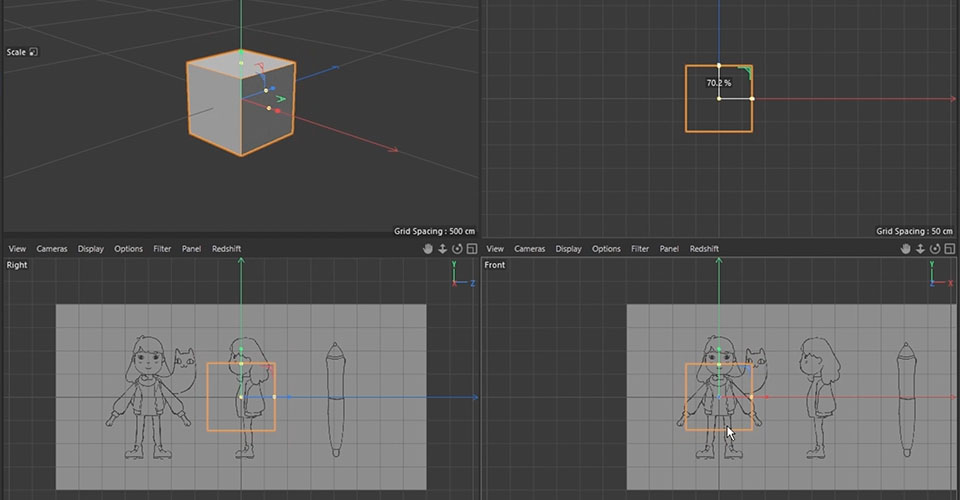
There are 2 main workflows for modeling characters: Box Modeling and Sculpting.
Box modeling is a more traditional process of modeling. You start with a cube, adding cuts and manipulating polygons, until you draw a character out.
If you have a solid idea of how the character looks on your sketch—and your character is fairly simple—box modeling is an easier and simpler process for you than trying to find your character while modeling.

Sculpting is a newer method, which is using software with dynamic remeshing tools—such as ZBrush or Blender—which sculpts the model like clay. It’s a very fun process, however the model you make with these tools has a very dense mesh and you can’t rig or animate as is. You have to retopologize the model, which is basically simplifying your polygons with the right topology flow for rigging.
If you are an artist and you want to be more experimental during the modeling process, or want to build a more complex character, Sculpting may suit you.
Modeling a Simple 3D Character
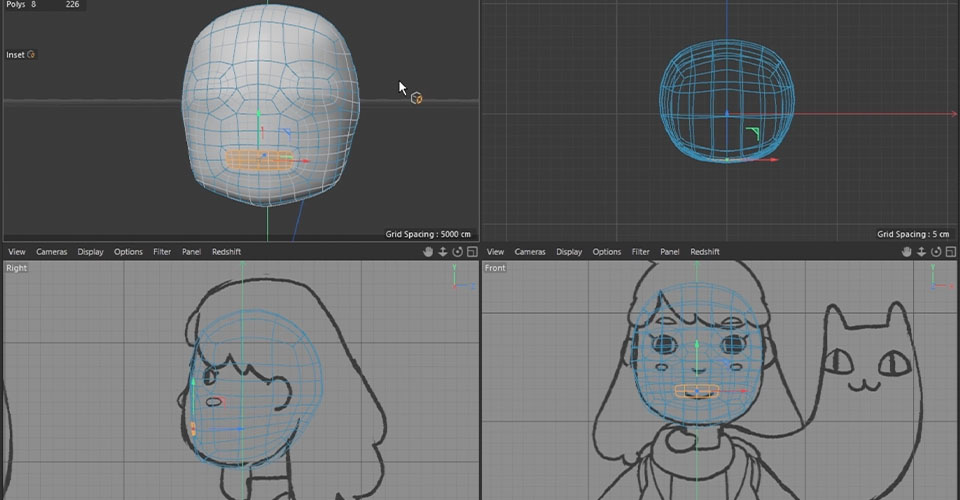
There are 2 things we caution all artists about during the modeling process.
The first thing is to make a model with the lowest number of polygons possible. This is generally an important rule for modeling any object. If you create a dense model, your project will be heavier and harder to work with due to the slower speeds in your viewport.
The second thing is to create a clean topology. This is also very important if you want to make a character model from as a single object. This is especially important if you are ultimately going to rig the character.
There are tons of great resources on pinterest if you search topology. Also INTRO TO 3D
has a great topology guide on their website.
Now it’s time to get into a detailed area: the face.
Modeling a Face in Cinema 4D
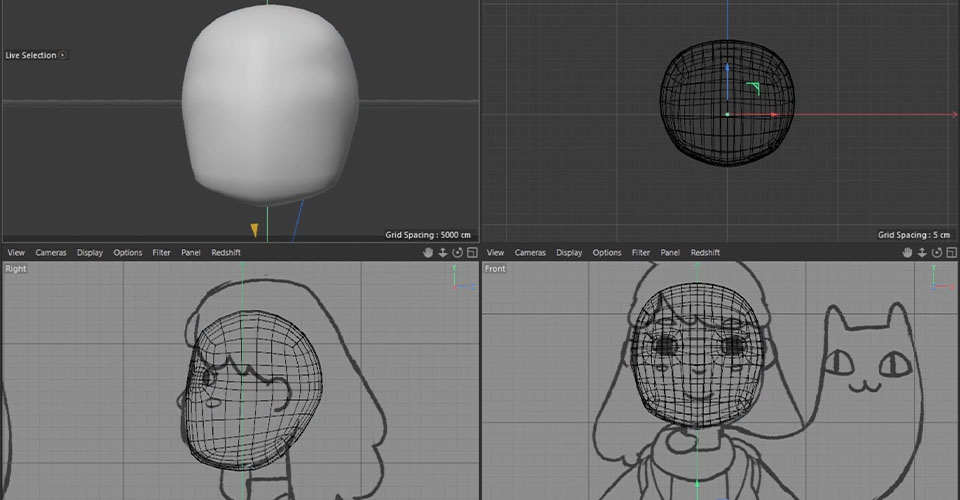
Let’s begin modeling the face! First, set your sketch in the viewport. Go to View settings and click the Front View Window to make it active. You'll see Viewport [Front] on the Attributes and you can load up an image.
Select Back and then you can select the background for your image. We like to adjust the position here and make the transparency about 80%.
Then Click on the Right View window and do the same thing again.
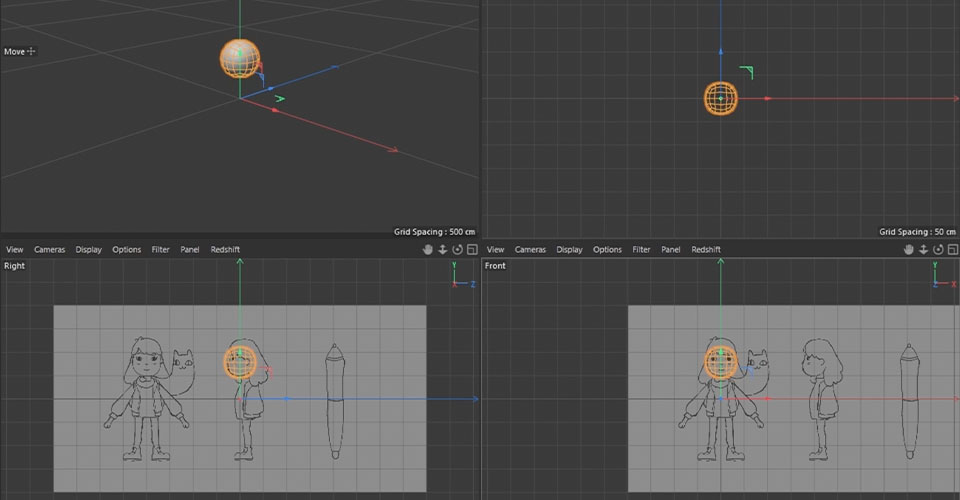
Now let’s call up a cube and make her head. Shrink this cube to about the size you want her head to be, and then add the subdivision surface to make our cube subdivided. Keep the subdivision level 2, then make it editable with the shortcut C. Now we have this rounded cube which is a bit closer to a head shape.
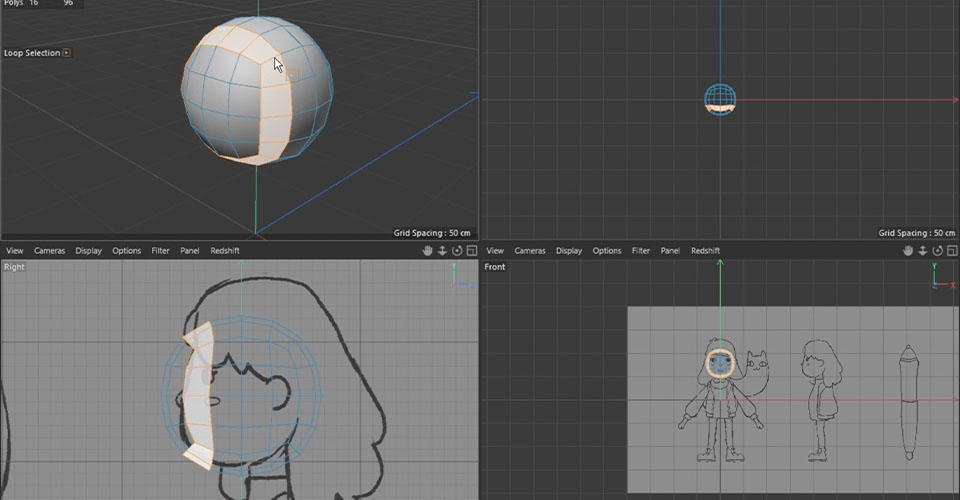
Here we have a polyloop which we want to use for her face. At the moment, this loop is a bit small and out of place, so what we’re gonna do is select this line loop with U+L, right-click and dissolve. Then select the polygons on the front of the face, move them back slightly and enlarge.
Next, we select all the points on the right half of her head and delete them. Then we add a symmetry object. We also add another subdivision object and put this object as the child of the Subdivision Surface—and make this subdivision level to 1, not 2.
Now you can use a sculpt tool or magnet tool to make this shape closer to her head shape.
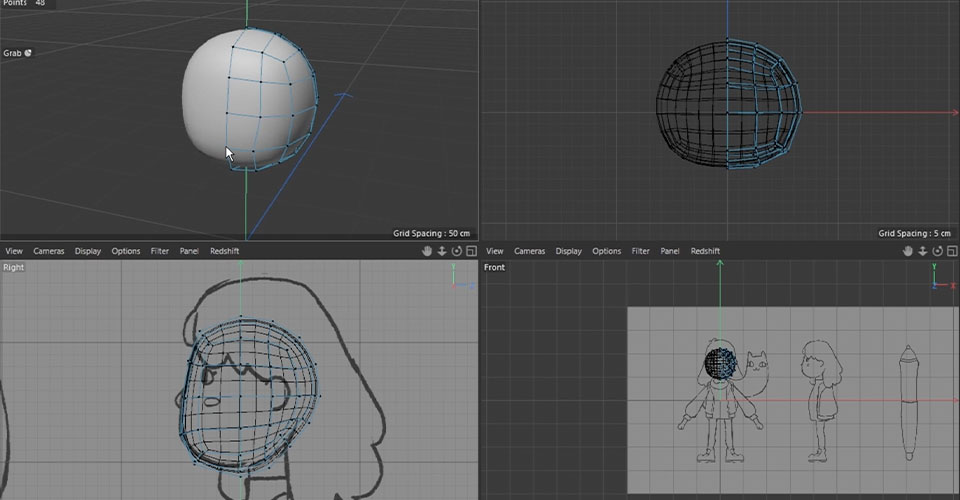
If the model’s center points move off the axis for some reason, you can select all of the center points by loop selection, then open the coordinate manager, zero out the size of X, and align the position to 0 in the coordinate manager.
Quick tip: If you need any brush to be a smooth brush, hold Shift as you use it.
Let’s make her an eye hole. Add a loop cut with the shortcut key K+L, and another here.
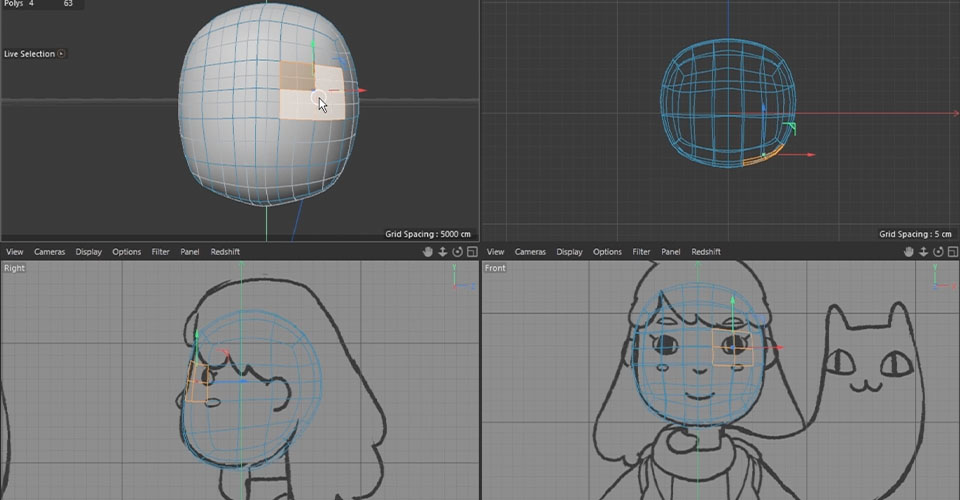
These 4 polygons will be her eyes. So I select these 4 polygons, then inset with the shortcut key I, and smooth them out using a smooth brush. Now we have eyes.
Make another loop for her nose and mouth—we like to make this symmetry object editable with the shortcut C. Inset these polygons with I, and then add 3 more loop cuts in this section and smooth the polygons.
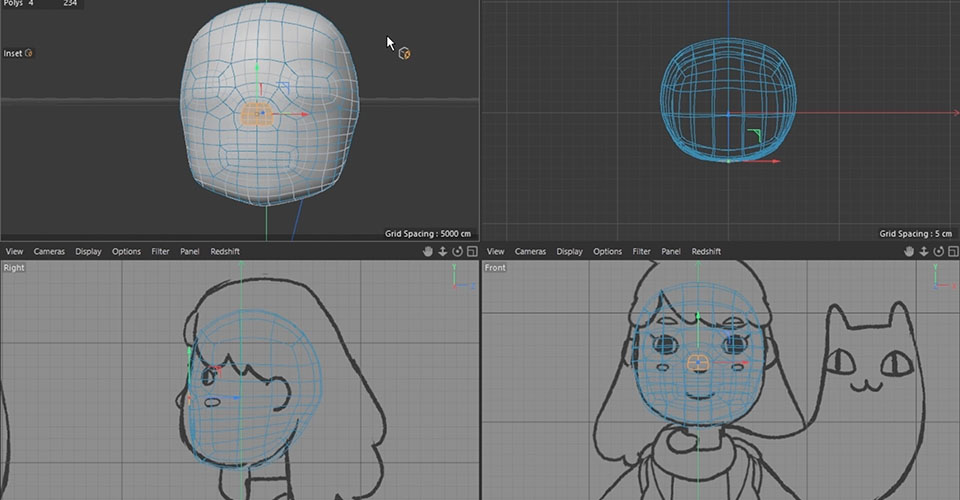
At this point, this model looks like C-3PO, but don’t worry too much. It will be ok. Just take your time. Since this part is more about feel and artistry, we’ll let you work on your own. Check out the video above to see how we finished out our character.
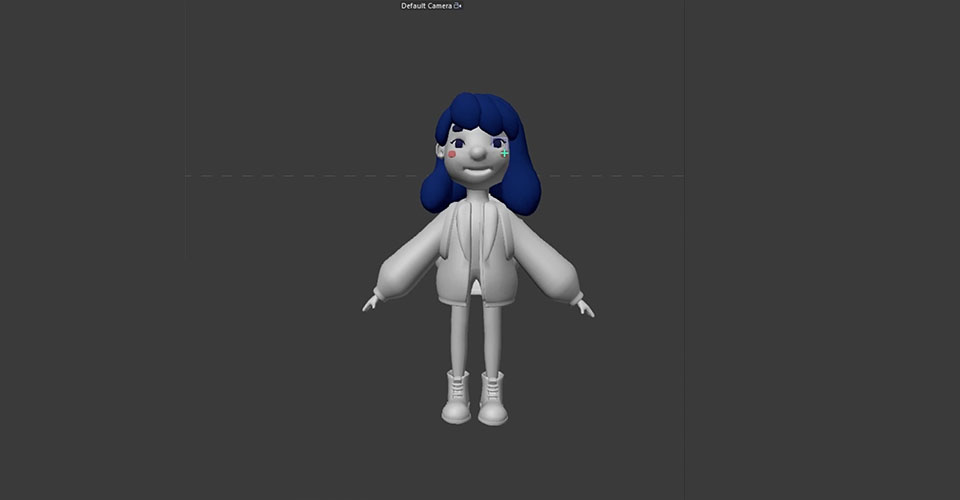
So this is the final model. Now we’re going to move into ZBrush and add a bit more polish. C4D is great for modeling, but ZBrush excels at finer details.
Before we go to ZBrush, we have to prepare files to export. The first thing you want to create is the UV maps. You can make a UV map with ZBrush if you want, but we personally prefer doing this with C4D.
Now I go to File, Export, and choose FBX file.
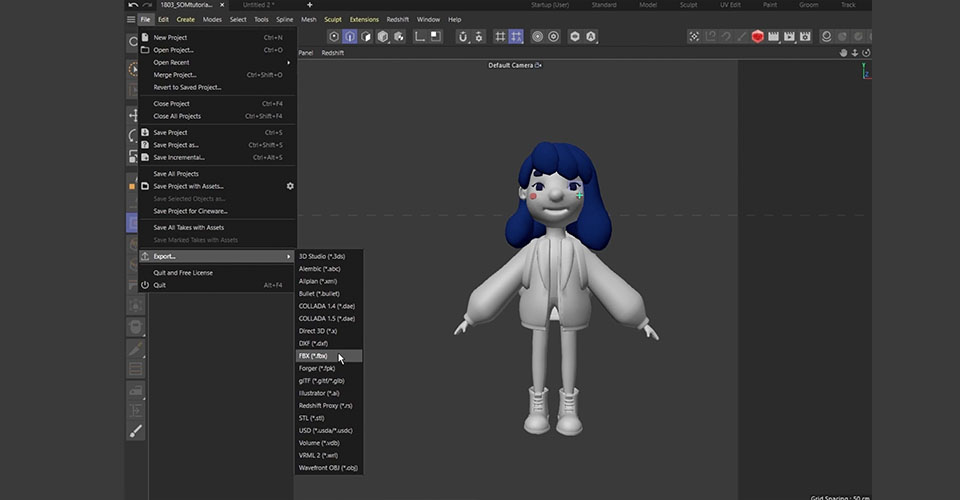
We’re going to barely scratch the surface of ZBrush, as there is a TON to learn. In this tutorial, we’ll show you a few tips and tricks, but you really need to roll up your sleeves and get to work inside the program to really get a handle on everything it has to offer.
I imported the FBX model I just exported. I subdivide all of these objects in ZBrush again. Now this model is ready to add some extra details.
The goal here is to keep the basic shape we created in C4D and add some extra details—such as details on her hair and wrinkles on her clothes. How much detail you add is completely up to you.
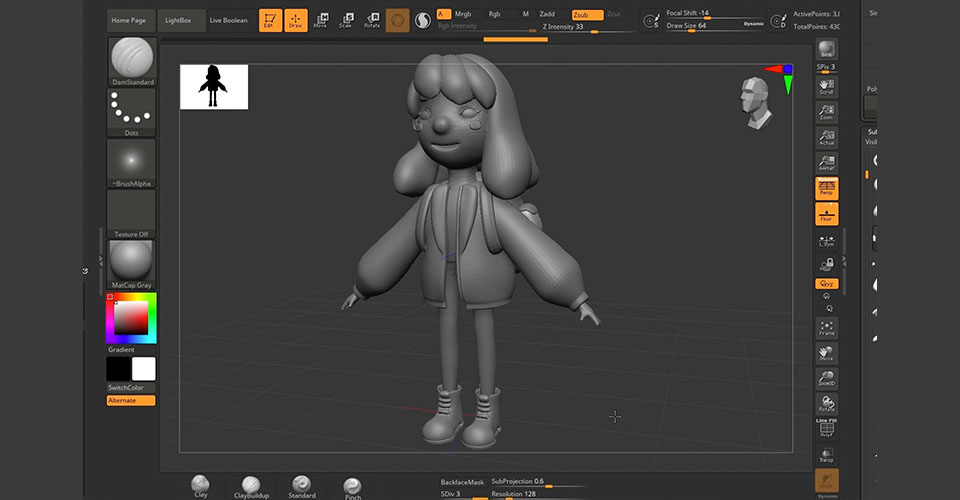
ZBrush is perfect for modeling finer details because sculpting can be a more intuitive way to model than box modeling. In ZBrush, you don’t have to worry about polygon flows; you can sculpt just as you would sculpt clay in real life.
It’s important to keep things consistent across your work, meaning if you add a lot of realistic details on your model’s clothes, then you should probably make the character’s face and body more realistic and detailed as well.
The great thing about ZBrush is that you can subdivide the model and add details without making the project heavy. Then you can bake these details as normal maps and displacement maps. This way, you still keep your models low poly in C4D for rigging, but also have some nice details using these maps as texture.
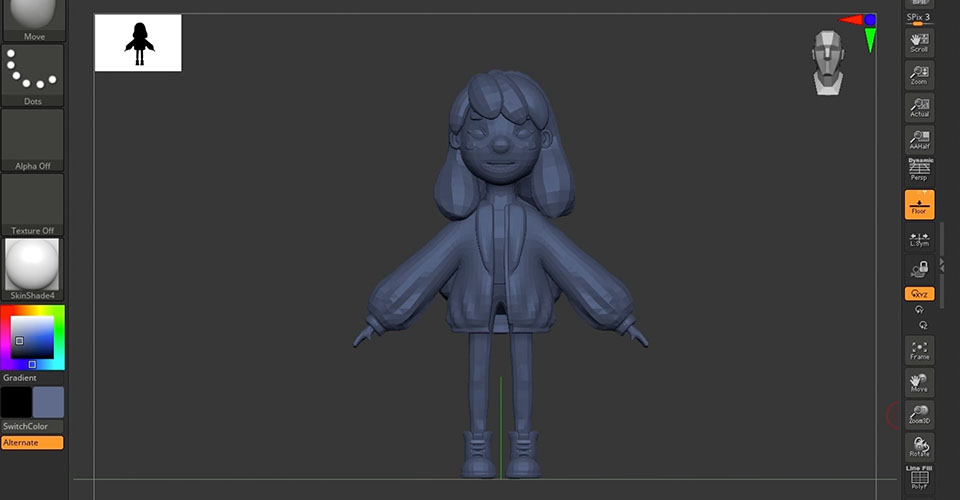
Now that she has some nice details, export the low poly FBX model and subdivided high poly model, as well as normal maps and displacement maps for each object. Now we are ready to go to Substance Painter and make the textures.
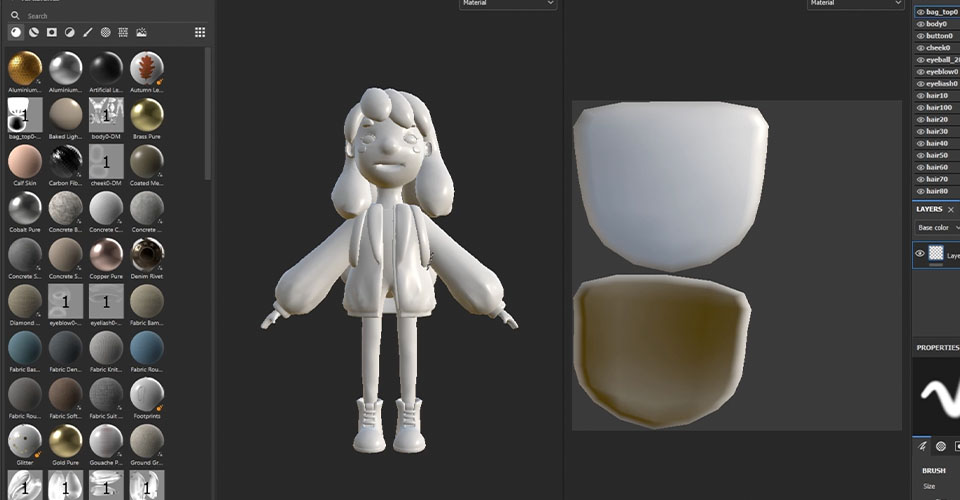
Substance painter is a super powerful software for texturing. You’ll find many character artists are using Substance Painter to add detailed textures to their characters, because it allows you to paint directly onto your 3D model in a very intuitive way. If you’re familiar with using Photoshop, you’ll find Painter uses a lot of the same techniques and tools.
With our project set up, we’ll show you how to make her skin texture first.
In the Asset Window, we already have tons of preset materials we can use.
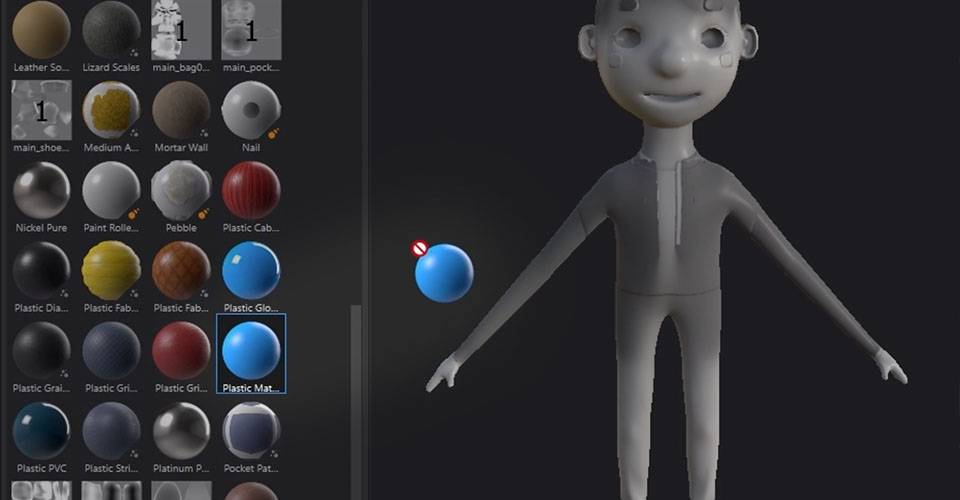
Applying the material is super simple: Just drag the material you want to use onto the model or layer window. Then you can go to the properties window and adjust the details, such as colors or roughness.
Now she looks OK, but we think she would look nicer with a natural blush on her face. So we’ll duplicate our material and this time choose pink, then we add a black mask. This mask works exactly like a Photoshop mask and we can paint some nice details directly onto this 3D model using the brush.
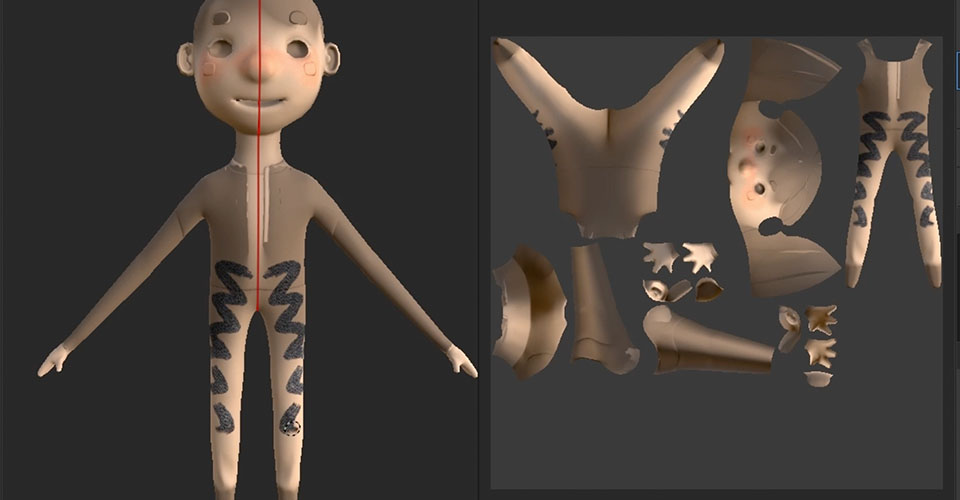
If you wanted to add this level of detail to your texture without using Substance Painter, you would probably need to paint onto the flat UV map using Photoshop. But it’s very tricky to paint by just imagining how your texture would look in 3D without the 3D preview, so this is where Substance Painter is really helpful. It allows you to paint directly on the model so you can create beautiful materials easily.
If you need a specific texture and don’t have one available, go to Adobe Substance Assets page to find an incredible amount of assets—and you can download 30 assets per month for free, so you don’t even need to know how to make these materials from scratch.
From here, keep experimenting with the preset textures, adjusting them, adding layers of paints and textures until you feel happy. Now that her texture is done, let’s go back to C4D and assemble the models and texture, and we will show you how it ended up.
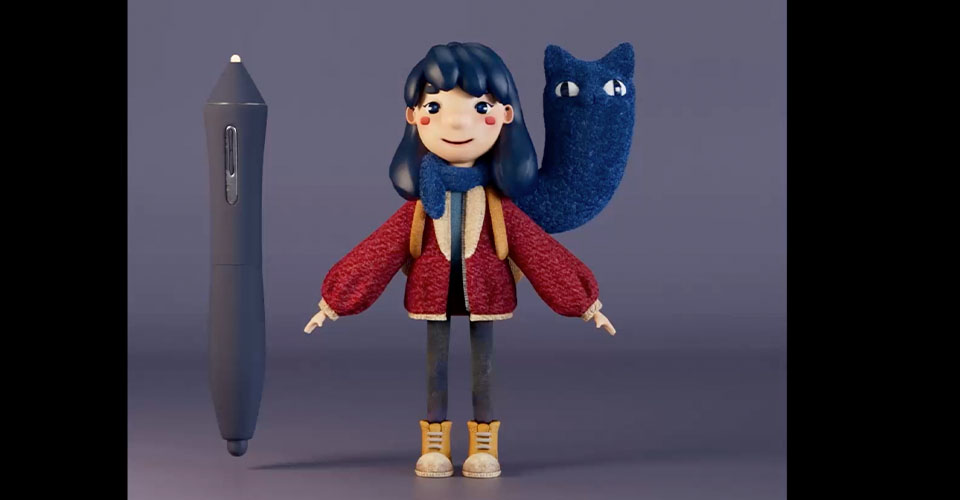
So this is the final work! We added her buddy-cat monster and the magic tablet pen.
Cinema 4D is an incredibly powerful tool for art and design, and you can get by with unwrapped UVs and a bit of imagination. But the power of ZBrush and Substance Painter opens up an amazing workflow. We hope you picked up a few cool tricks, and we can’t wait to see what you’ll create next.
Learn 3D Art and Design like a Pro
Are you interested in learning Cinema 4D, but not sure how to start? We highly recommend taking Cinema 4D Basecamp.
Learn Cinema 4D, from the ground up, in this intro to Cinema 4D course from Maxon Certified Trainer, EJ Hassenfratz. This course will get you comfortable with the basics of modeling, lighting, animation, and many other important topics for 3D Motion Design. Master basic 3D principles and lay the foundation for more advanced subjects in the future.
ENROLL NOW!
Acidbite ➔
50% off everything

ActionVFX ➔
30% off all plans and credit packs - starts 11/26

Adobe ➔
50% off all apps and plans through 11/29

aescripts ➔
25% off everything through 12/6
Affinity ➔
50% off all products

Battleaxe ➔
30% off from 11/29-12/7
Boom Library ➔
30% off Boom One, their 48,000+ file audio library
BorisFX ➔
25% off everything, 11/25-12/1

Cavalry ➔
33% off pro subscriptions (11/29 - 12/4)

FXFactory ➔
25% off with code BLACKFRIDAY until 12/3

Goodboyninja ➔
20% off everything

Happy Editing ➔
50% off with code BLACKFRIDAY

Huion ➔
Up to 50% off affordable, high-quality pen display tablets

Insydium ➔
50% off through 12/4
JangaFX ➔
30% off an indie annual license
Kitbash 3D ➔
$200 off Cargo Pro, their entire library
Knights of the Editing Table ➔
Up to 20% off Premiere Pro Extensions
Maxon ➔
25% off Maxon One, ZBrush, & Redshift - Annual Subscriptions (11/29 - 12/8)
Mode Designs ➔
Deals on premium keyboards and accessories
Motion Array ➔
10% off the Everything plan
Motion Hatch ➔
Perfect Your Pricing Toolkit - 50% off (11/29 - 12/2)

MotionVFX ➔
30% off Design/CineStudio, and PPro Resolve packs with code: BW30

Rocket Lasso ➔
50% off all plug-ins (11/29 - 12/2)

Rokoko ➔
45% off the indie creator bundle with code: RKK_SchoolOfMotion (revenue must be under $100K a year)

Shapefest ➔
80% off a Shapefest Pro annual subscription for life (11/29 - 12/2)

The Pixel Lab ➔
30% off everything
Toolfarm ➔
Various plugins and tools on sale

True Grit Texture ➔
50-70% off (starts Wednesday, runs for about a week)

Vincent Schwenk ➔
50% discount with code RENDERSALE

Wacom ➔
Up to $120 off new tablets + deals on refurbished items


Start Your 3D Journey in Cinema 4D

Master the essentials of 3D modeling, lighting, and animation in C4D. Enroll in All-Access to unlock C4D Basecamp and 50+ other courses.


