Creating simple 3D text in Cinema 4D is easy. But what about combined 3D text, where the two words intersect on different axes? Guess what? It’s also easy…if you know the secret to creating advanced 3d typography in Cinema 4D.
In this video, we’ll show you how to bring together 2 different 3D text elements (or 3D text and a logo) to create multi-dimensional typography in Cinema 4D. Added bonus: You’ll learn how to animate the transition between each side of the text. :)
ENROLL NOW!
Acidbite ➔
50% off everything

ActionVFX ➔
30% off all plans and credit packs - starts 11/26

Adobe ➔
50% off all apps and plans through 11/29

aescripts ➔
25% off everything through 12/6
Affinity ➔
50% off all products

Battleaxe ➔
30% off from 11/29-12/7
Boom Library ➔
30% off Boom One, their 48,000+ file audio library
BorisFX ➔
25% off everything, 11/25-12/1

Cavalry ➔
33% off pro subscriptions (11/29 - 12/4)

FXFactory ➔
25% off with code BLACKFRIDAY until 12/3

Goodboyninja ➔
20% off everything

Happy Editing ➔
50% off with code BLACKFRIDAY

Huion ➔
Up to 50% off affordable, high-quality pen display tablets

Insydium ➔
50% off through 12/4
JangaFX ➔
30% off an indie annual license
Kitbash 3D ➔
$200 off Cargo Pro, their entire library
Knights of the Editing Table ➔
Up to 20% off Premiere Pro Extensions
Maxon ➔
25% off Maxon One, ZBrush, & Redshift - Annual Subscriptions (11/29 - 12/8)
Mode Designs ➔
Deals on premium keyboards and accessories
Motion Array ➔
10% off the Everything plan
Motion Hatch ➔
Perfect Your Pricing Toolkit - 50% off (11/29 - 12/2)

MotionVFX ➔
30% off Design/CineStudio, and PPro Resolve packs with code: BW30

Rocket Lasso ➔
50% off all plug-ins (11/29 - 12/2)

Rokoko ➔
45% off the indie creator bundle with code: RKK_SchoolOfMotion (revenue must be under $100K a year)

Shapefest ➔
80% off a Shapefest Pro annual subscription for life (11/29 - 12/2)

The Pixel Lab ➔
30% off everything
Toolfarm ➔
Various plugins and tools on sale

True Grit Texture ➔
50-70% off (starts Wednesday, runs for about a week)

Vincent Schwenk ➔
50% discount with code RENDERSALE

Wacom ➔
Up to $120 off new tablets + deals on refurbished items


Download the project files to follow along.
I recently came across an amazing tutorial by Anurag Raturi where he demonstrated the creation of duality/multi-dimensional typography effects using Blender. This got me thinking... could we achieve a similar 3D text effect in Cinema 4D? So, I reached out to Anurag and with his permission, I adapted the core concepts of his tutorial to fit a Cinema 4D workflow. A big shoutout and thanks to Anurag!
Download the project files in this post and follow along. Without further ado, let’s dive in…
3D typography in Cinema 4D: Start with a simple version
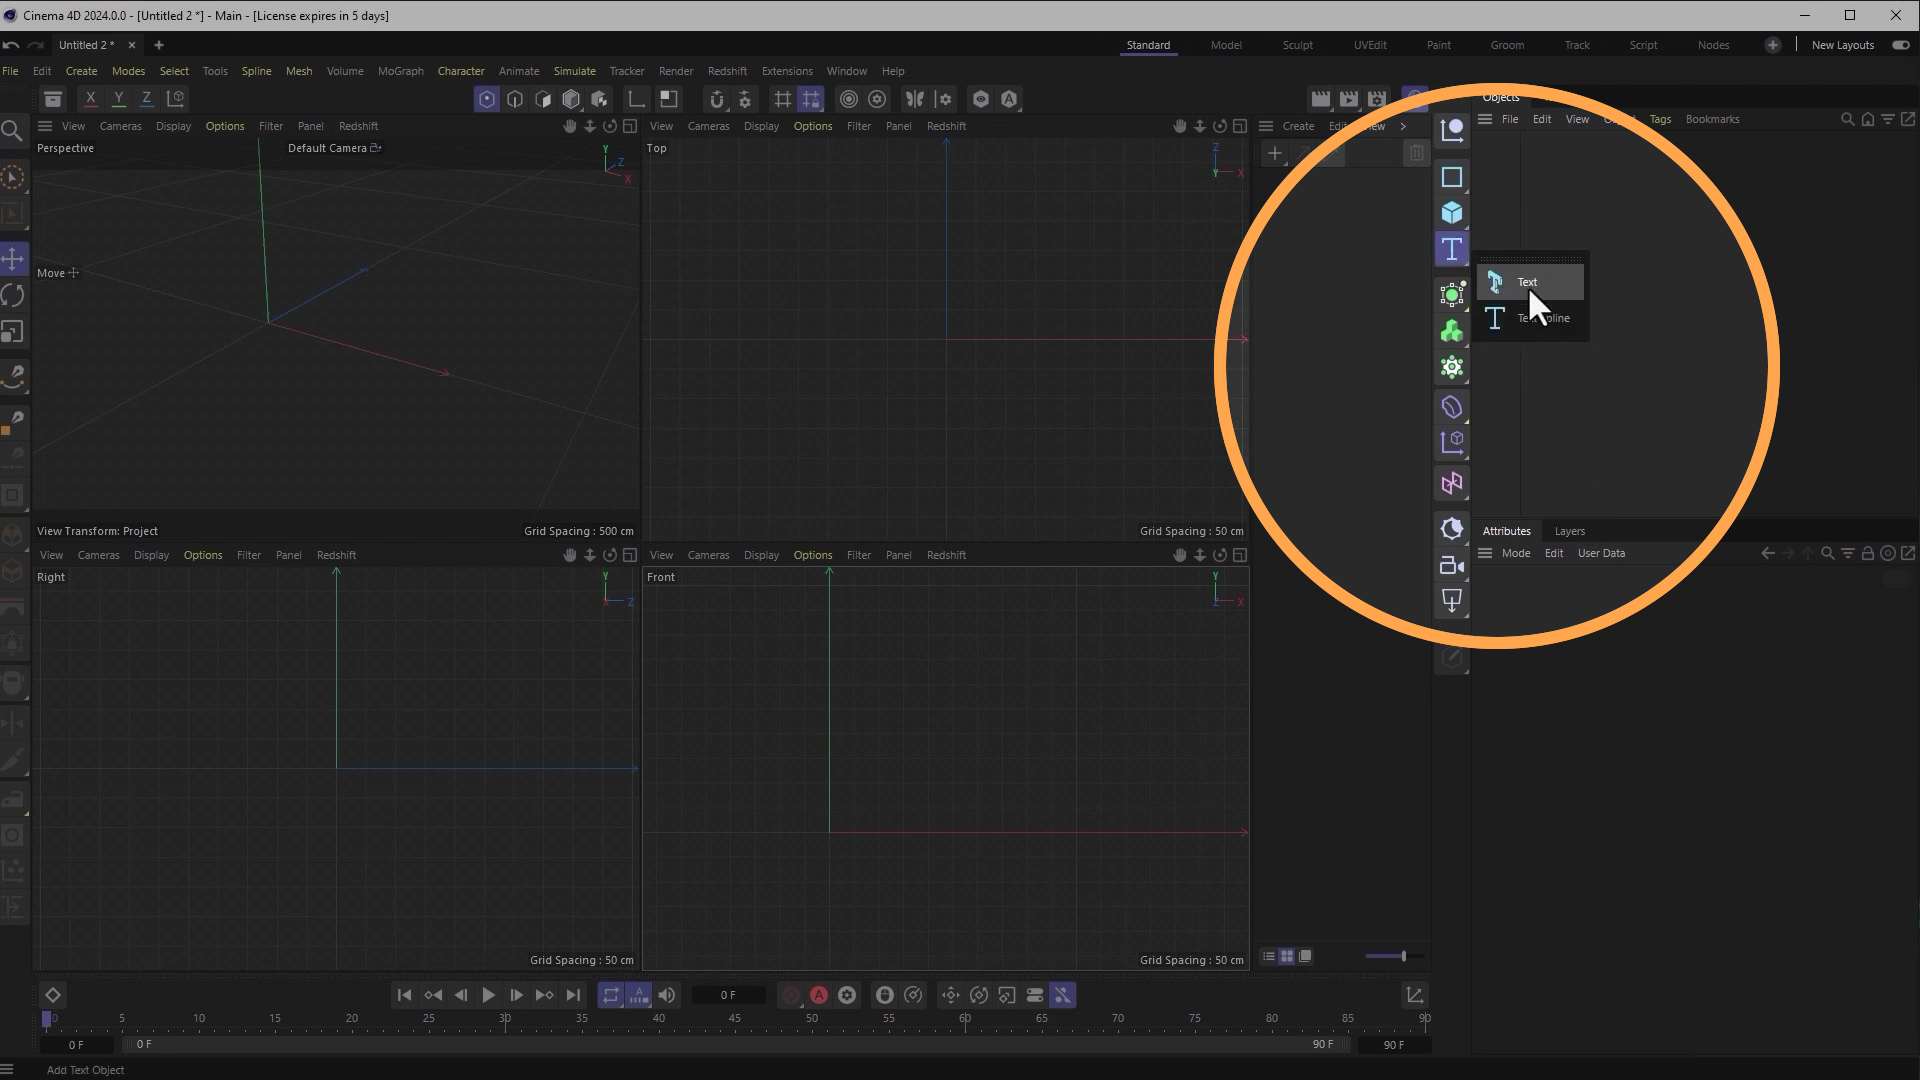
First, you’ll want to navigate to the text tool and add some basic text to your project.
Now, there’s a little ‘gotcha’ here you need to be aware of. With some fonts the letters may not all be the same height (this is especially true for curved letters). For this effect to work well, I suggest you use a font that has letters that are all the same height.
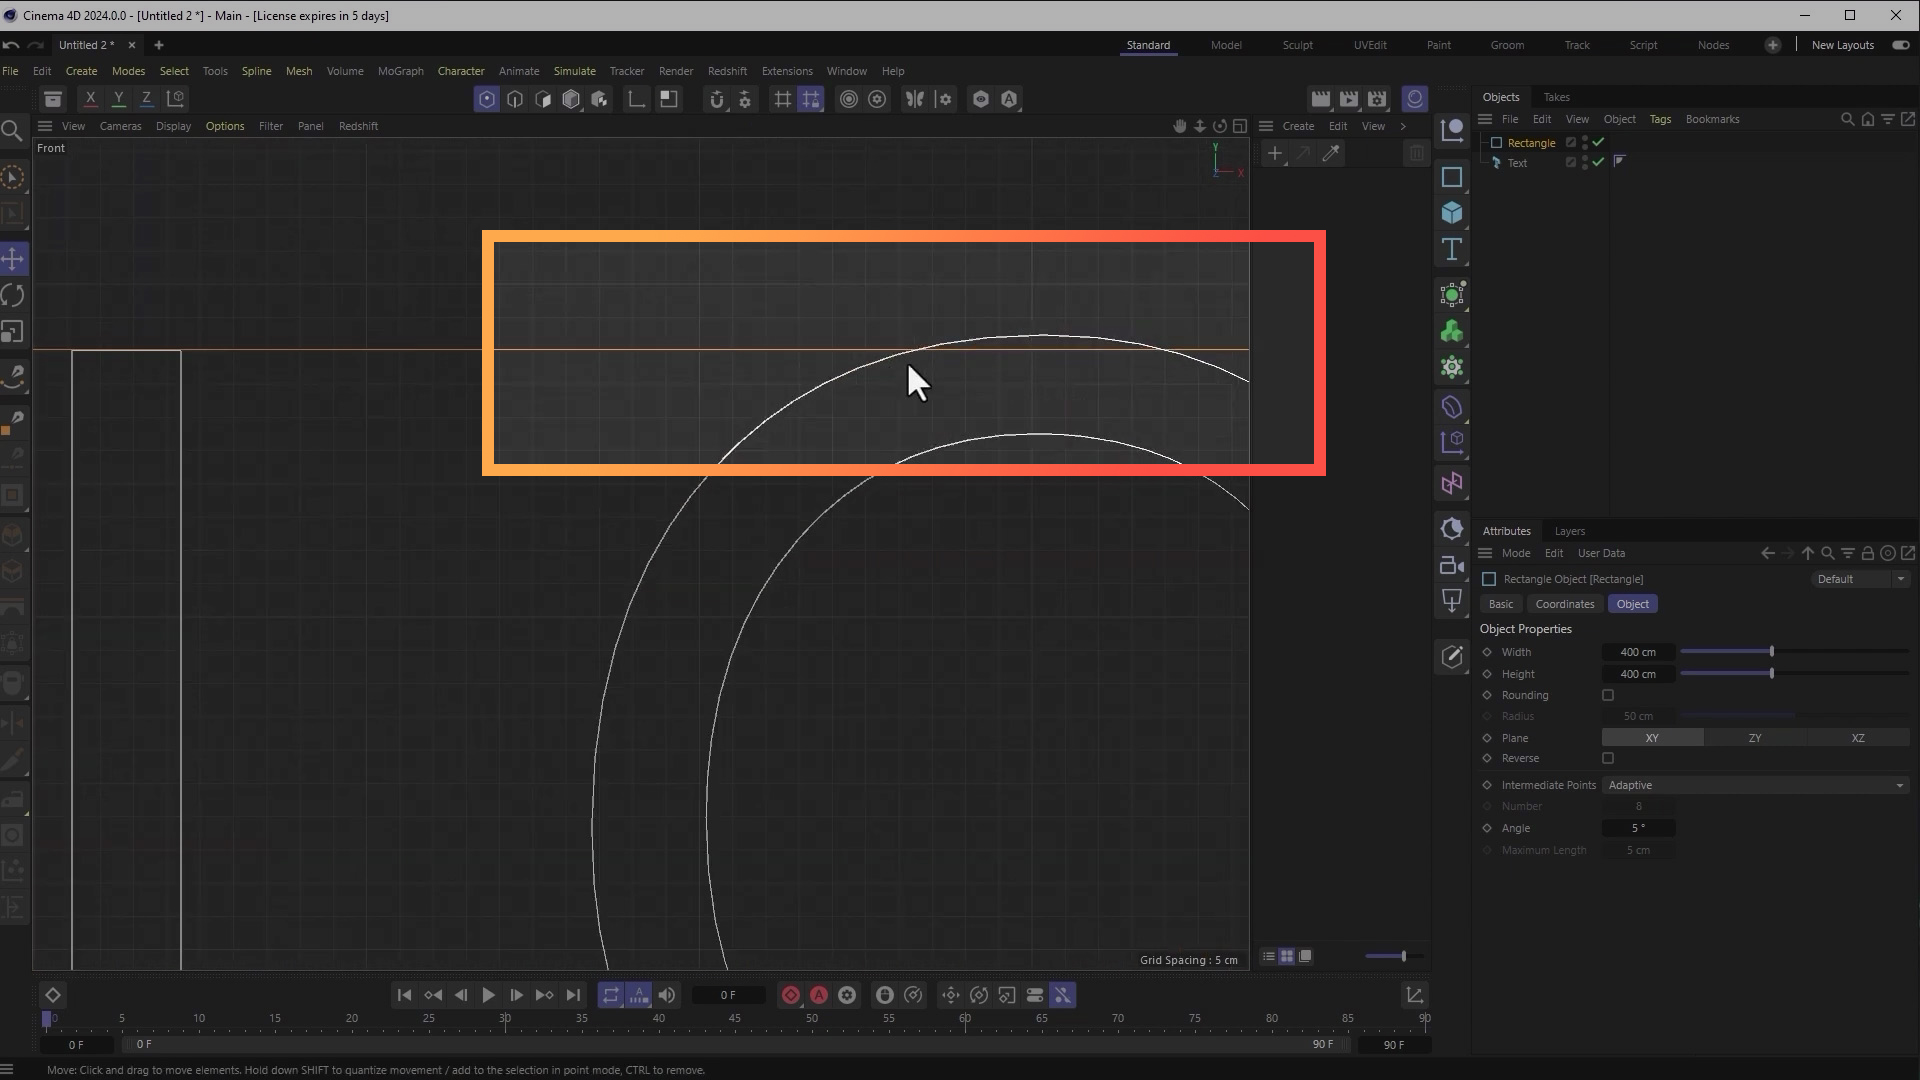
In this example, I used Orbitron — a downloadable Google font where all capital letters are the same height.
Now, add in another word — giving you two words in your project. Now that we’ve got some text in the project, select both text objects and crank up the depth.
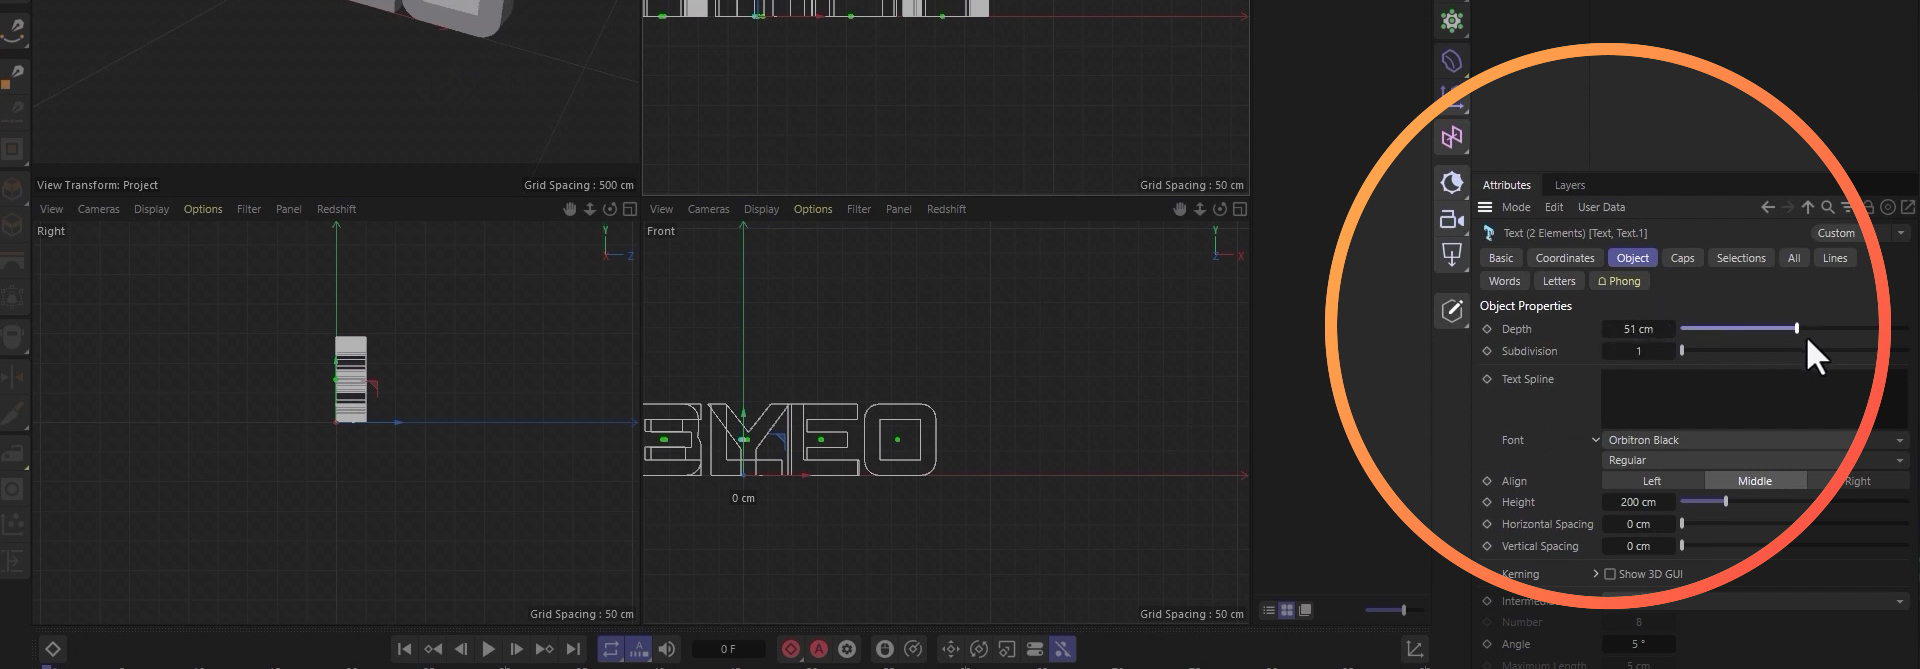
Click the Rotate tool and rotate your second text object 90º.
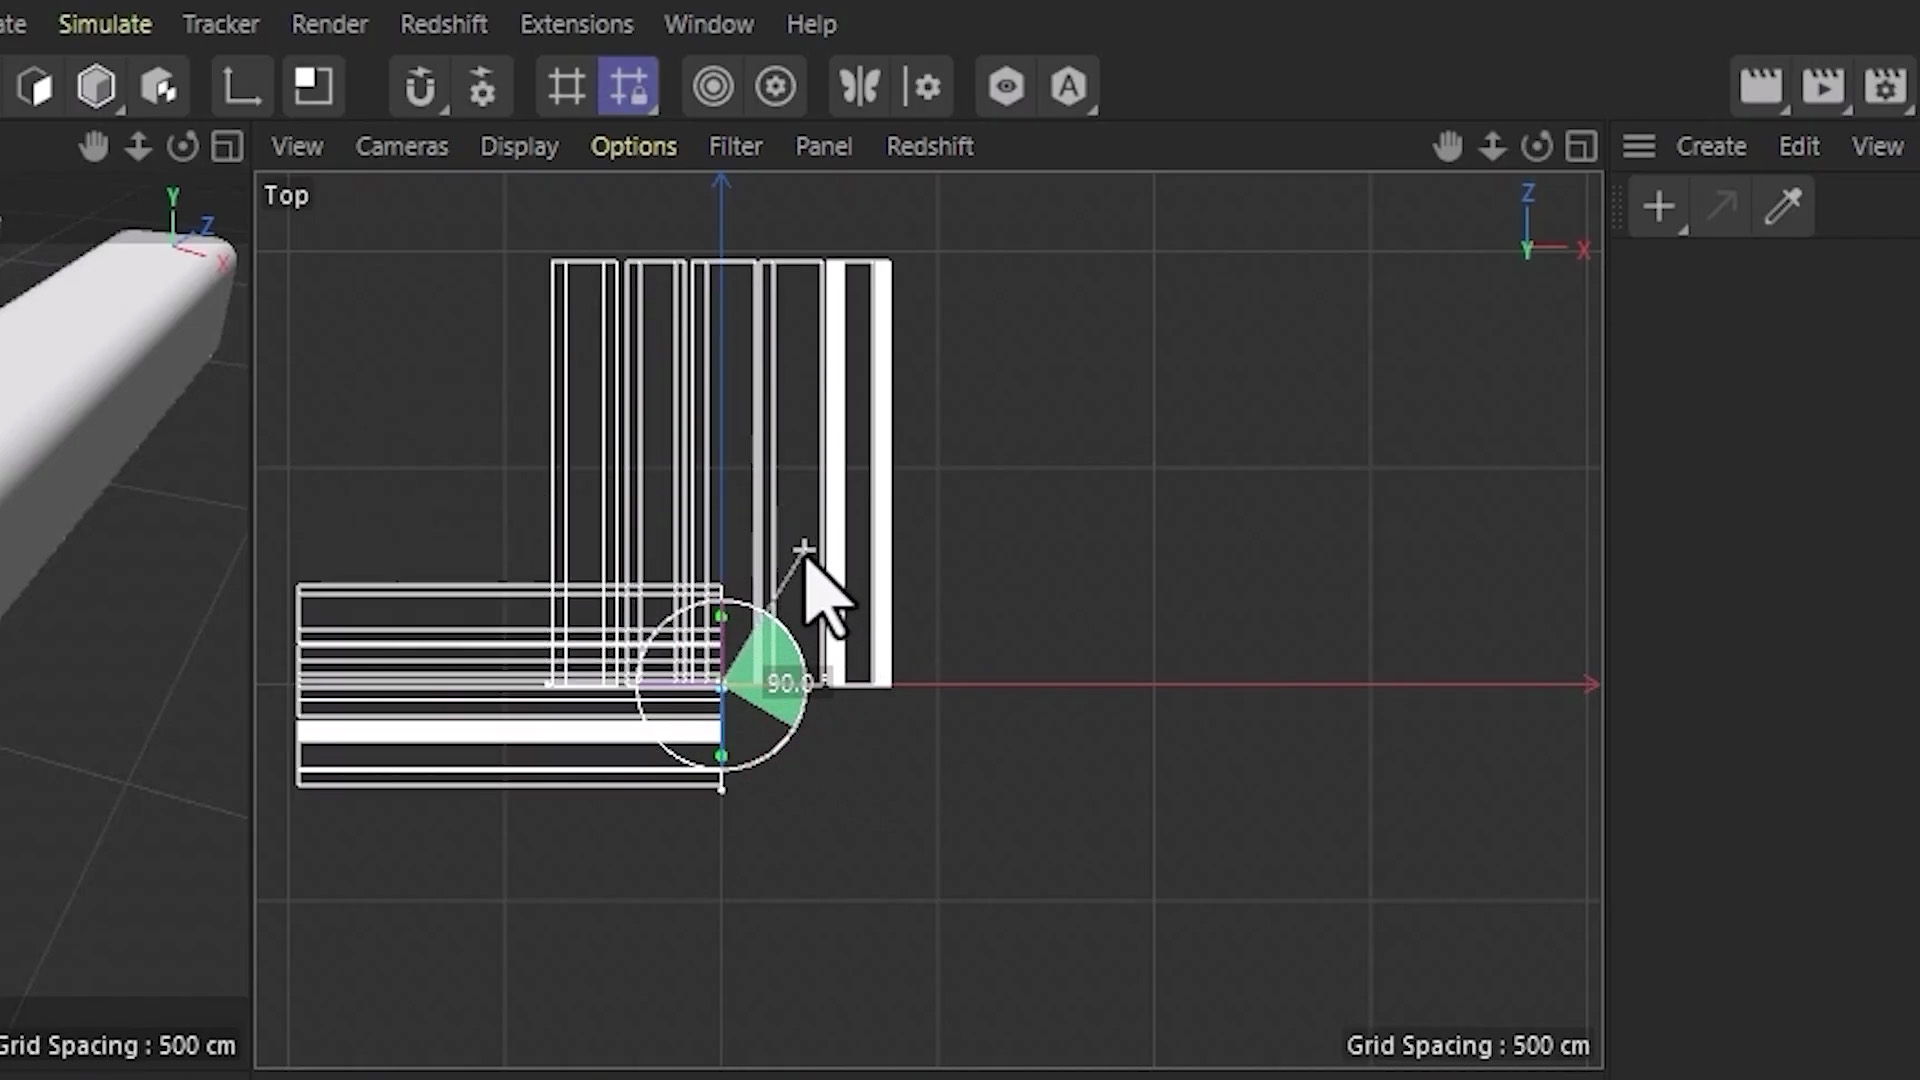
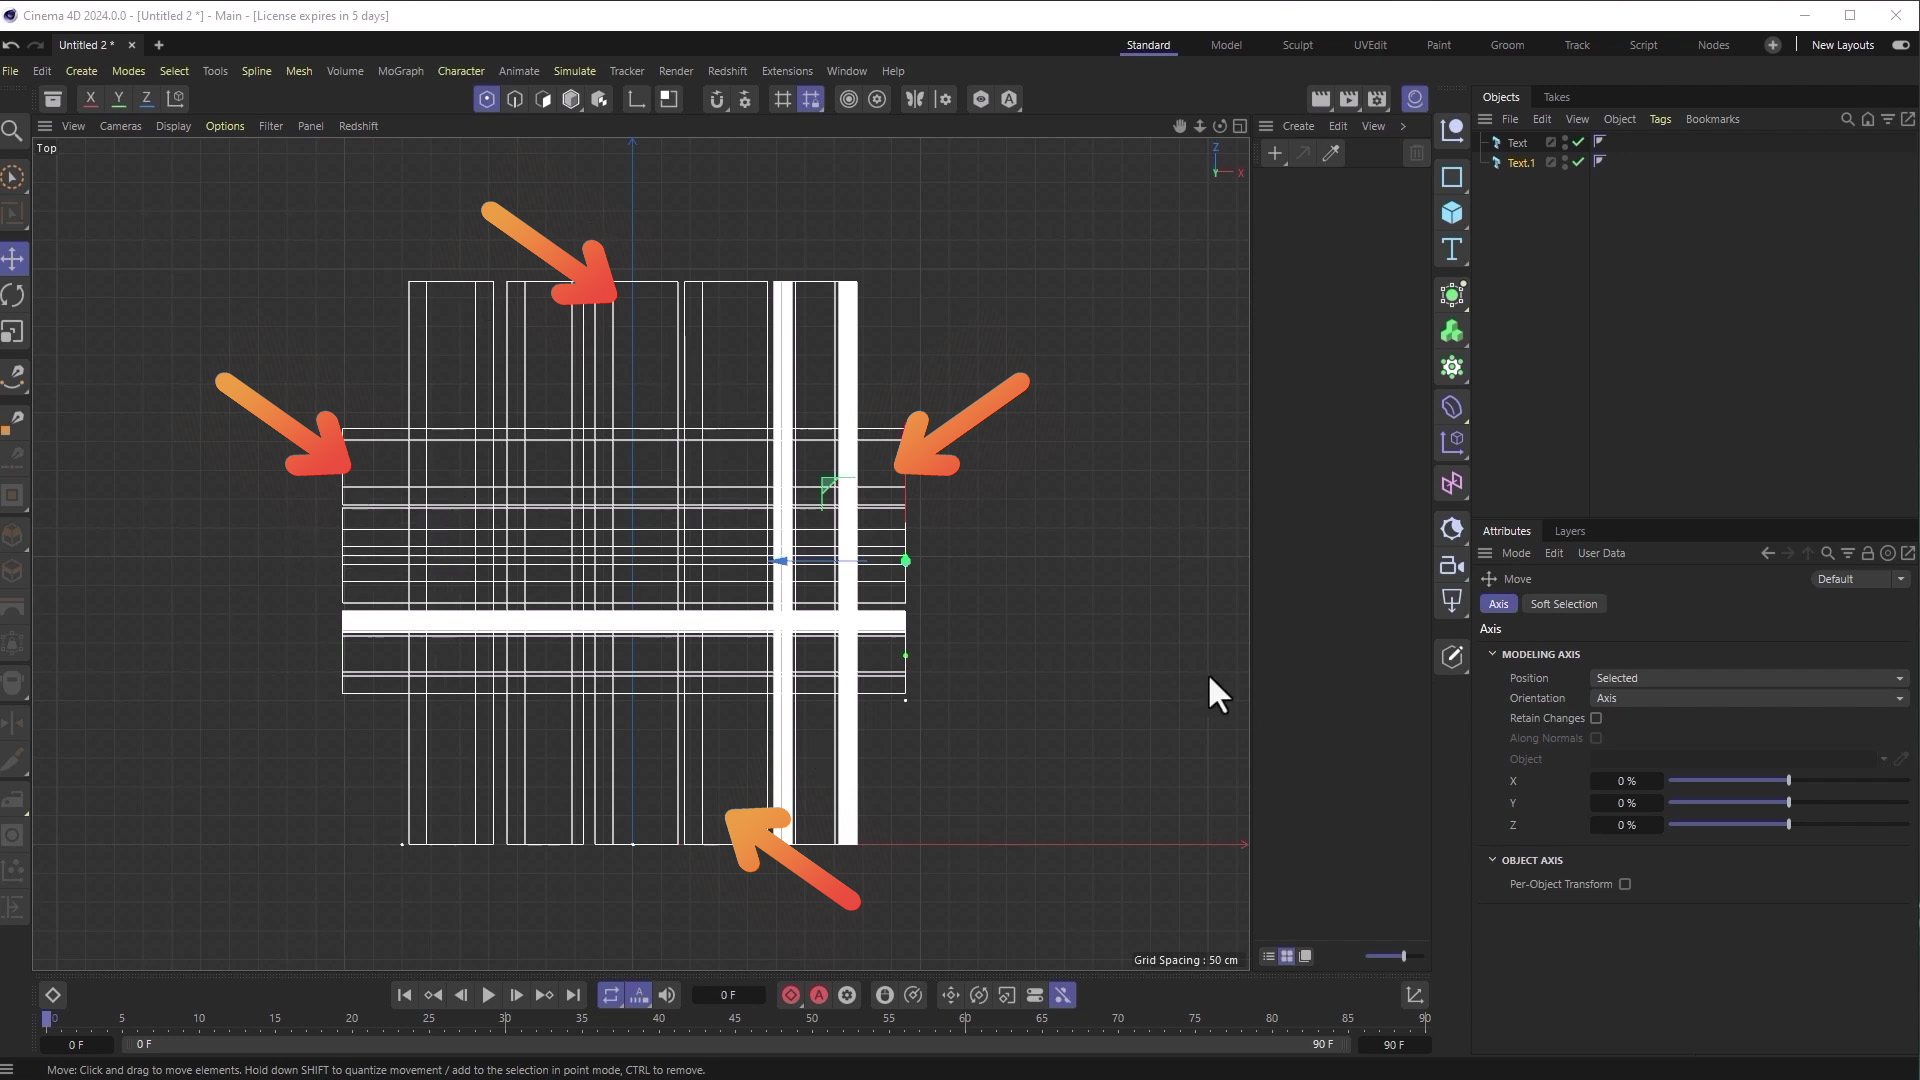
Once rotated, use the Move tool and position the second text object so it’s basically ‘intersecting through the middle’ of your first text object. The trick here is to make sure that both ends of each text object sticks out a bit. It might look something like this…
Adding color and material to 3D typography in Cinema 4D
Alright, now we’re getting somewhere. Let’s give these objects a little pizazz by adding material.

In this example I applied these settings to the mat:
- Set the material color to black
- Reflection weight turned down to 0
- Emission color set to white, with emission weight of 4
Now copy that material and simply change the emission weight to 0. You should now have two mats—one black and one white.
Before we apply the materials to the text objects, we’ll need to adjust some of the text settings. To do that, select both of the text objects, go into Selections, and enable Shell, Start Cap and End Cap.
Now drop the first mat (white) onto your first text object. With that mat selected in the Objects panel, set the Section in the Attributes panel to “S” (the shell…in this case the sides of the text).

Now drop the second mat (black) two times on the same text object and modify the Selection in Attributes panel for each — “C1” and “C2” (cap 1 and cap 2).
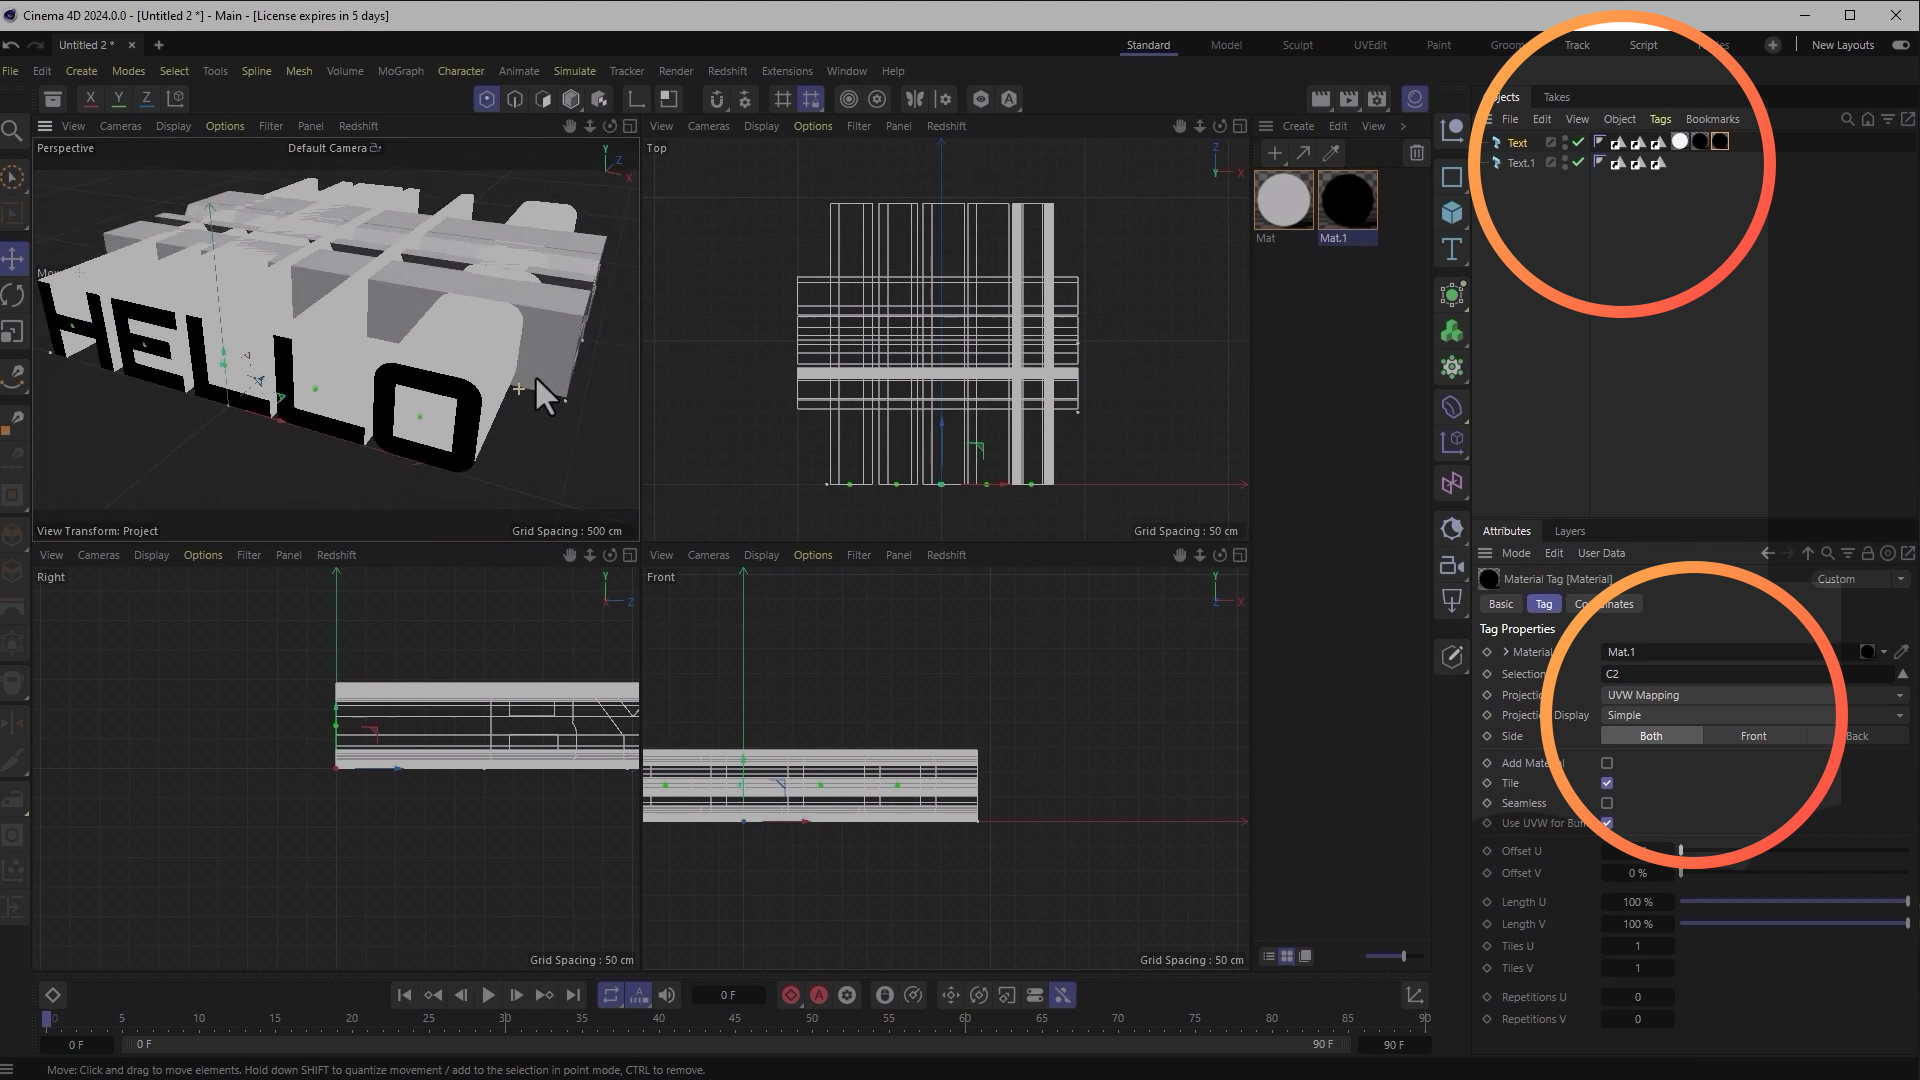
We’ll do the opposite color setup in your other text object — black, white, white — with the same settings as above.

Let’s get Boolean
Next, we’ll need to combine the two text objects. We can do that with a Boolean operation.
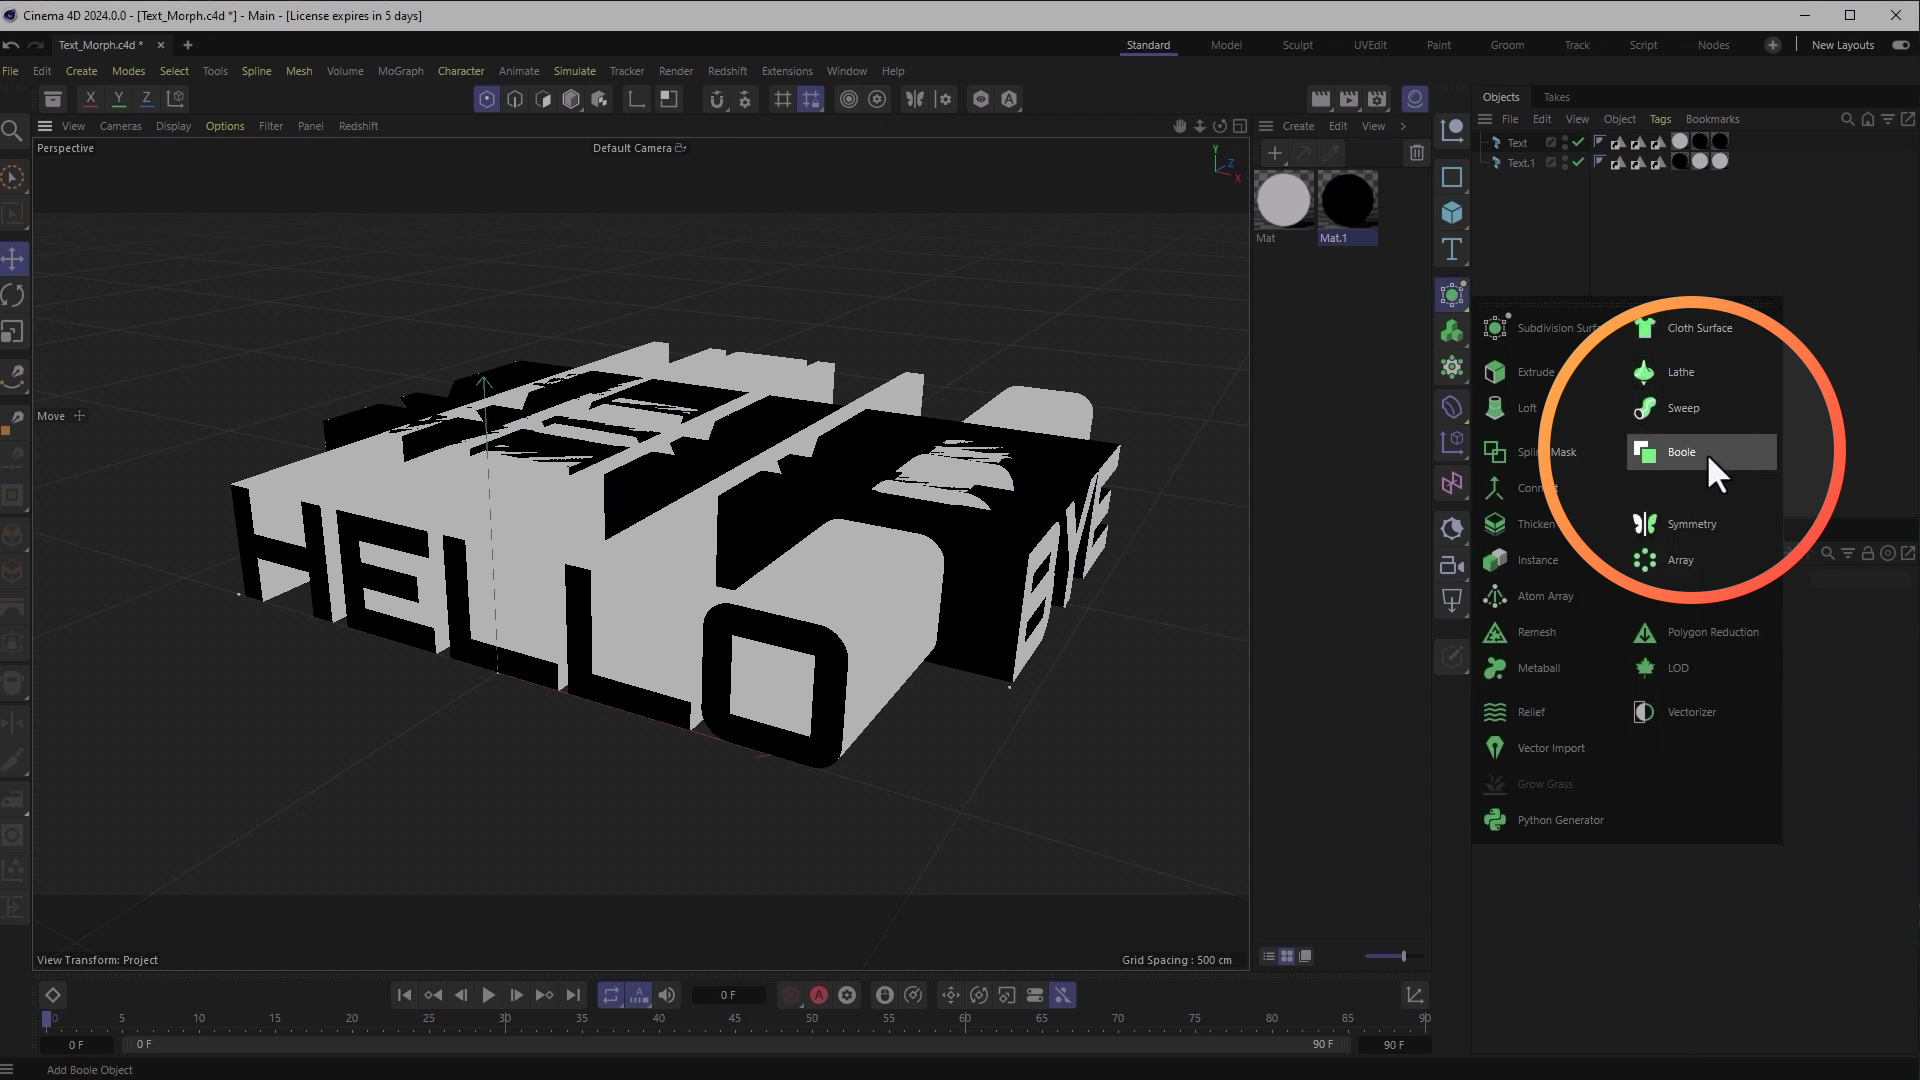
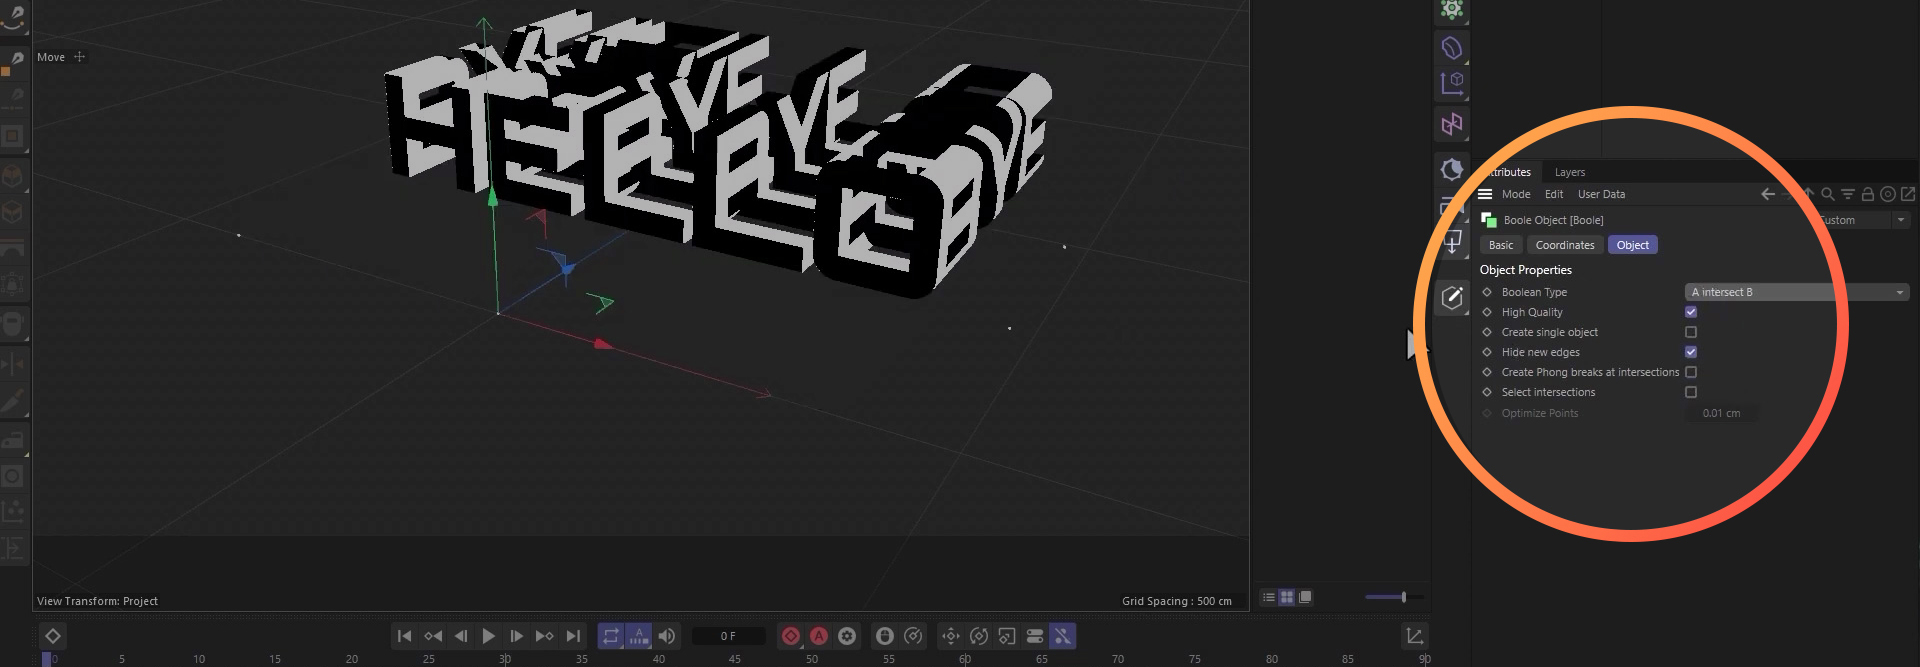
Once added, nest both text objects in the Boole. With the Boole selected, change the Boolean Type in the Attributes panel to “A intersect B”.
Now, for the text effect to work we’ll need to rotate the text from it’s center point. There’s a few ways to do this, but the easiest fix in this case is to select the Boole operation and then Object > Connect Objects.
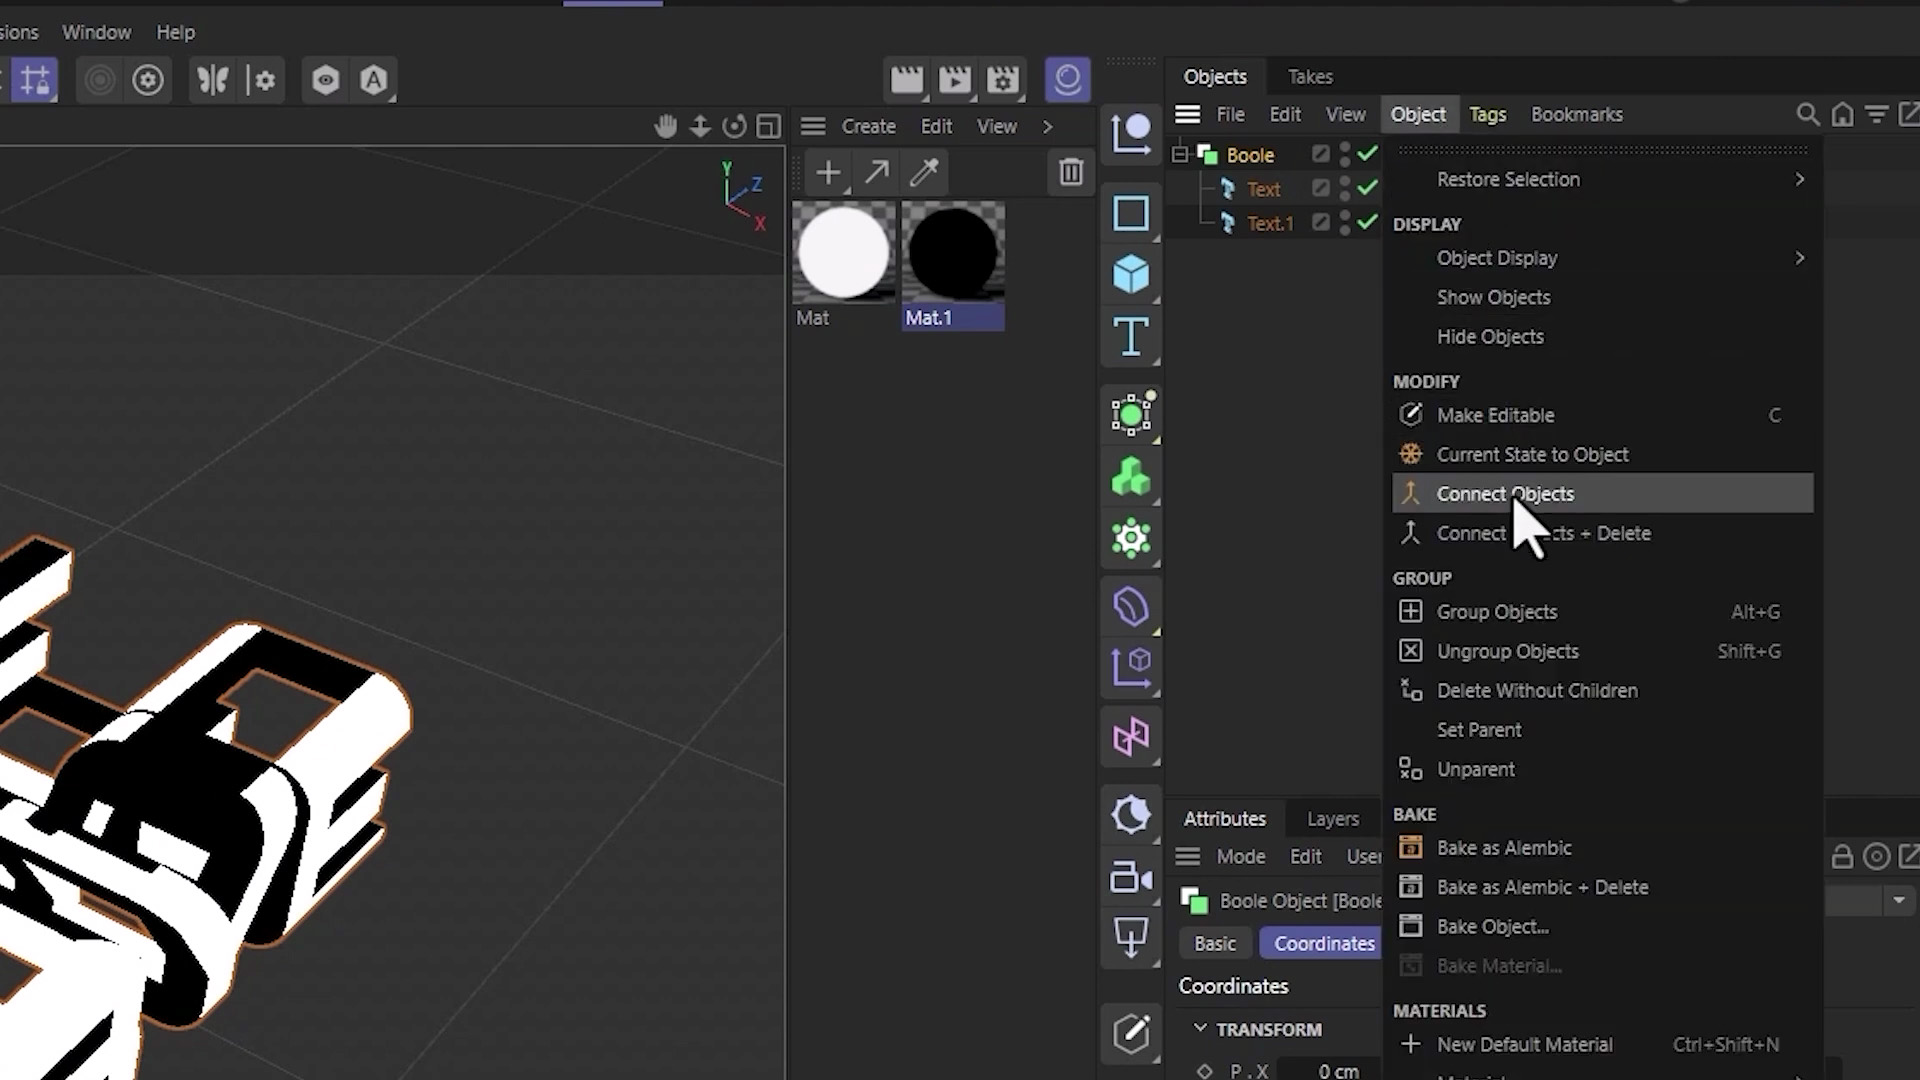
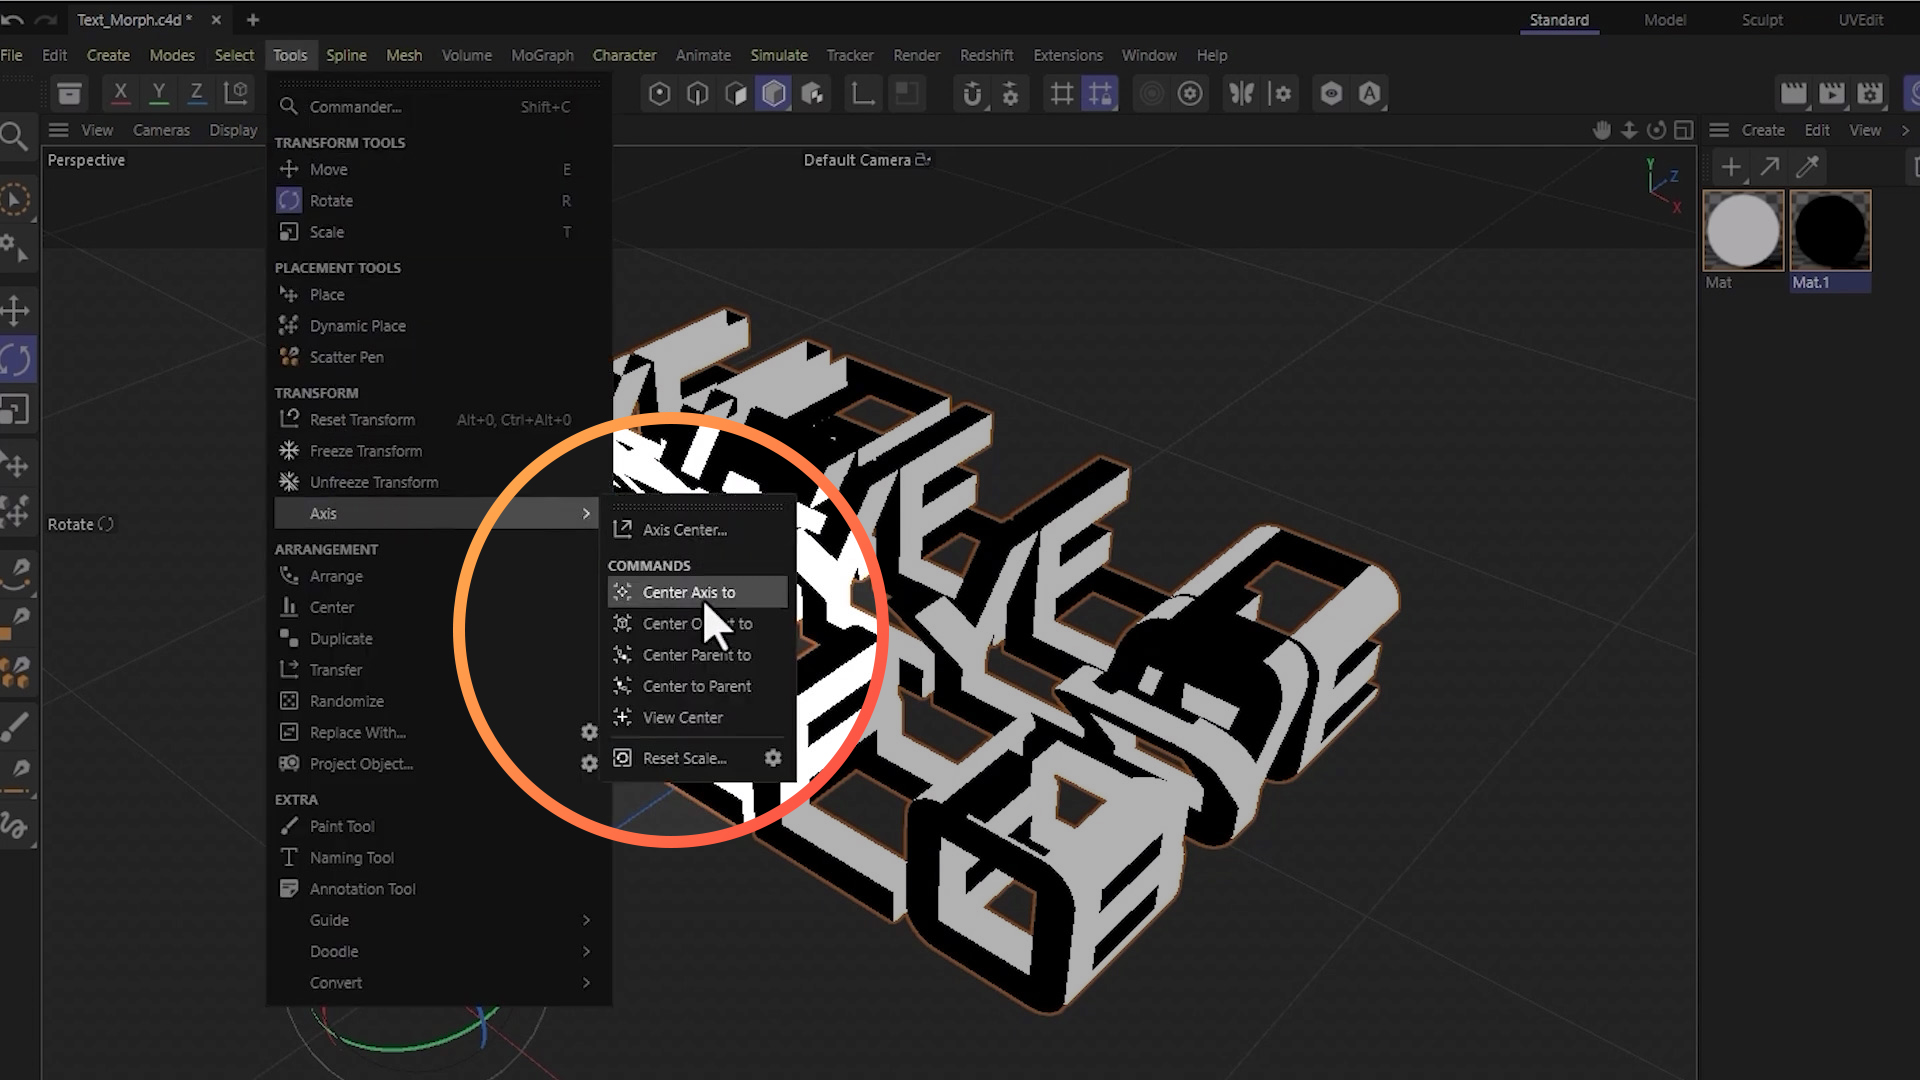
This is essentially an editable copy of your original. Go ahead and turn off your initial objects. With the new Boole selected, go to Tools > Axis > Center Axis to….and boom! Now the center axis point is in the middle of your text.
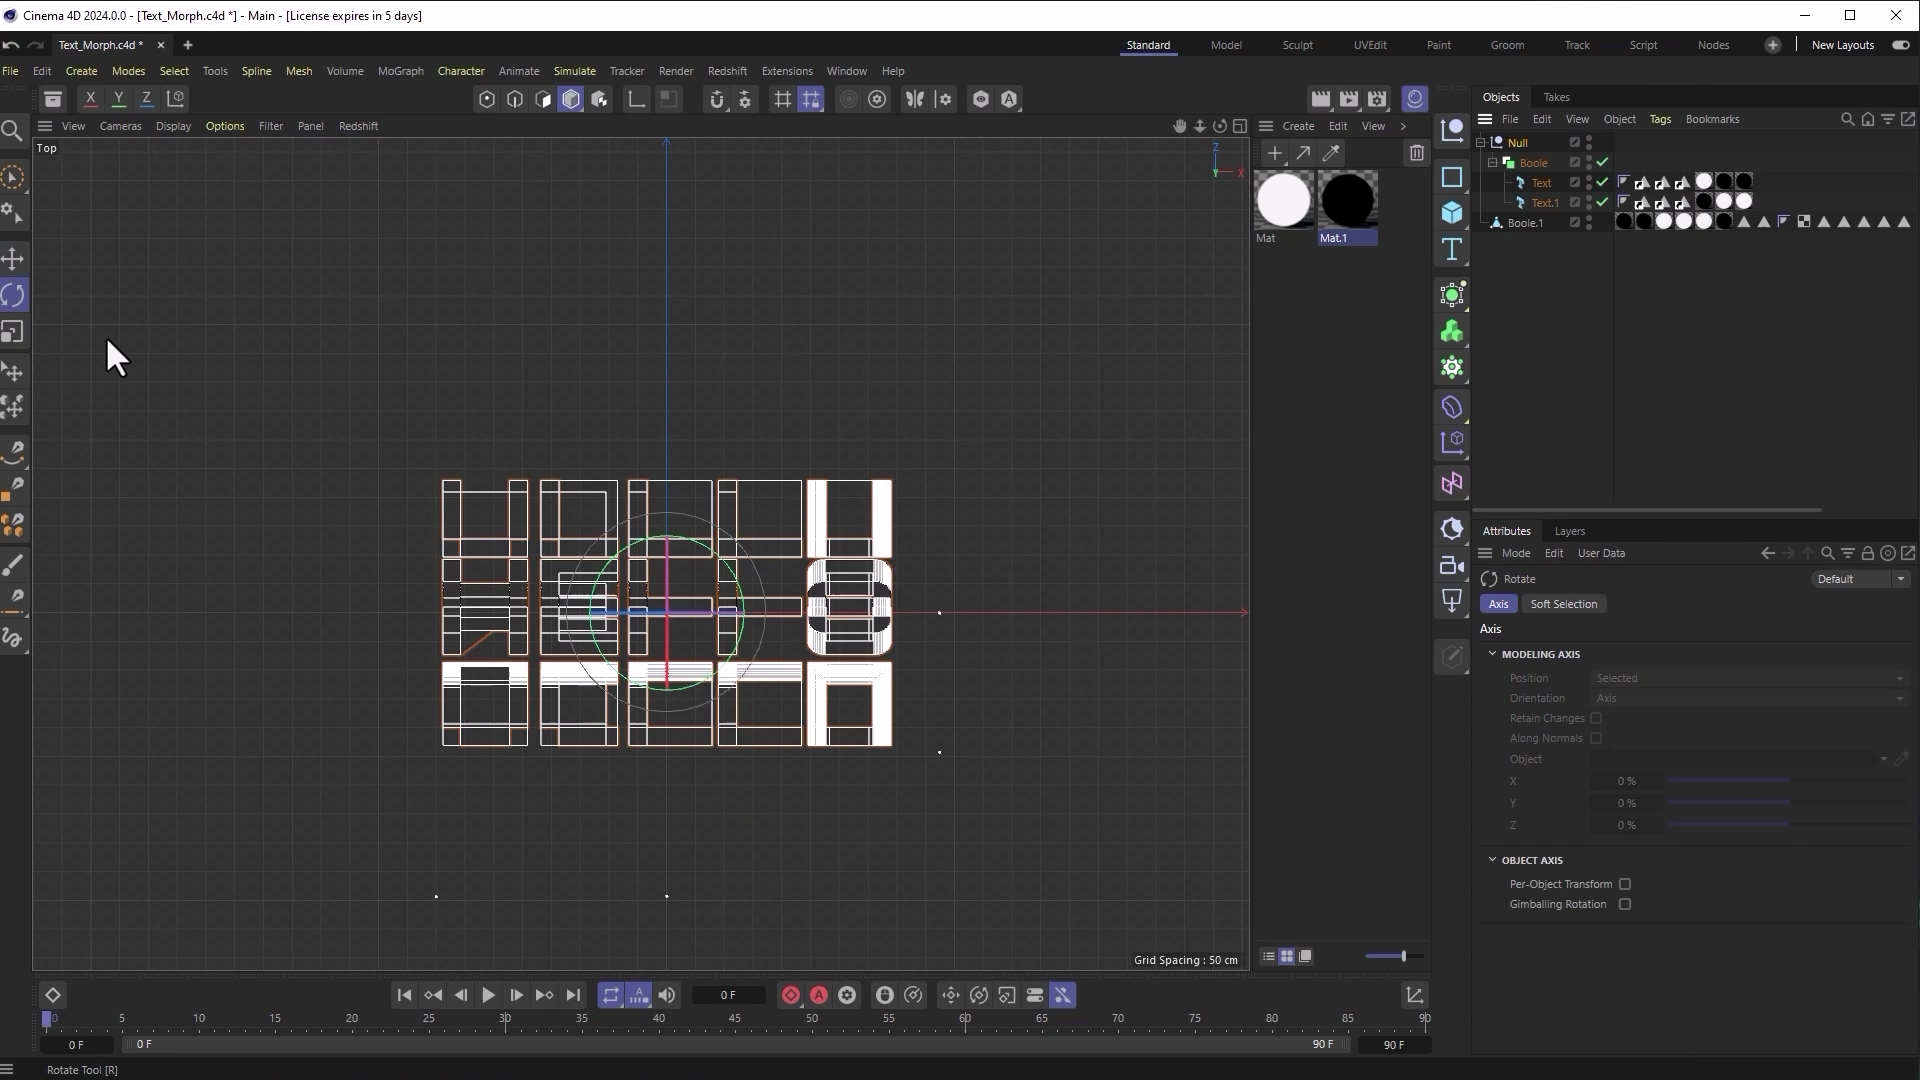
Create a new null object and nest your initial Bool as a child of that null.
Adding a camera to 3D text in Cinema 4D
Still with me? Now we’re getting to the fun part. Add a camera.
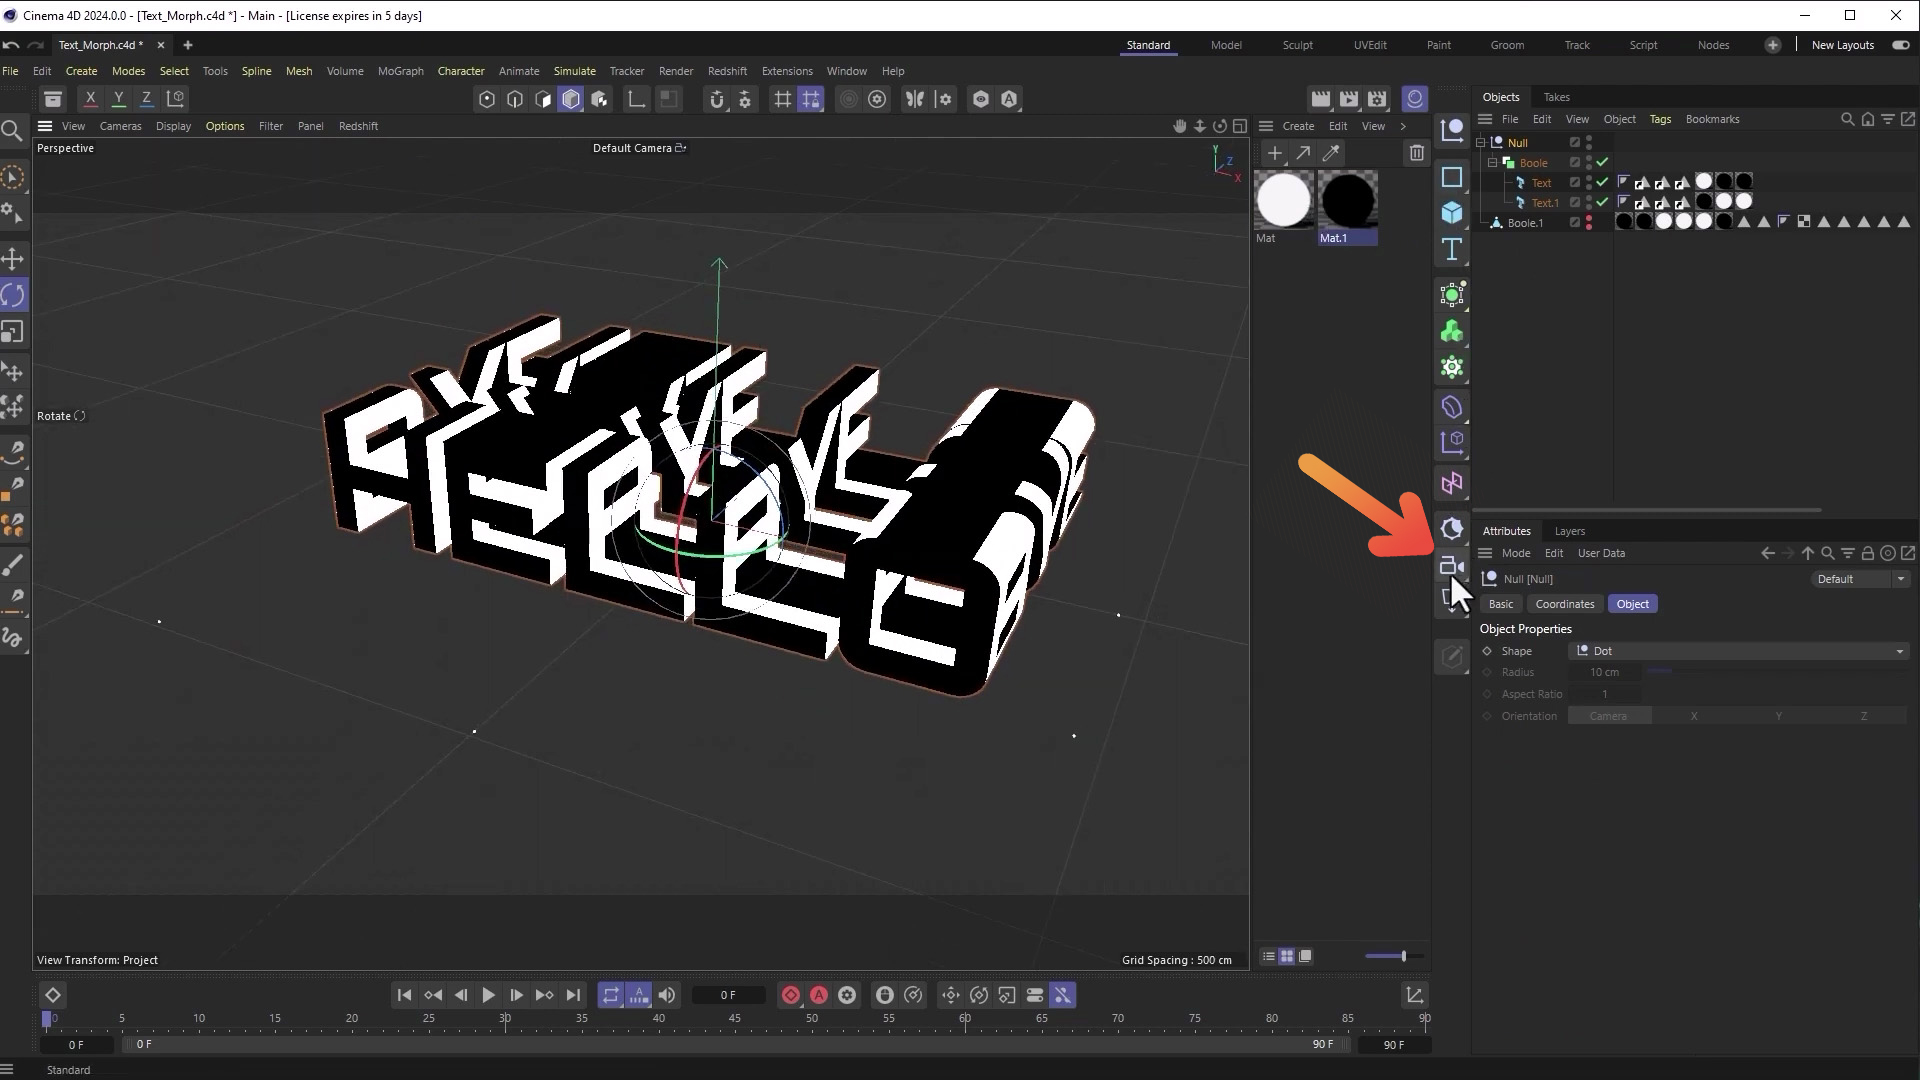
Once added, you’ll want to change the camera projection to Parallel. This will give us a nice orthographic type view.
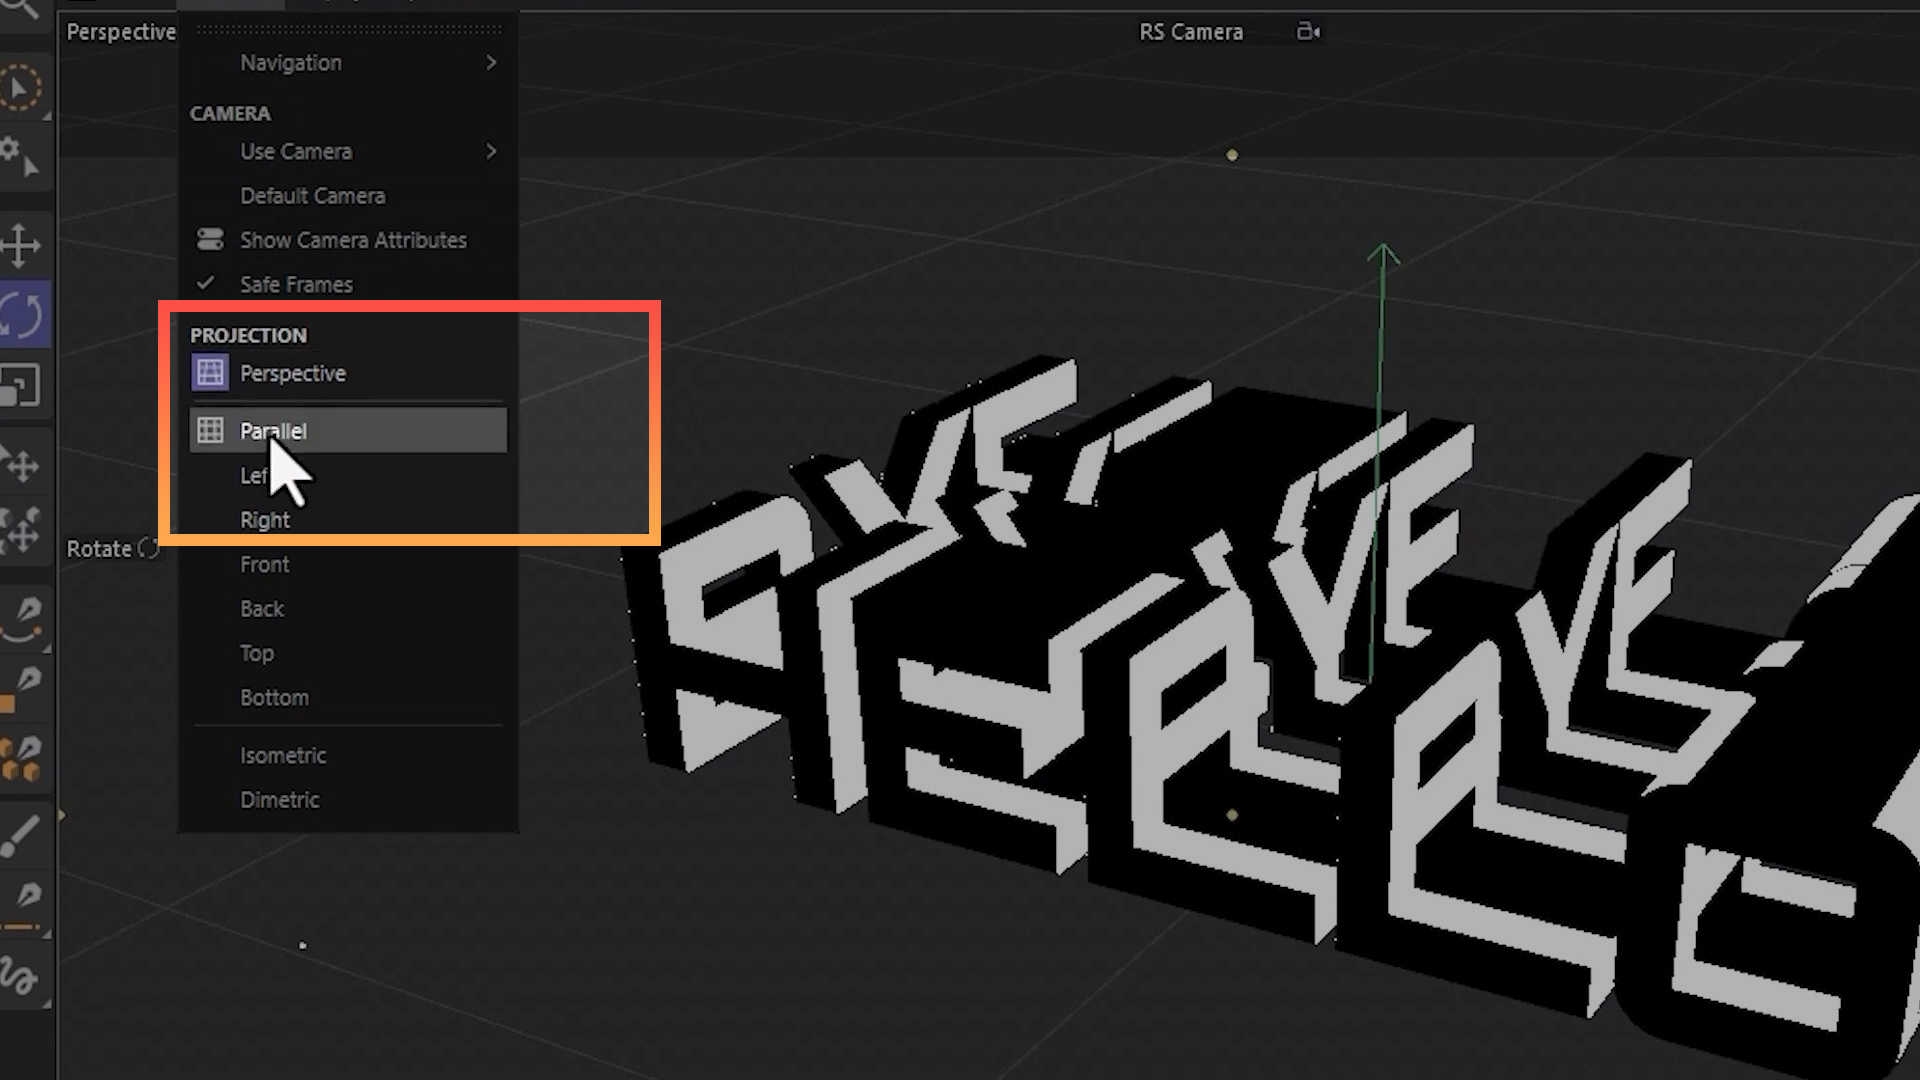
With the camera selected, it’s a good idea to go ahead and zero-out your coordinates.

Animated 3D text in Cinema 4D
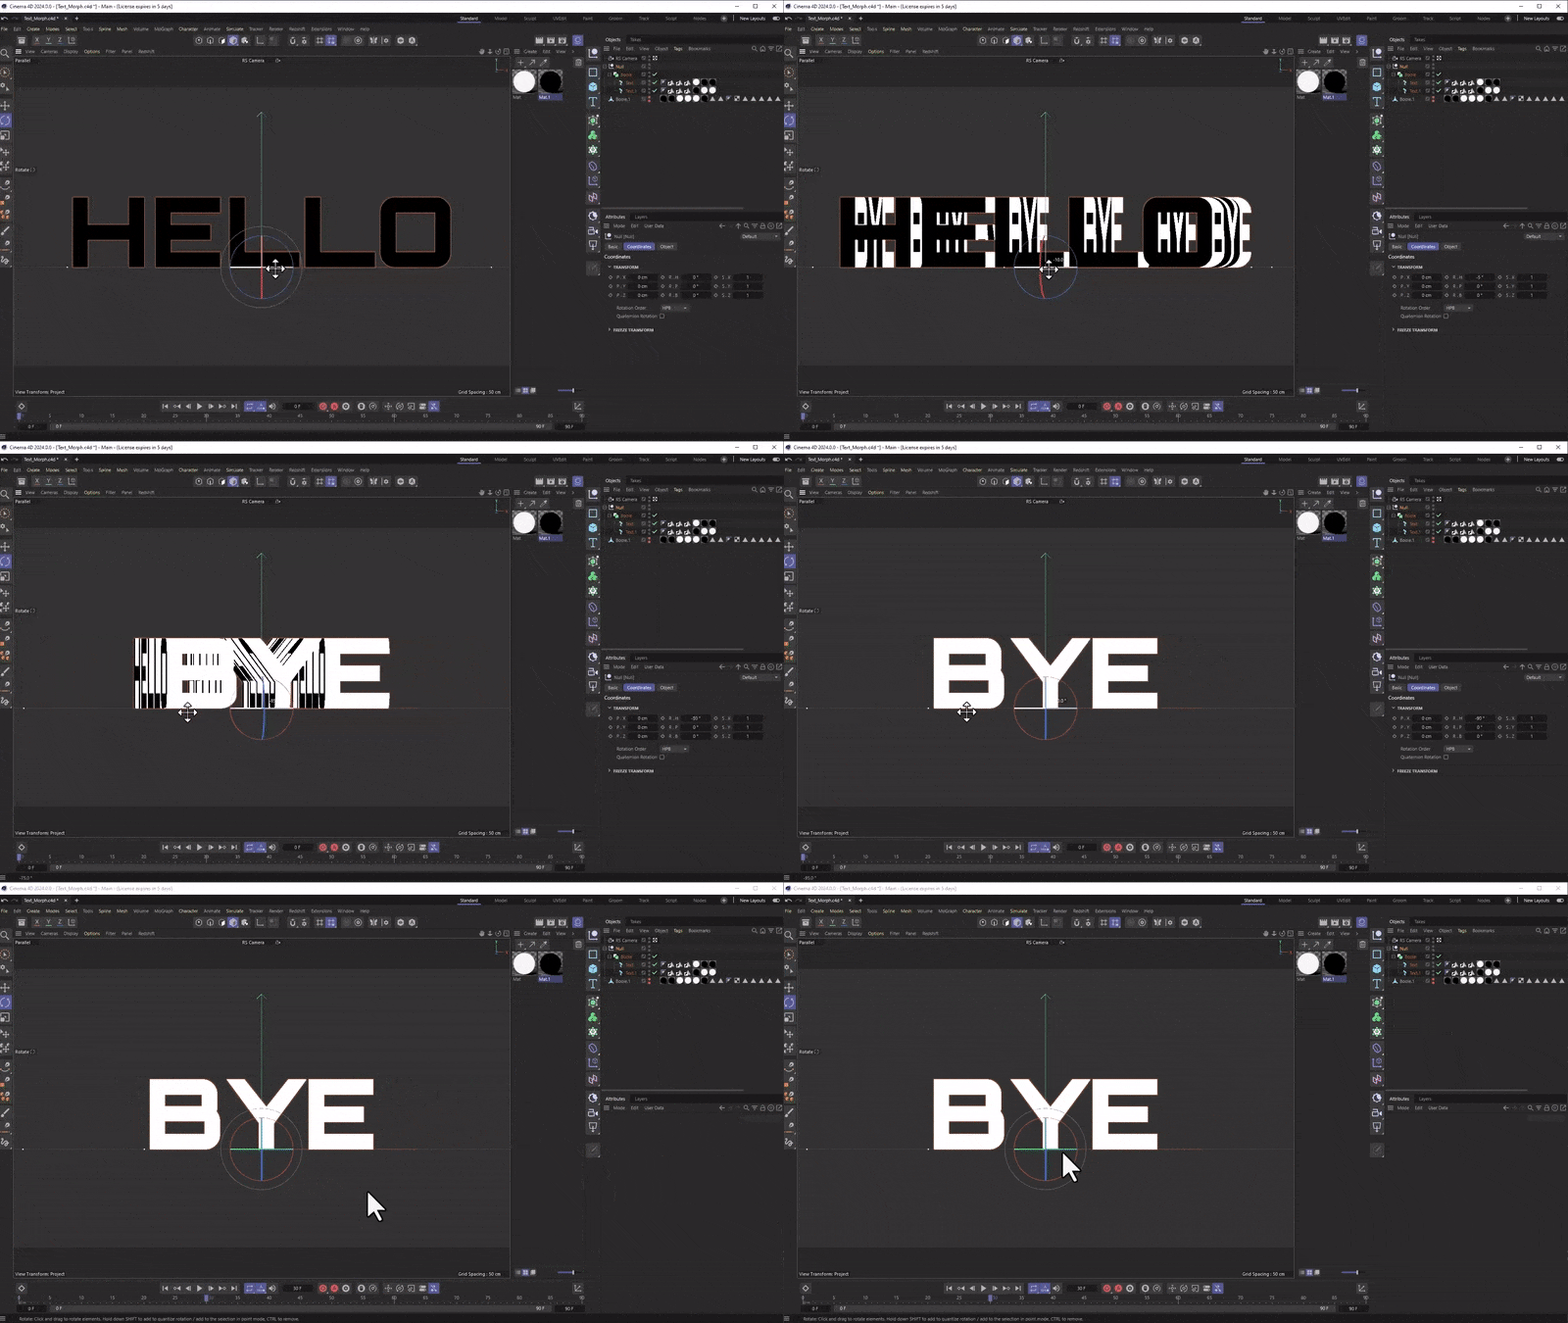
All the tedious work is behind us…it’s animation time. We want the text to have a fluid rotation — from word one to word two, like this:
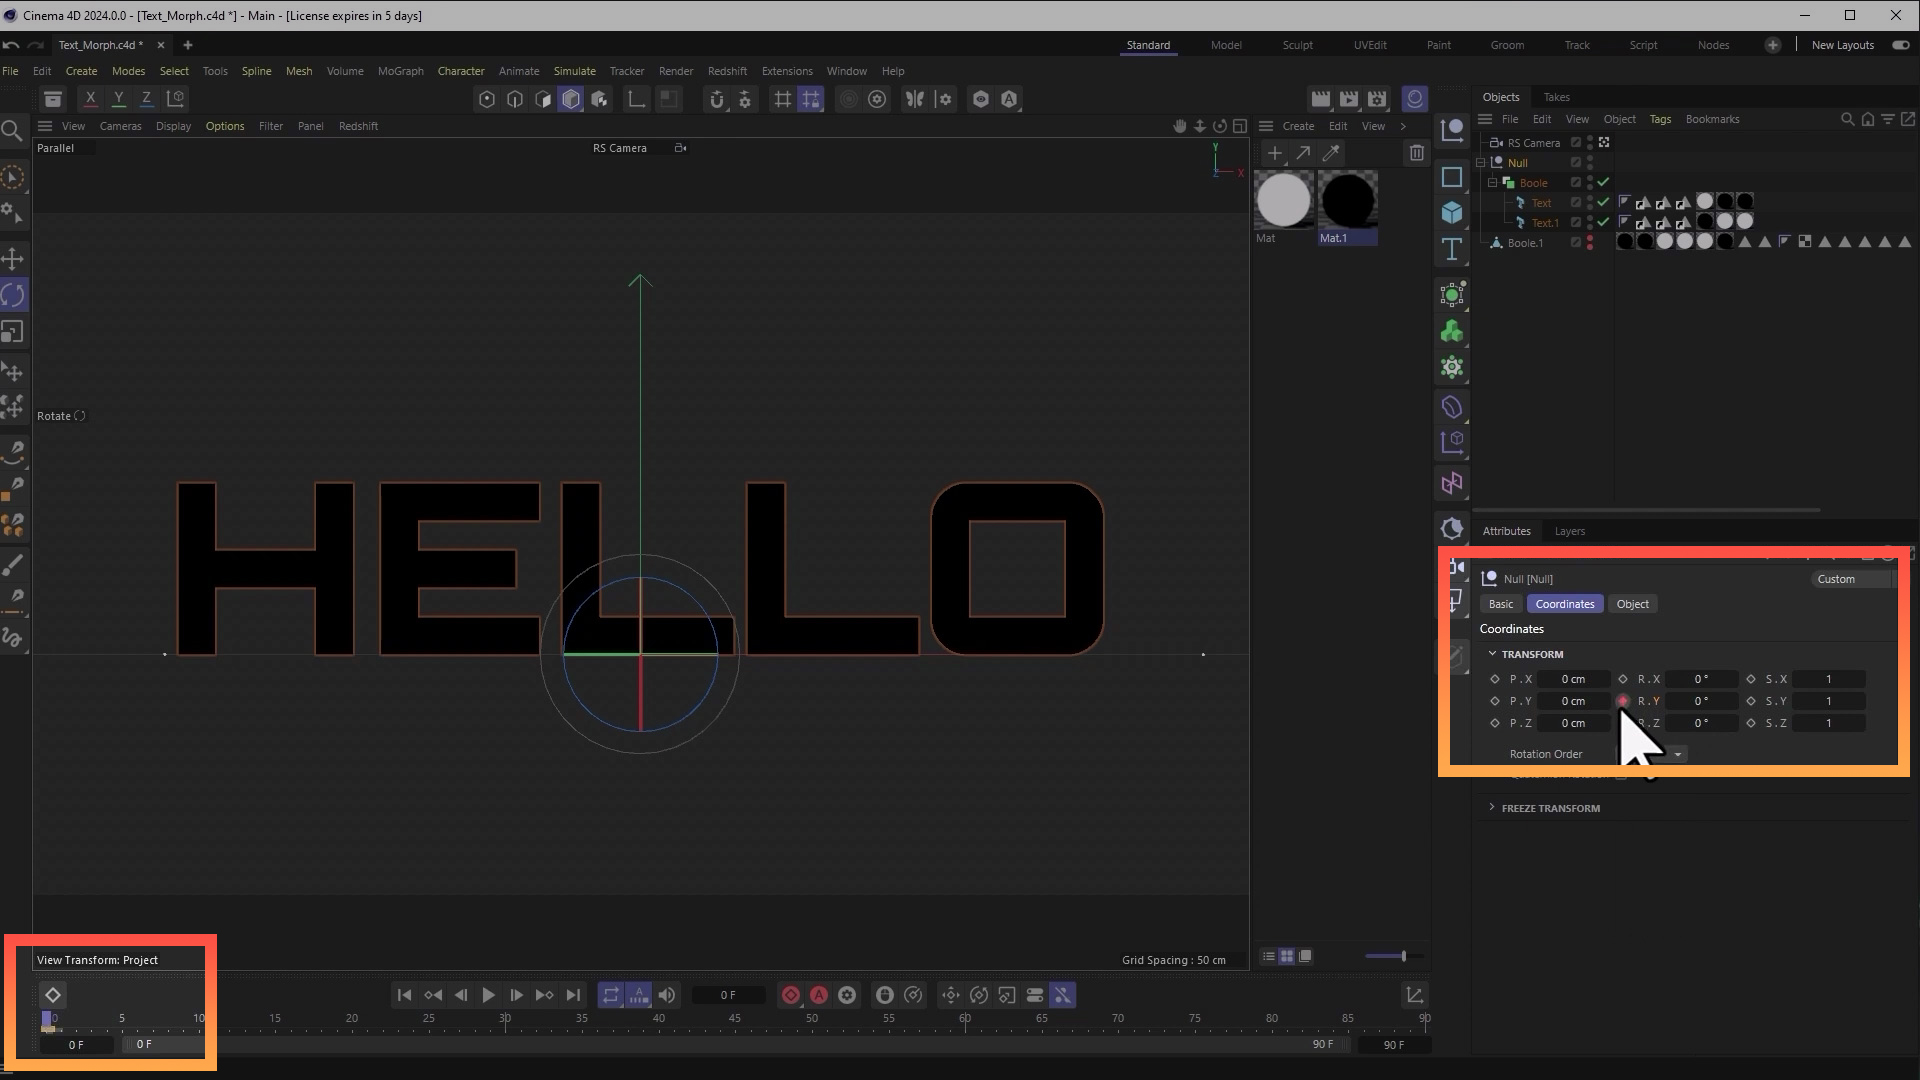
Move the playhead to the first frame of your project. Then, select the null and go to Attributes > Coordinates > Transform. Add a R. Y keyframe (should be set to 0º).
Now move your playhead a few seconds ahead and add another R. Y keyframe, but this time set it to -90º
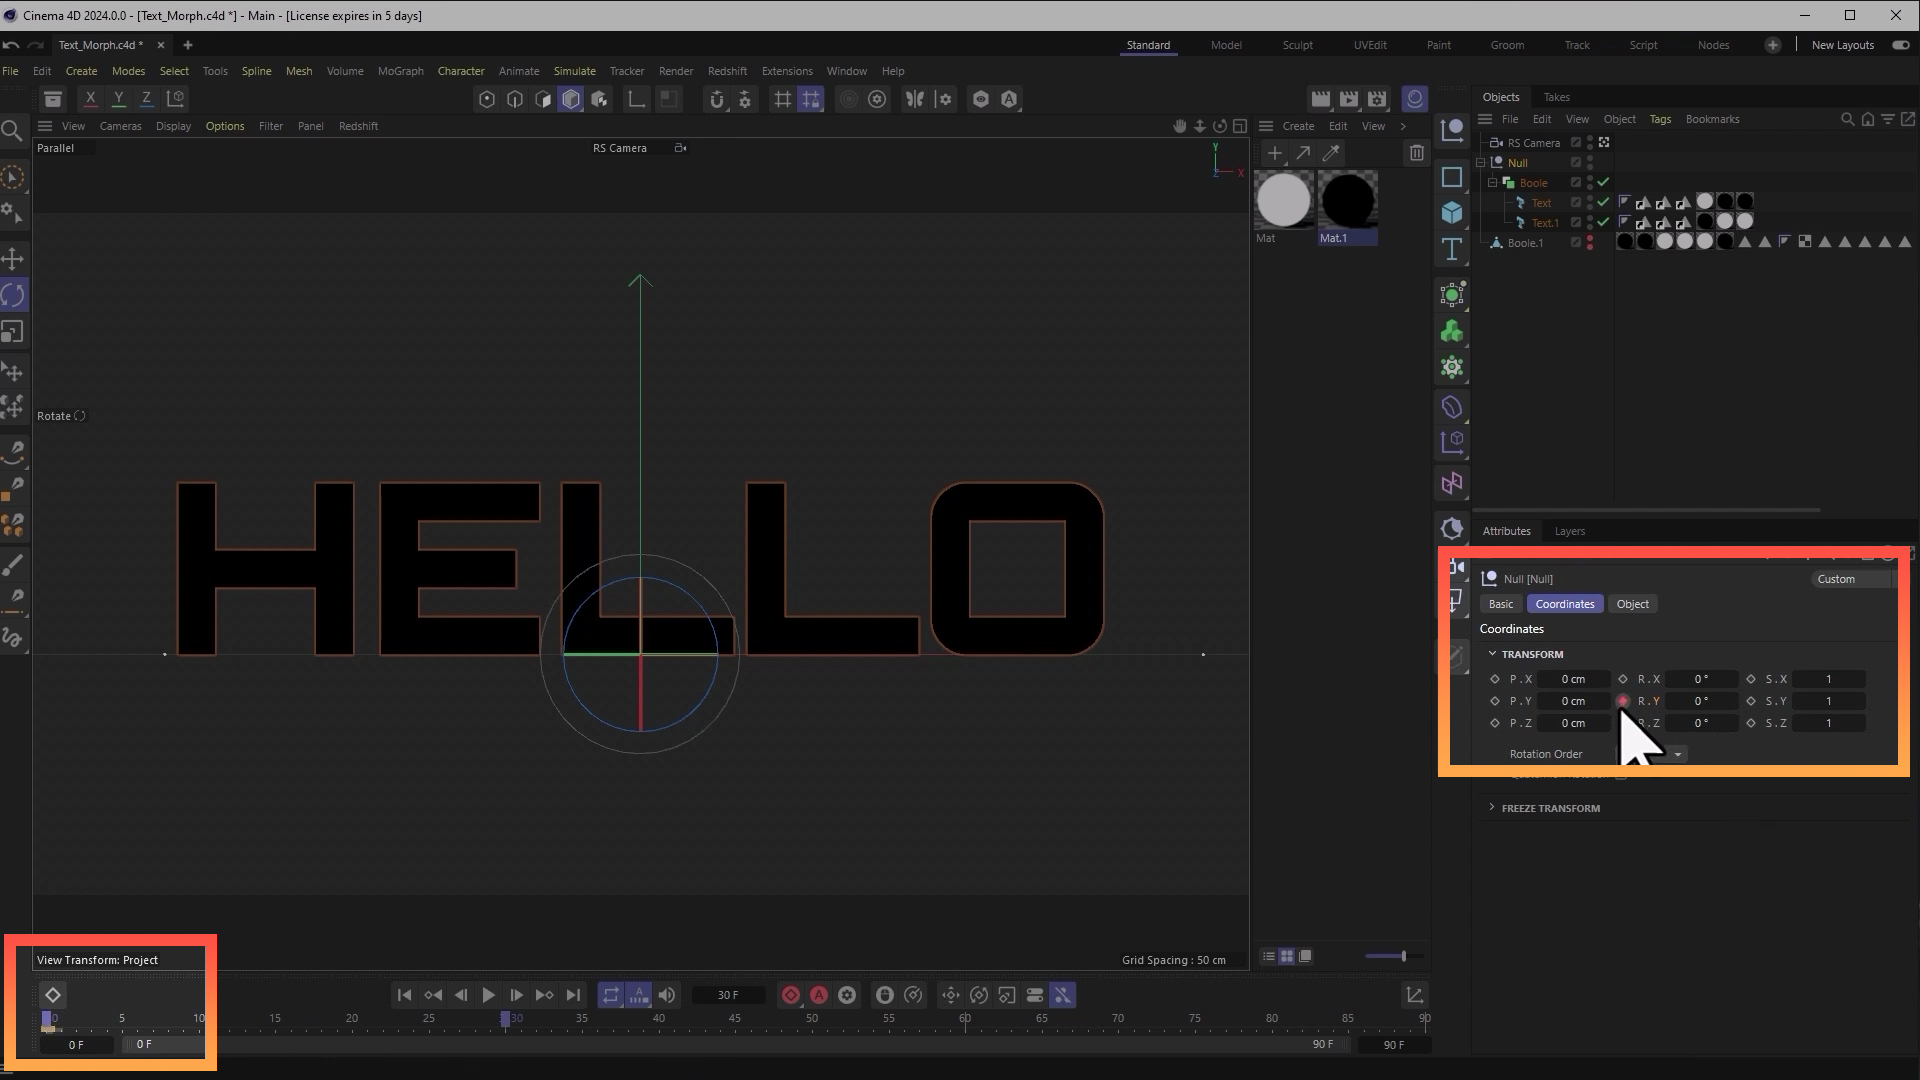
While Cinema 4d will automatically add in some ease in and out interpolation, you may want to adjust this a bit to your liking.
And that’s just the half of it! Jump to 15:00 in the video above and discover how to create a similar 3d effect in Cinema 4D but with text and a logo element. Thanks for following along!
3D typography in Blender
Are you a Blender user? Check out the tutorial referenced above for creating a similar 3D typography effect in Blender:


