Want to create a custom font for your next project? Here's how to create your very own typeface.
Today we’re exploring how to have a design superpower. Yes, I'm talking about creating a custom font or typeface.
Creating a font is not as difficult as you might think and if you have just basic illustrator knowledge you already have the power to create your own font, you just don't realize it yet. Kinda like Luke Skywalker in A New Hope. So get ready to pull some paths young padawan; it’s time to jump into custom type design!
You’ve probably looked into sites like MyFonts or FontSquirrel to download or buy fonts for a project. There are many options to choose from, but in rare cases you might want something very specific to fit your style. However, before getting started, you should know some basics about font design.
Common Fonts used for Motion Design
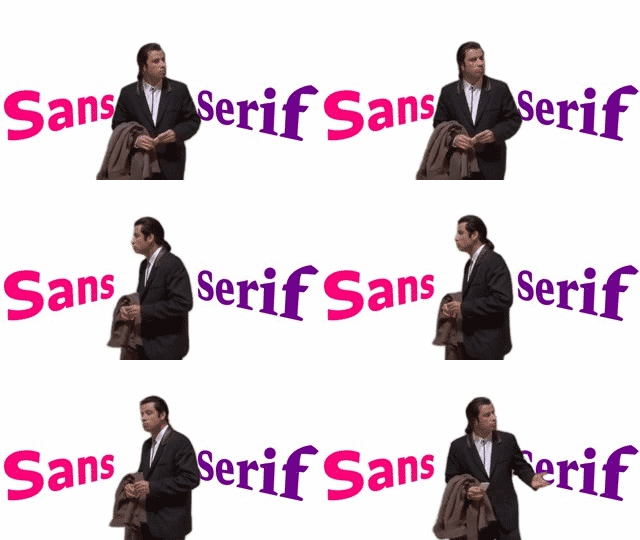
SERIF
With projected accents at the ends of letters, Serif fonts have hanging accents on all letters; representative of Roman Columns. Think Times New Roman.
SANS-SERIF
Sans (without) Serif (projection). Sans-Serif fonts have butt-ends without additional features. Ha... butt-ends. (Maturity is overrated).
CALLIGRAPHY / SINGLE-STROKE
Calligraphy is normally hand-drawn with a specialized Pen that broadens with pressure. Single-Stroke letters are painted by-hand; traditionally made by Sign Painters, but there are plenty of fonts that can simulate this skill-set.
BUBBLE / CARTOON
Commonly, this is a much thicker Sans-Serif Font, but can vary in style quite a lot. Most-notably, classic Mickey Mouse & Tex Avery cartoons featured this type in their titles.
For a lot more information about Fonts & TypeFaces, be sure to check-out Sara Wade’s very helpful post titled Fonts and Typefaces for Motion Design.
How to Create a Custom Font for Motion Design
Now that we have the basics down. Let's take a look at how to create a custom font. It'll be fun!
STEP 1: DOWNLOAD FONTFORGE, AI TEMPLATE, & MULTIEXPORTER
You're going to need a few things in order to create your own font. But don't worry! All of these tools are free.
Click below to download the free tools:
Just follow this short tutorial and you’ll be on your way to making a fun new style; unique for your Motion Graphics projects!
{{lead-magnet}}
STEP 2: BUILD GUIDES FOR CONSISTENCY
In this example, I’m going to develop a basic typeface. This is a good time to develop a pattern of style / angle and thickness for your letters. For example, the angle of the leader for an “A” might be the same angle as a “V’. The thickness of an “S” will usually end-up thinner than that of an O, C, or Q and should be adjusted accordingly.
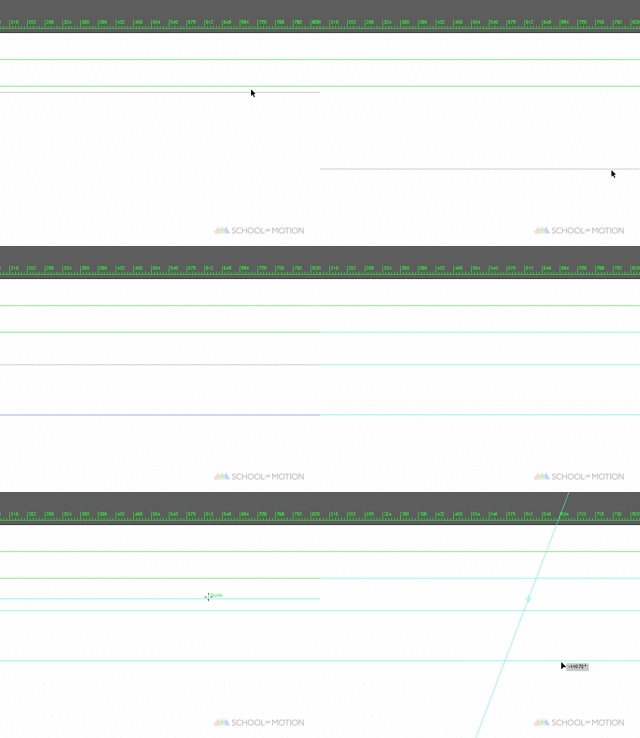
Illustrator quick-tip: To prepare a specified angle to work with, using Illustrator go to View > guides > unlock guides. Click on your specific guide and hit “R” and “Enter” to begin rotating it to your desired angle. If you have snapping enabled, you can Alt+Click on that guide while in Rotate mode to pick a particular point you want to rotate from.
STEP 3: DESIGN A-Z IN ILLUSTRATOR
Commonly, using Strokes to design fonts makes the design process more adaptable when working with 26+ letters. This is because if you change thickness and decide your font would look better all-around with that specified width halfway into designing a font, this will be a simple & fast update to change mid-process.
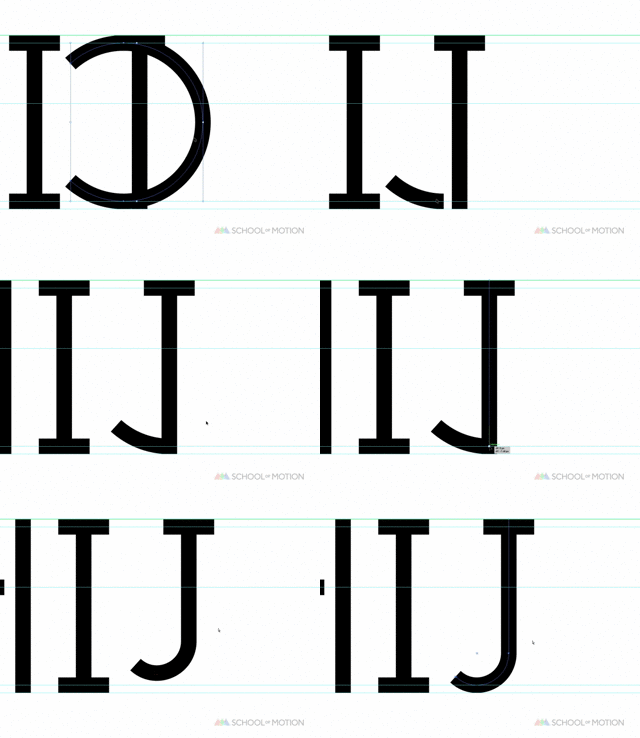
When you’ve completed your first set of letters, it’s highly recommended to (SAVE first) copy over your stroke-designed letters and expand them into shapes via Edit > Object > Expand. From here, you’ll be able to further stylize your font. Moving forward, you can add serifs, fills, or median spurs to your lettering.
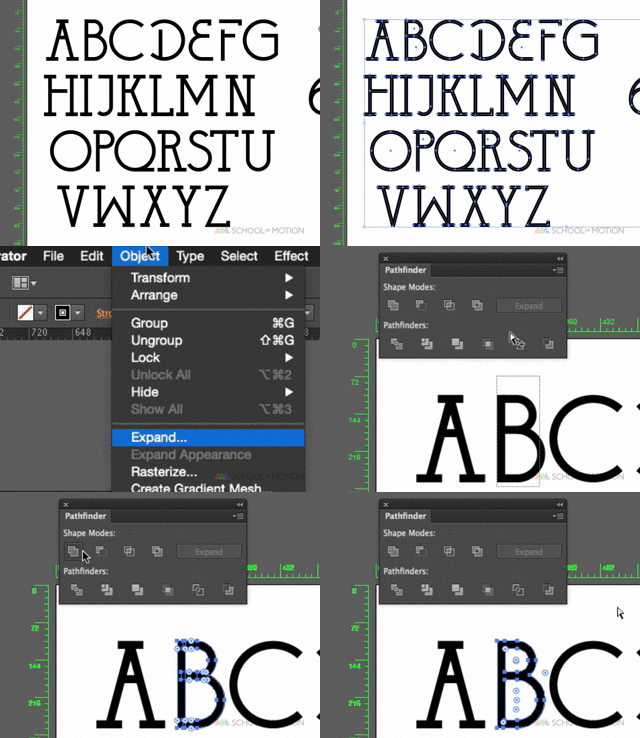
The quickest approach to designing Letters is in this order:
O S A L U R N X B C D E F G H I J K M P Q T V W Y Z
As far as numbers go, the best way to approach them is by developing your numbers in this order:
0 8 4 1 2 3 5 6 7 9
Regarding Glyphs, be sure to include Numbers, lower-case letters and short glyphs to your font collection; this is great for using quotations, commas, dashes & periods. I just used 5 different glyphs in that sentence alone, so that should give you an idea of how vital glyphs are to font design.The most useful glyphs to design (in this order) are:
& ? @ # $ % ! ( ) [ ] ; : ’ ’ ” ” , . - _ + =
(Note: You'll need more if you want to make this emoji: ¯\_(ツ)_/¯ )
At this point, you should have a set of letters, numbers & glyphs designed & expanded.
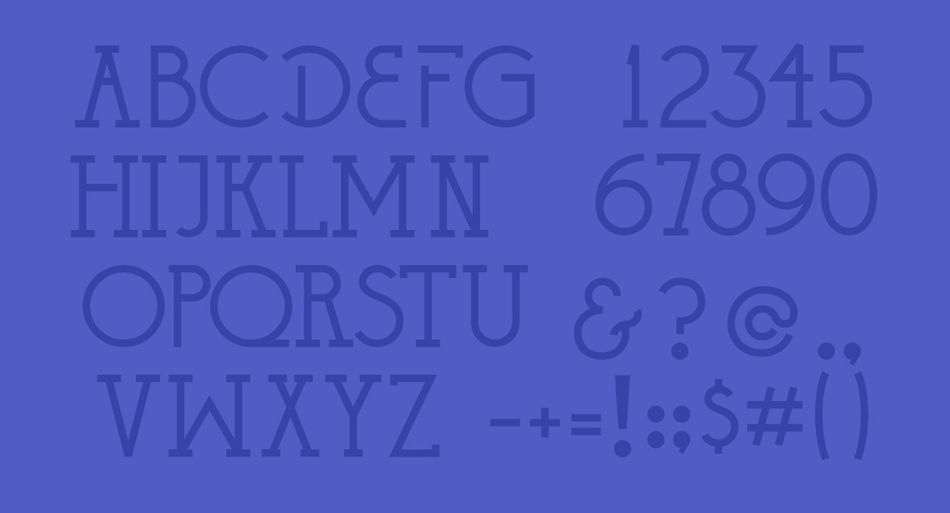
STEP 4: SCALE & FORMAT THE FONTS
Now that you have designed a custom font, the next step is to match everything to FontLab’s default artboard. The attached Illustrator template accommodates for that.Opening the template, you’ll notice that there are layers for each letter; uppercase, numbers, lowercase & various glyphs. Firstly, I suggest bringing everything into the “--WorkSpace” layer before formatting all of your fonts to their designated layers.
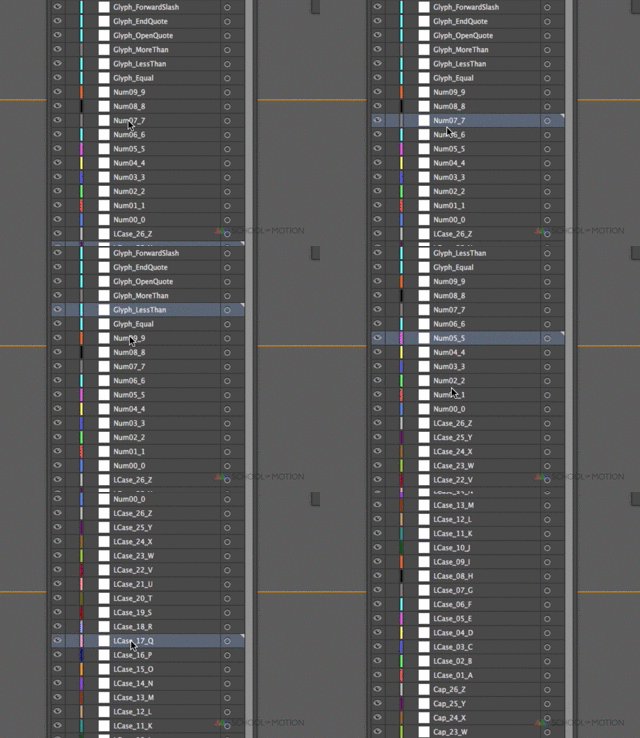
For each expanded letter, you’ll want to cut (command+x) and paste in-front (command + f) each letter to their specified layer. It’s best to keep your Bounding box enabled (command + shift + b) and edges enabled (command + h) as well.
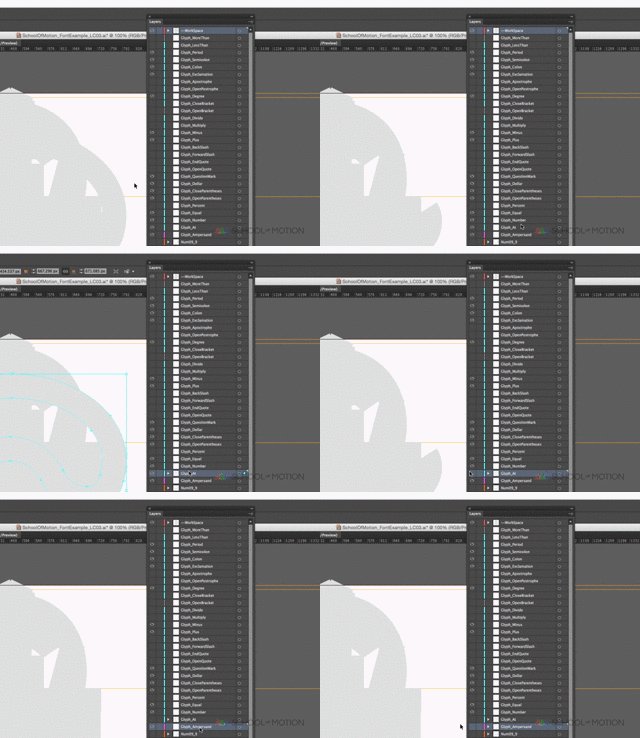
STEP 5: EXPORT TO SVG USING MULTIEXPORTER
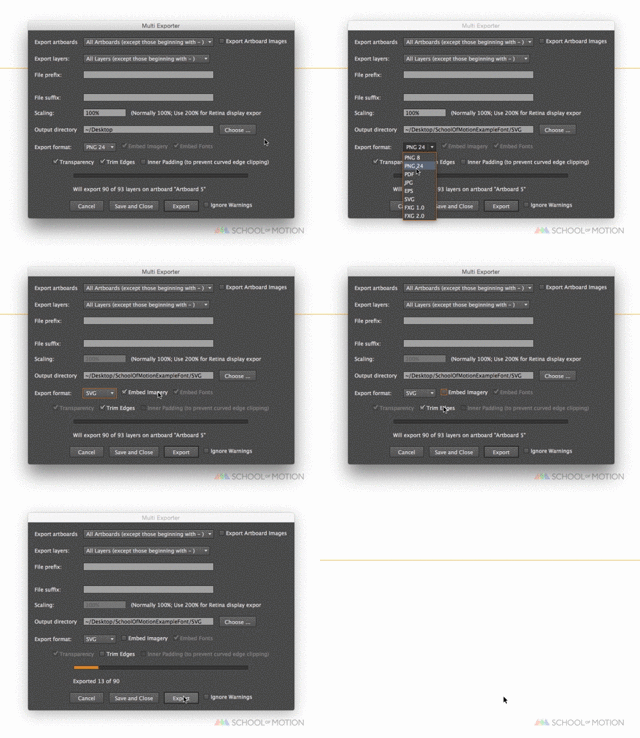
After layering-out all of your lettering, it’s time to export to SVG from Illustrator. With the MultiExporter.jsx file you copied into your Scripts folder, you’ll just need to pull-up the command.
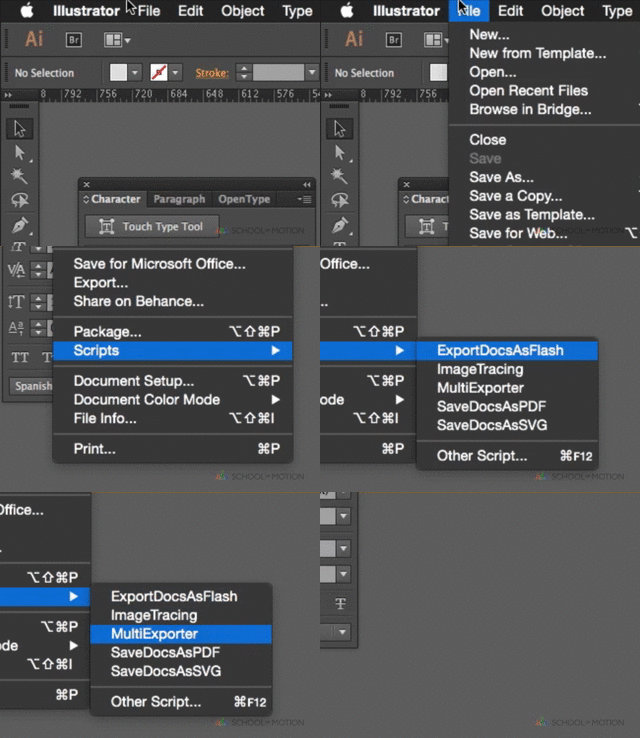
Be sure to save them into an easy-to-navigate and top-hierarchy folder if you can (ie. Desktop); this will reduce the amount of time you’ll need to import the SVG layers into FontForge.
STEP 6: IMPORT THE SVG FILES INTO FONTFORGE
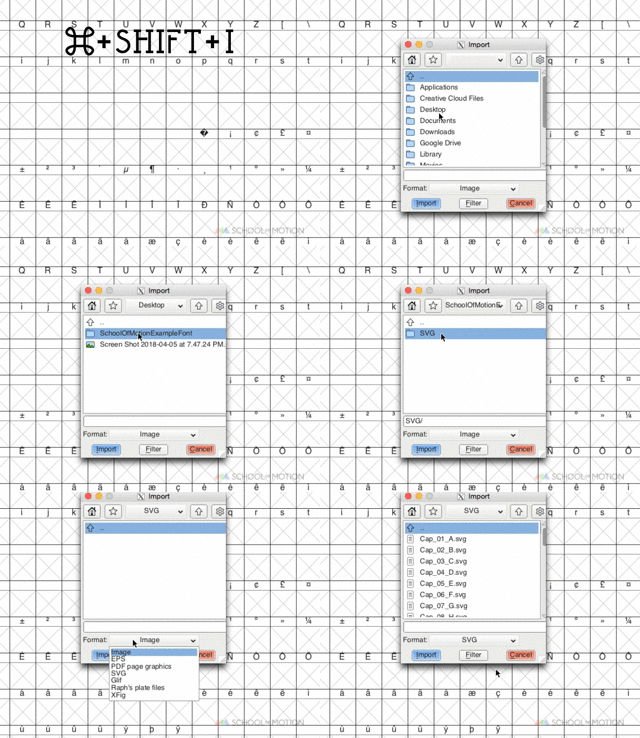
This is a time-consuming process. To begin importing your letters, double-click on the letter you’re looking to import. In the new window, navigate to File > Import > *Desktop > *FOLDER* > *Template Letter.svg.
Thankfully, through the supplied preset Illustrator Layers from the template, you’ll be able to view the letter you’re looking for quickly. I highly recommend working with a Wacom Tablet here to quickly navigate through folders.
Here’s where the process will begin to get repetitive; for each letter, you’ll have to navigate to each letter SVG and import them; after you’ve completed this for your 26 letters, numbers, glyphs and lower-case letters, you will now want to adjust your letter spacing on each individual letter.
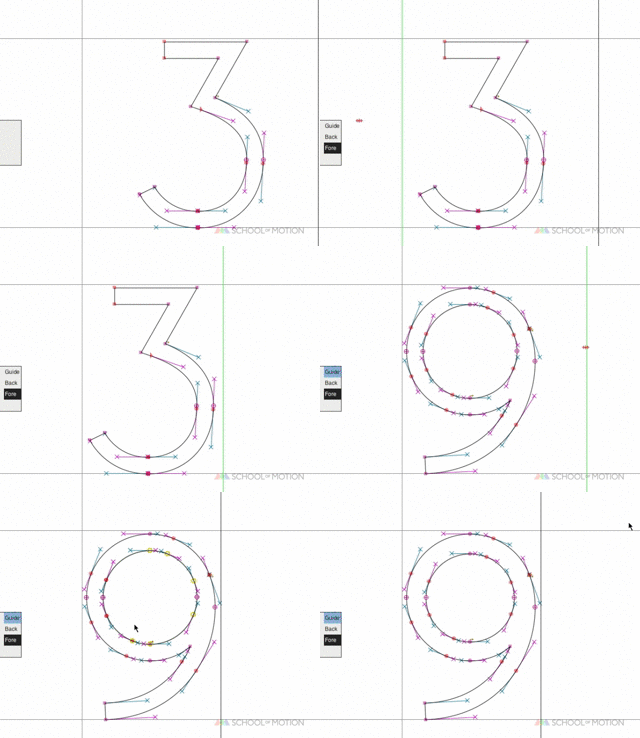
For the spacebar, use an unclosed line or dot to #32; the one to the left of the Exclamation Point glyph. When you open this window, it will be titled, “Space at 32” in most cases.To adjust spacing, again; double-click into each letter and pull the corresponding guides left & right until you get your letter spacing to a feeling of proper distance. In my opinion, it is best to use the thickness of your letter to decide your spacing. This process, you’re going to eventually come back to adjust in your final steps.
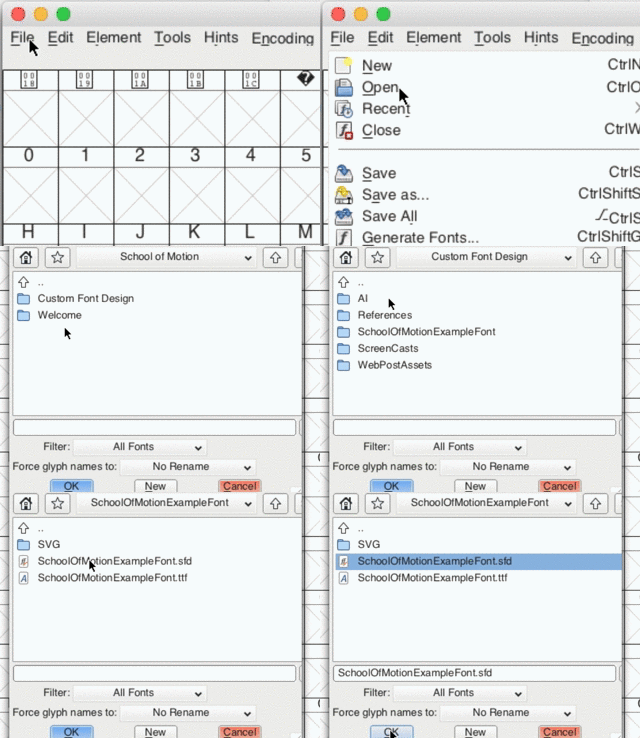
It can be tricky to save your FontForge project file depending on your operating system. Or it might be as simple as navigating to your root design folder. In some versions, you won’t be able to double-click your FontForge project file to open it. To open a FontForge file, you’ll need to go to File > Open > *YourFont.sfd
If you’re looking to make an all-caps font, the simplest solution is to click on each capital letter you’re interested in using as a lower-case from the main work area, and copy + paste into the corresponding lower-case letter tab.
STEP 7: SAVE YOUR CUSTOM FONT
Before saving your font, you’ll want to name it and the process to naming your font is different than that of a standard “save as”. In some versions, you won’t be able to double-click your FontForge project file to open it. To open a FontForge file, you’ll need to go to File > Open > *YourFont.sfd
To officially name your font, Navigate to Element > Font Info, and rename “Untitled” to what you’d like to title your custom Typeface to be under the PS Names tab.
STEP 8: EXPORT YOUR FONT
After you have everything prepared with FontForge, the next step will require a bit of a back-and-forth process. To export your custom font, you’ll just need to go to File > Generate and select which filetype you’re looking to develop. Most-commonly used is TTF (True Type Format).
After you’ve exported your Typeface, you’re going to want to load it up into your font app and test it out. If your spacing looks awkward, this is where the back-and-forth step comes in. You’ll have to re-adjust your spacing using FontForge by moving the tracking bar in FontForge and re-export your font to test any specific letters / glyphs you want to fix..
While testing out your font, a great approach to judging spacing is to squint your eyes as you check the natural tracking of your lettering; I’ve found out through many jobs that my safest approach to kerning from a creative director’s standpoint is to squint your eyes while testing your typeface. Check at various distances and when looking at a full 16:9 comp, this gives you a lot of insight to your font scale as well.
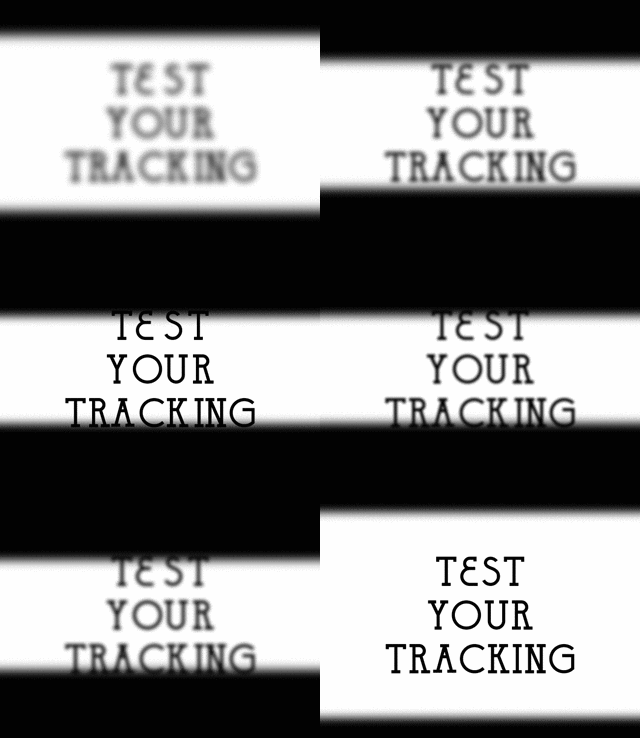
With this completed, and if you’re feeling confident about using your newly designed font, it’s time to bring it into your next After Effects project and begin typing away using a typeface with your own touch to it!
For more super-useful tutorials on Typefaces, check out School of Motion’s Design BootCamp which covers major design principles for the field, and put your cool new Typeface to great use by animating it via School of Motion’s In-Depth Type Animator Tutorial.
Another amazing tutorial to add visual flair to your new font is Joey's tutorial for creating a Write-On effect in After Effects. School of Motion also has a new course coming in the fall all about using Illustrator and Photoshop for Motion Design, but let's just keep that a secret between you and me for now.
I hope this was a very exciting and creative tutorial; enjoy the new capability you now possess. I look forward to the new retro movie fonts we'll be seeing from you in all your upcoming Motion projects!
ENROLL NOW!
Acidbite ➔
50% off everything

ActionVFX ➔
30% off all plans and credit packs - starts 11/26

Adobe ➔
50% off all apps and plans through 11/29

aescripts ➔
25% off everything through 12/6
Affinity ➔
50% off all products

Battleaxe ➔
30% off from 11/29-12/7
Boom Library ➔
30% off Boom One, their 48,000+ file audio library
BorisFX ➔
25% off everything, 11/25-12/1

Cavalry ➔
33% off pro subscriptions (11/29 - 12/4)

FXFactory ➔
25% off with code BLACKFRIDAY until 12/3

Goodboyninja ➔
20% off everything

Happy Editing ➔
50% off with code BLACKFRIDAY

Huion ➔
Up to 50% off affordable, high-quality pen display tablets

Insydium ➔
50% off through 12/4
JangaFX ➔
30% off an indie annual license
Kitbash 3D ➔
$200 off Cargo Pro, their entire library
Knights of the Editing Table ➔
Up to 20% off Premiere Pro Extensions
Maxon ➔
25% off Maxon One, ZBrush, & Redshift - Annual Subscriptions (11/29 - 12/8)
Mode Designs ➔
Deals on premium keyboards and accessories
Motion Array ➔
10% off the Everything plan
Motion Hatch ➔
Perfect Your Pricing Toolkit - 50% off (11/29 - 12/2)

MotionVFX ➔
30% off Design/CineStudio, and PPro Resolve packs with code: BW30

Rocket Lasso ➔
50% off all plug-ins (11/29 - 12/2)

Rokoko ➔
45% off the indie creator bundle with code: RKK_SchoolOfMotion (revenue must be under $100K a year)

Shapefest ➔
80% off a Shapefest Pro annual subscription for life (11/29 - 12/2)

The Pixel Lab ➔
30% off everything
Toolfarm ➔
Various plugins and tools on sale

True Grit Texture ➔
50-70% off (starts Wednesday, runs for about a week)

Vincent Schwenk ➔
50% discount with code RENDERSALE

Wacom ➔
Up to $120 off new tablets + deals on refurbished items


