Your current graphics workflow leaves a lot to be desired...
Let’s not beat around the bush here, having to go back and forth between Premiere Pro and After Effects is a pain. If you work in a collaborative video environment a typical graphics workflow looks something like this:
- Someone creates an After Effects template
- That person sends it to the editor
- The editor or producer figures out the necessary graphics for video
- The graphics are edited and exported in After Effects (one-by-one)
- The graphics are Imported and added in Premiere Pro
Needless to say this workflow takes for-ev-ur. Adobe has addressed this problem by introducing features like the Dynamic Link and Live Text Templates, but each update has had it’s own issues that have made it very difficult to use in day-to-day editing life. That was until they released the Essential Graphics Panel
{{lead-magnet}}
What is the Essential Graphics Panel?
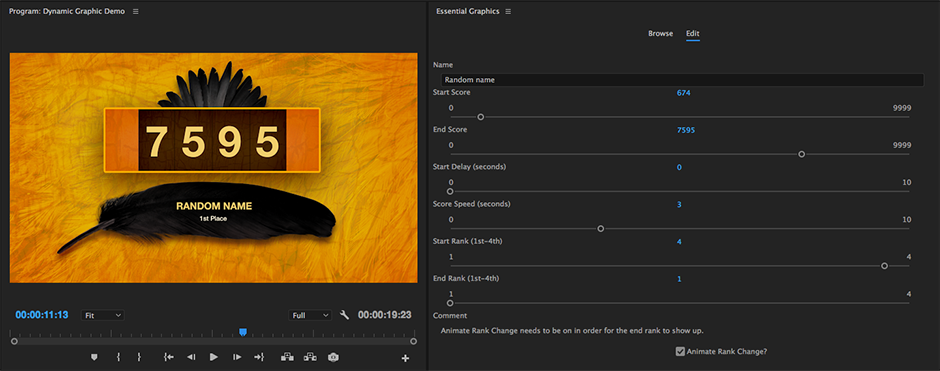
The Essential Graphics Panel is a feature that makes graphic workflows 10x easier when working on a video project. For motion designers the biggest reason to get excited about the Essential Graphics Panel is the fact that it allows After Effects projects to be linked to Premiere Pro. Unlike traditional After Effects templates, the Essential Graphics Panel gives video editors the ability to edit an After Effects composition without ever opening up After Effects. This allows any editor, no matter their After Effects proficiency, to edit and customize After Effects templates without having any After Effects knowledge whatsoever.
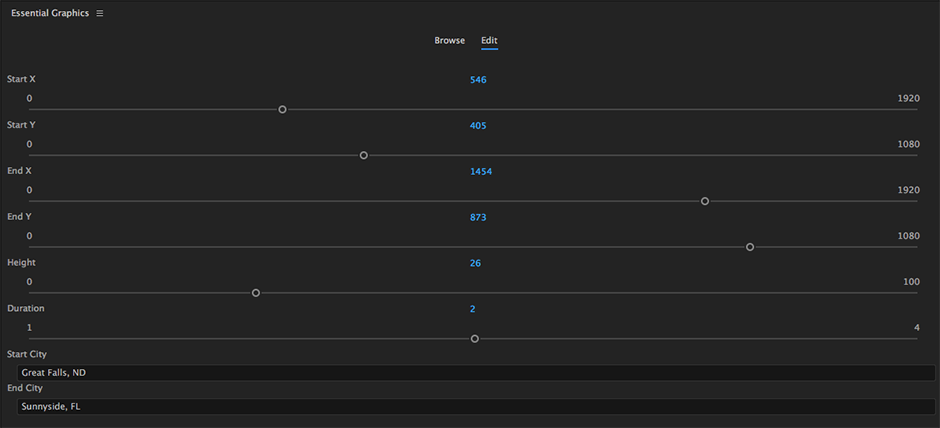
Now the actual process of creating, preparing, and editing an Essential Graphics Template isn’t as easy as simply importing an After Effects sequence into Premiere, but it honestly isn’t that difficult either. In the video above we= cover everything you need to know to get started with the Essential Graphics Panel. The video covers the entire Essential Graphics Panel workflow, from start to finish. If you want to follow along you can download the free project files by following the download link at the top of the page.
A TALE OF TWO TEMPLATES (PREMIERE-BASED VS AE-BASED TEMPLATES)
Currently there are two distinctly different types of Essential Graphics Templates available to Creative Cloud users: Premiere-Based Templates and After Effects Motion Graphic Templates.
PREMIERE-BASED ESSENTIAL GRAPHIC TEMPLATES

Pros: Fully Editable Text, Easily Save New Templates, Master Styles, Master Graphic Upgrades
Cons: None of the benefits of After Effects (Precomps, Effects, Expressions, Plugins, etc.), Can Give Non-Designer Users Too Much Control
Premiere-Based Title Graphic Motion Graphic Templates are Motion Graphic Templates that have have been created inside of Premiere Pro. While this may seem a little weird if you come from a Motion Graphic background, it is a helpful tool for editors who may not be as comfortable with After Effects and expression engineering. Any title can be turned into a template in Premiere Pro by navigating to Graphics>’Export as a Motion Graphic Template’. Title Graphic Templates give users access to the type tool, ellipses, rectangles, and video/image asset uploads.
The video/image upload feature is especially cool because it allows you to pre-render graphic elements like lower thirds or full screens in After Effects and combine them with a text layer to create an easily editable and sharable template in Premiere Pro. The animation potential for such a feature is a low, but worth noting. We will not cover Title Graphic Templates for this tutorial as they are limited to Premiere Pro’s animation features, but there are some good articles and videos out there about how to use this feature.
AFTER EFFECTS ESSENTIAL GRAPHIC TEMPLATES

Pros: Utilizes After Effects Projects, Custom Editable Fields in Premiere, Tons of Control via Expressions
Cons: Requires Intermediate to Advanced After Effects Knowledge, Can Take a While to Load in Premiere
In contrast to text-based graphic templates, After Effects Essential Graphic Templates allow users to have almost complete control over an After Effects project if they are setup correctly. These templates can be built just like any After Effects project, but they must be editable from sliders, checkboxes, or source text controls (more on this below). Using the Essential Graphics Panel users can utilize Dynamic Motion Graphic Templates to edit virtually any field in After Effects, from simple color controls to third-party plugins like Element 3D. Our tutorial and step-by-step process will outline how to create this type of template.
Note: To use the Essential Graphics Panel you must have After Effects installed on your computer.
How to Create an Essential Graphics Template
1. CREATE THE AFTER EFFECTS TEMPLATE
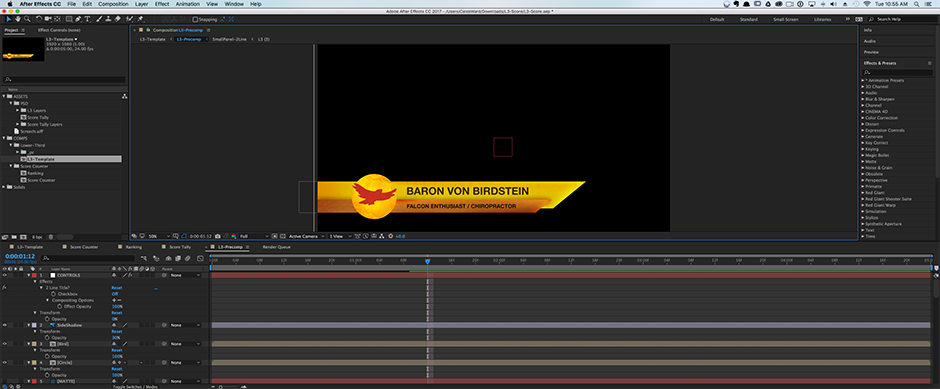
Creating an Essential Graphics Template starts with creating an After Effects project. While the entire process of creating an After Effects project is definitely outside of the scope of this specific lesson, if you’re interested in learning more about After Effects check out our 30 Days of After Effects series here on School of Motion.
Simply setup your After Effects template project like you would any other project with two major caveats:
Caveat #1: You Can’t Drop Any Parameter into an Essential Graphics Template
Not every parameter can be dropped into a new Essential Graphics Template. Items like point values and rotations must be ‘hacked’ via expressions in order to work. The best way to make this happen is to link expression controllers to various parameters and inputs around your After Effects project. I typically place all of my expression controllers in a null object located in the master composition. This is actually pretty easy to do if you know how to use expressions. If not, check out our intro to After Effects Expressions lesson here on School of Motion.

Note: Be sure to mess with individual parameters before committing to using expressions. You might get away with directly adding certain fields like on/off switches and slider based value controllers without writing a single line of expressions.
EXPRESSION REFERENCE
Here’s how to link all of the expression controllers to the Essential Graphics Panel:
Checkbox - This expression to create an On/Off checkbox. A value of 1 is for ‘On’ and a value of 0 is for ‘Off’.
If ('Pickwhip to Checkbox'.value) ? 'True Value(ex. 100)' : 'False Value(ex. 0)'

Slider - Use this expression to link parameters to sliders. This one is super easy because you can simply use a pick whip to link parameters together.
#1 Pickwhip Method: The easiest way to connect a slider to a parameter is to use the pickwhip tool. You can also add mathematical modifiers to the end of a pickwhipped expression to change the final value.

Note: You can lock your effects box by clicking the lock icon at the top of your effects control panel.
#2 Linear Method: Proportionally scale two sets of values. This is great if you want your slider to be 0 - 100, but your value must be a smaller or larger number to get your desired effect.

#3 Ease Method: Similar to the linear expression, but the values ease into each other.

Text Box - To link a text box simply pickwhip from your source text to a text box expression controller. Easy-peasy.

Note: If you want give your users control over type controls like font, position, boldness, paragraph, etc., you must create the template in Premiere Pro using the type tool and the ‘Export as Motion Graphic Template’ feature. This means that all of your shape layers and keyframes will be created directly in Premiere Pro. Premiere Gal has an in-depth tutorial about how to do this. Because we’re dealing with pre-customized and on-brand graphics we will ignore this feature.
Color Control - Use a pick whip to connect a color box.

Point Controls - Unfortunately at this time point controls are not supported. Instead you must use an array (scary, I know…) to connect each one of your individual X,Y, and Z axis to an individual slider. X = 0, Y = 1, Z = 2.

Angle Controls - Similar to point controls, users don’t currently have the ability to adjust angle sliders from the Essential Graphics Panel. But you can easily attach angle controls to sliders.

Layer Control - There’s really no great way to create a layer control at the moment. The best way I’ve seen people do it is through using an ‘If Than’ expression for BG images and connect the assets to a slider. For example: If (‘slider value’ == 6) 100 else 0.
CAVEAT #2: YOUR GRAPHICS CANNOT REQUIRE DIRECT ASSET UPLOADS TO FUNCTION.

In short, Premiere doesn’t give editors the ability to upload image, video, or sound assets to AE-based templates in the Essential Graphics Panel. This means that (at this point) it is basically impossible to upload a custom image or video to your motion graphic template without opening it up in After Effects. Perhaps this will be introduced in the future, but for now editors have to workaround this issue. This problem is, of course, irrelevant if you are using a Premiere-based Motion Graphic Template.
Don’t let the caveats scare you away from using this feature. They honestly shouldn’t impair you from using the Essential Graphics Panel on most of your projects.
2. CREATE THE ESSENTIAL GRAPHICS PANEL
Now that we’ve put our project together now it’s time to create the panel that can be exported to Premiere. You can access the Essential Graphics Panel in After Effects by navigating to Window>Essential Graphics (duh). This will pop up a simple box with a four options:
Name: The final name of your effect
Master: The Master Composition. AKA the composition with all of the precomps in it.
Solo Supported Properties: Shows all of the parameters that can added to the Essential Graphics Panel. This will make sense in a second.
Set Poster Frame: Sets the thumbnail that your editor will see when they are browsing for the template in Premiere. By default this is set to the first frame so be sure to adjust this if you are working on a transition template.
Assuming you’ve set up your composition correctly by connecting the necessary layers and properties to expression controllers it’s time to create the panel. This process is actually surprisingly easy. Just hit the ‘Solo Supported Properties’ button in the Essential Graphics Panel and drag and drop your desired parameters to the Essential Graphics Panel. Once you’ve populated your ‘template’ with all of the desired parameters you can drag them around into any order that you want. The ‘Add Comment’ button is especially useful if you want to add in notes for your editors.

Once you’ve created your template hit the ‘Export Motion Graphics Template…’ button and you will be prompted to save your new template to a specific location. If you’re using the same machine to design and edit you can export directly to the ‘Essential Graphics’ folder on your machine. If not, you can export the template file anywhere you like. I recommend using the Creative Cloud libraries feature for quick and easy access across all of your devices. The file will be be saved as a .mogrt file.
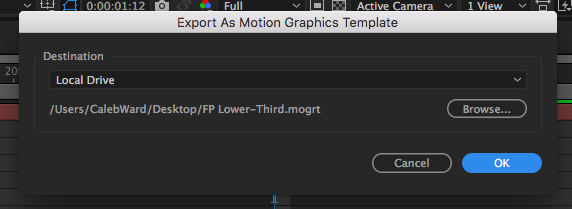
It’s important to note that these new .mogrt files are much different than normal After Effects project files in that the assets are stored inside the project file. This means you don’t have to worry about compiling or collecting all of the assets before giving the template to your editor.
3. IMPORT THE ESSENTIAL GRAPHICS PANEL PROJECT IN PREMIERE PRO

Now it’s time to close After Effects (or minimize because let’s get real you don’t ever really close After Effects) and open up a project Premiere Pro. Once you’re ready to bring your template into your project navigate to Window>Essential Graphics. This will pop up the Essential Graphics Panel.
By default you’ll notice a few folders with template files inside. A few of these templates can be useful for utility purposes like closed captions and credits, but for the most part you’ll probably want to ignore the majority of these default templates.
To import your template into Premiere hit the small import button that looks like a folder with an arrow. This will open up a browser where you can find your desired Essential Graphics Template. Once you hit the open button it will appear in the browser window. To stay better organized I recommend creating a folder for each of your motion graphic projects.
Bring your template into your project by simply dragging it into the timeline.
Once you drop your template into the timeline there will be a small wait before it loads. If you get the dreaded red ‘media offline’ screen don’t worry. The graphic template can take anywhere from a few seconds to a minute or two to load depending on the size of the template.
4. EDIT THE ESSENTIAL GRAPHICS PANEL IN PREMIERE PRO
Once your template is loaded into your timeline you should automatically see that your Essential Graphics Panel has changed from ‘Browse’ mode to ‘Edit’ mode. If not, just select your graphic in the timeline and hit the ‘Edit’ tab at the top of the Essential Graphics Panel.

Assuming that you have correctly set up all of your graphics in After Effects you should be able to edit all of the necessary fields using the parameters listed. However, if you find something wrong with your template you must go back into After Effects and re-save the template. It’s a little tedious when you’re setting up a graphics package, but once it’s done it will save you a ton of time in the future.
Duplicating the Graphics in the Premiere Pro Timeline
If you want to duplicate your template all you have to do is either hold down option (alt on a PC) and drag your template to the desired location, or simply copy and paste the clip to the correct spot in the timeline.
Quick Note: Don’t forget to have the right video track selected when you copy and paste the clip.
IT’S REALLY NOT THAT COMPLICATED…
I know this may seem like a lot, but once you understand the workflow it is actually incredibly easy to create Essential Graphics Templates out of After Effects projects. This new feature is likely going to evolve into a larger shift in the way editors and motion designers collaborate, making it easier for everybody to focus on creating a great video content and not technical implementation.
ENROLL NOW!
Acidbite ➔
50% off everything

ActionVFX ➔
30% off all plans and credit packs - starts 11/26

Adobe ➔
50% off all apps and plans through 11/29

aescripts ➔
25% off everything through 12/6
Affinity ➔
50% off all products

Battleaxe ➔
30% off from 11/29-12/7
Boom Library ➔
30% off Boom One, their 48,000+ file audio library
BorisFX ➔
25% off everything, 11/25-12/1

Cavalry ➔
33% off pro subscriptions (11/29 - 12/4)

FXFactory ➔
25% off with code BLACKFRIDAY until 12/3

Goodboyninja ➔
20% off everything

Happy Editing ➔
50% off with code BLACKFRIDAY

Huion ➔
Up to 50% off affordable, high-quality pen display tablets

Insydium ➔
50% off through 12/4
JangaFX ➔
30% off an indie annual license
Kitbash 3D ➔
$200 off Cargo Pro, their entire library
Knights of the Editing Table ➔
Up to 20% off Premiere Pro Extensions
Maxon ➔
25% off Maxon One, ZBrush, & Redshift - Annual Subscriptions (11/29 - 12/8)
Mode Designs ➔
Deals on premium keyboards and accessories
Motion Array ➔
10% off the Everything plan
Motion Hatch ➔
Perfect Your Pricing Toolkit - 50% off (11/29 - 12/2)

MotionVFX ➔
30% off Design/CineStudio, and PPro Resolve packs with code: BW30

Rocket Lasso ➔
50% off all plug-ins (11/29 - 12/2)

Rokoko ➔
45% off the indie creator bundle with code: RKK_SchoolOfMotion (revenue must be under $100K a year)

Shapefest ➔
80% off a Shapefest Pro annual subscription for life (11/29 - 12/2)

The Pixel Lab ➔
30% off everything
Toolfarm ➔
Various plugins and tools on sale

True Grit Texture ➔
50-70% off (starts Wednesday, runs for about a week)

Vincent Schwenk ➔
50% discount with code RENDERSALE

Wacom ➔
Up to $120 off new tablets + deals on refurbished items


