A Step-by-Step Guide to Setting Keyframes in After Effects.
Short of the timeline itself, a keyframe is the most important animation tool in After Effects. So with this is mind we’re going to take a basic look at how to set keyframes in After Effects.
However, it's not good to put the cart before the horse. First, let’s learn a little bit more about these mysterious keyframes.
What is a Keyframe in After Effects?
Keyframes are markers in time that allow you to tell After Effects where you want to change the value for a layer or effect property such as position, opacity, scale, rotation, amount, particle count, color, etc. By setting these 'markers' and changing the values you create animation.
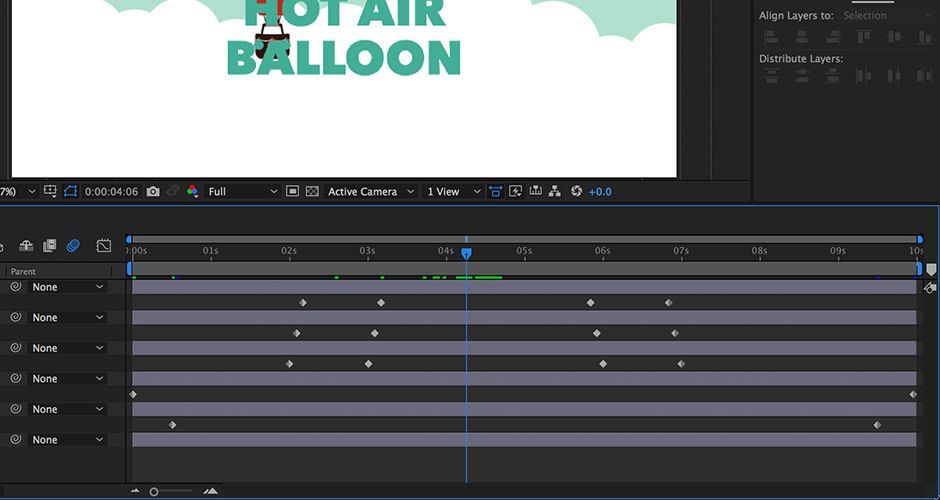
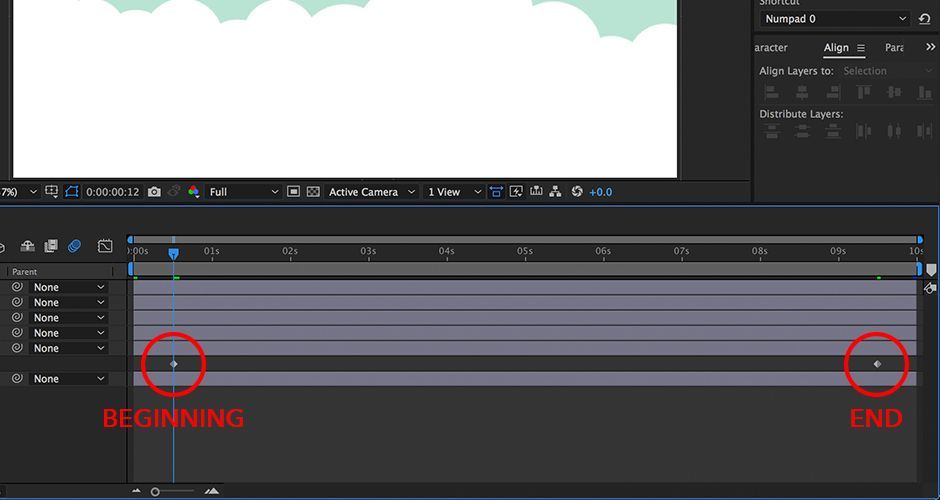
Every MoGraph (Motion Graphic) application has a timeline, and it's inside this timeline that you add keyframes to create movement. For After Effects, keyframes are set in the Timeline Panel. When we set these keyframes in the timeline we are telling After Effects where we want our animation to begin and where we want it to end.
Why do we Need Keyframes in After Effects?
Keyframes are the most crucial component for animation, and because of this they are used on all sorts of properties and effects. As we learned above, keyframes tell After Effects where we want an animation to begin and where we want it to end.
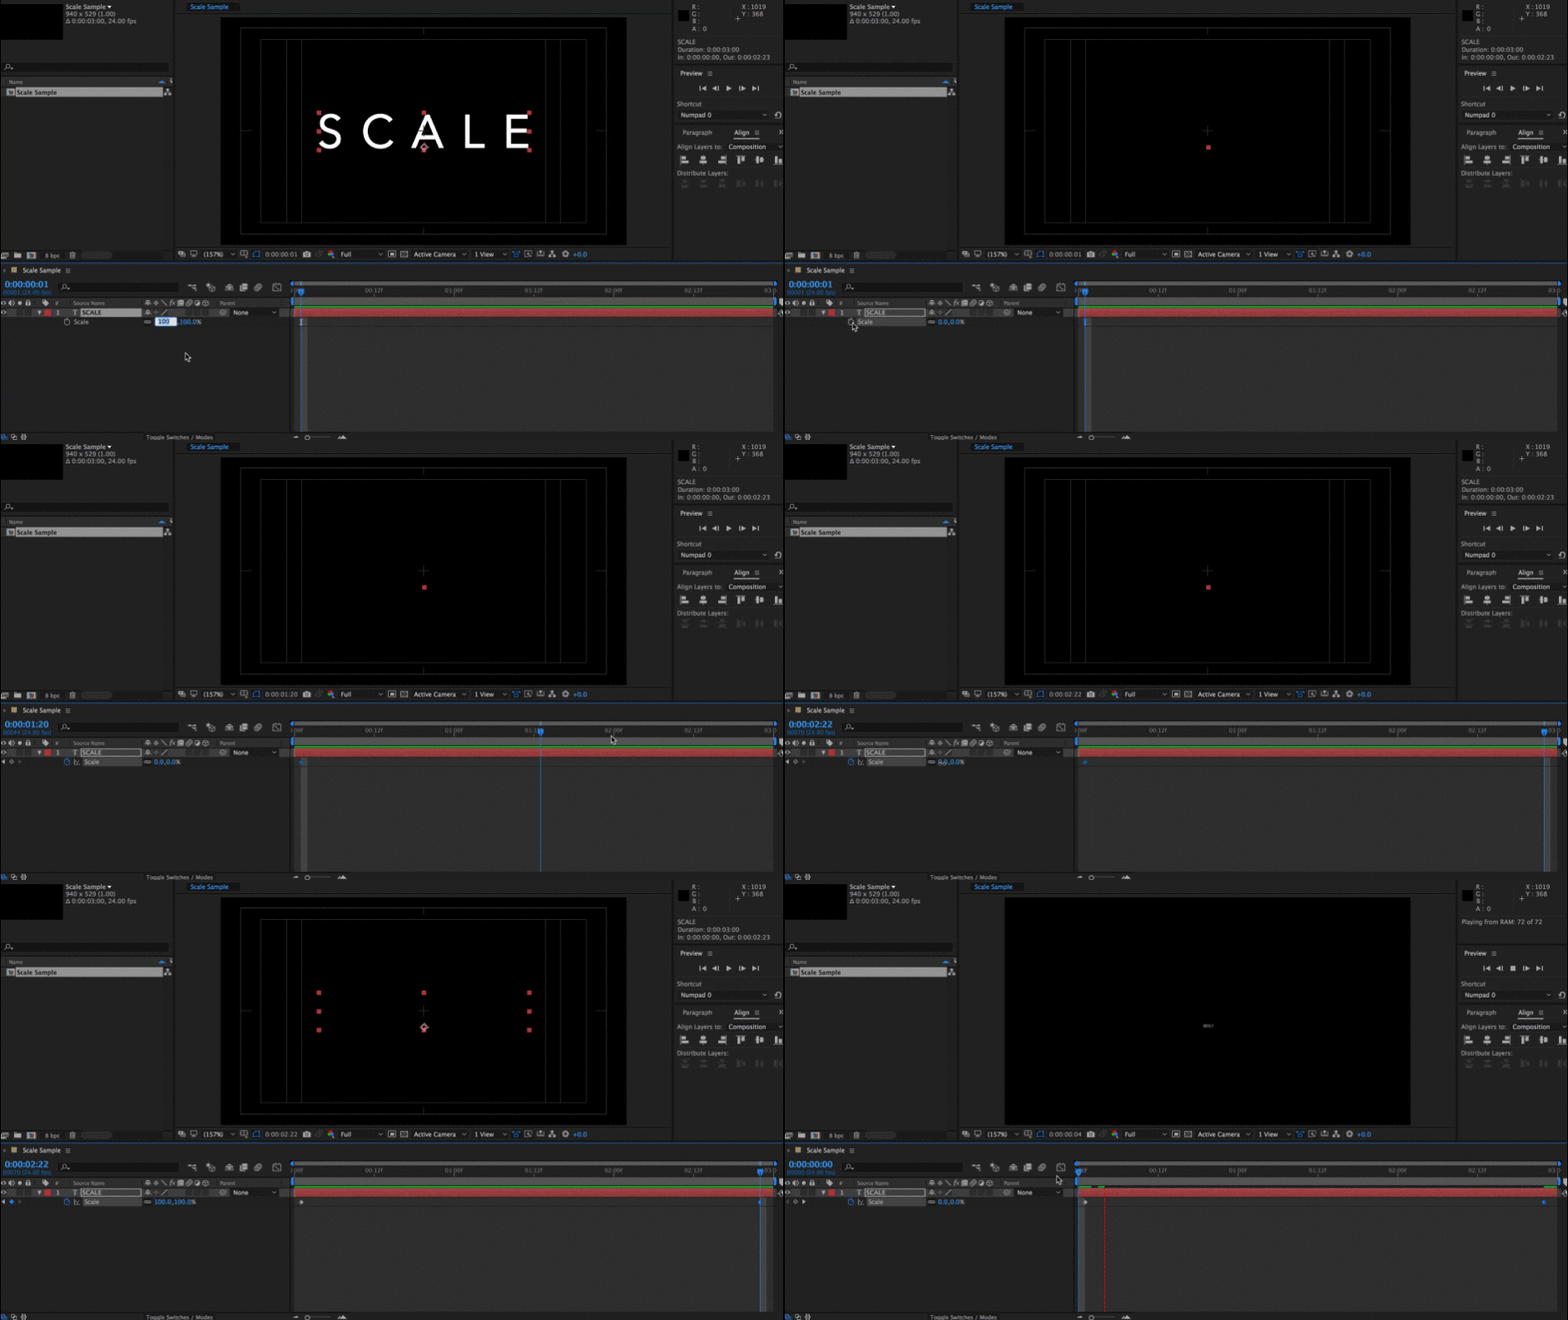
Keyframes do more than just move a layer from one side of the composition to the other. You can use keyframes to change the opacity of an element from 100% visibility to 0% visibility over time. Or could you change the scale of an element from 0% to 100% over time. You can even add keyframes to effects, which gives your effects greater flexibility, and this essentially unlocks a infinite world of Motion Design possibilities.

3 Steps to Setting Keyframes in After Effects
Now that we know the basics of what keyframes are, and why they are important, let’s walk through how to set keyframes in After Effects. This short and basic exercise will break things down in their simplest form, with the hope that you gain a firm foundation on how keyframes work and how you should utilize them on your future projects. Here's a quick outline on how to set a keyframe in After Effects:
- Step 1: Set a starting value & select the stopwatch icon next to the property.
- Step 2: Move your playhead to a new spot in the timeline.
- Step 3: Adjust the second value.
Hot Air Balloon Animation Keyframe Example
For this first example we’re going to use an image we found from Adobe Stock, the elements we’re going to animate are the clouds in the background and the hot air balloon in the foreground. We’ll be using two simple keyframes to change the position value for each element. Let’s get going!
STEP 1: SET YOUR FIRST KEYFRAME WITH THE STOPWATCH ICON
Let’s determine our starting point for the balloon and set our first keyframe by clicking the stopwatch next to the position property. Remember, this technique can work for any effect or transformation property in After Effects. Neat!

STEP 2: MOVE THE PLAYHEAD TO THE SECOND LOCATION
Next, let’s move our time indicator to the end of the timeline. For your project you can move your playhead anywhere you want.
STEP 3: ADJUST THE SECOND VALUE PROPERTY
Now move out balloon to the other side of the comp. You’ll see once we release the mouse button a new keyframe is created. You can hit the spacebar to preview your new animation, but let's take this a littler further...
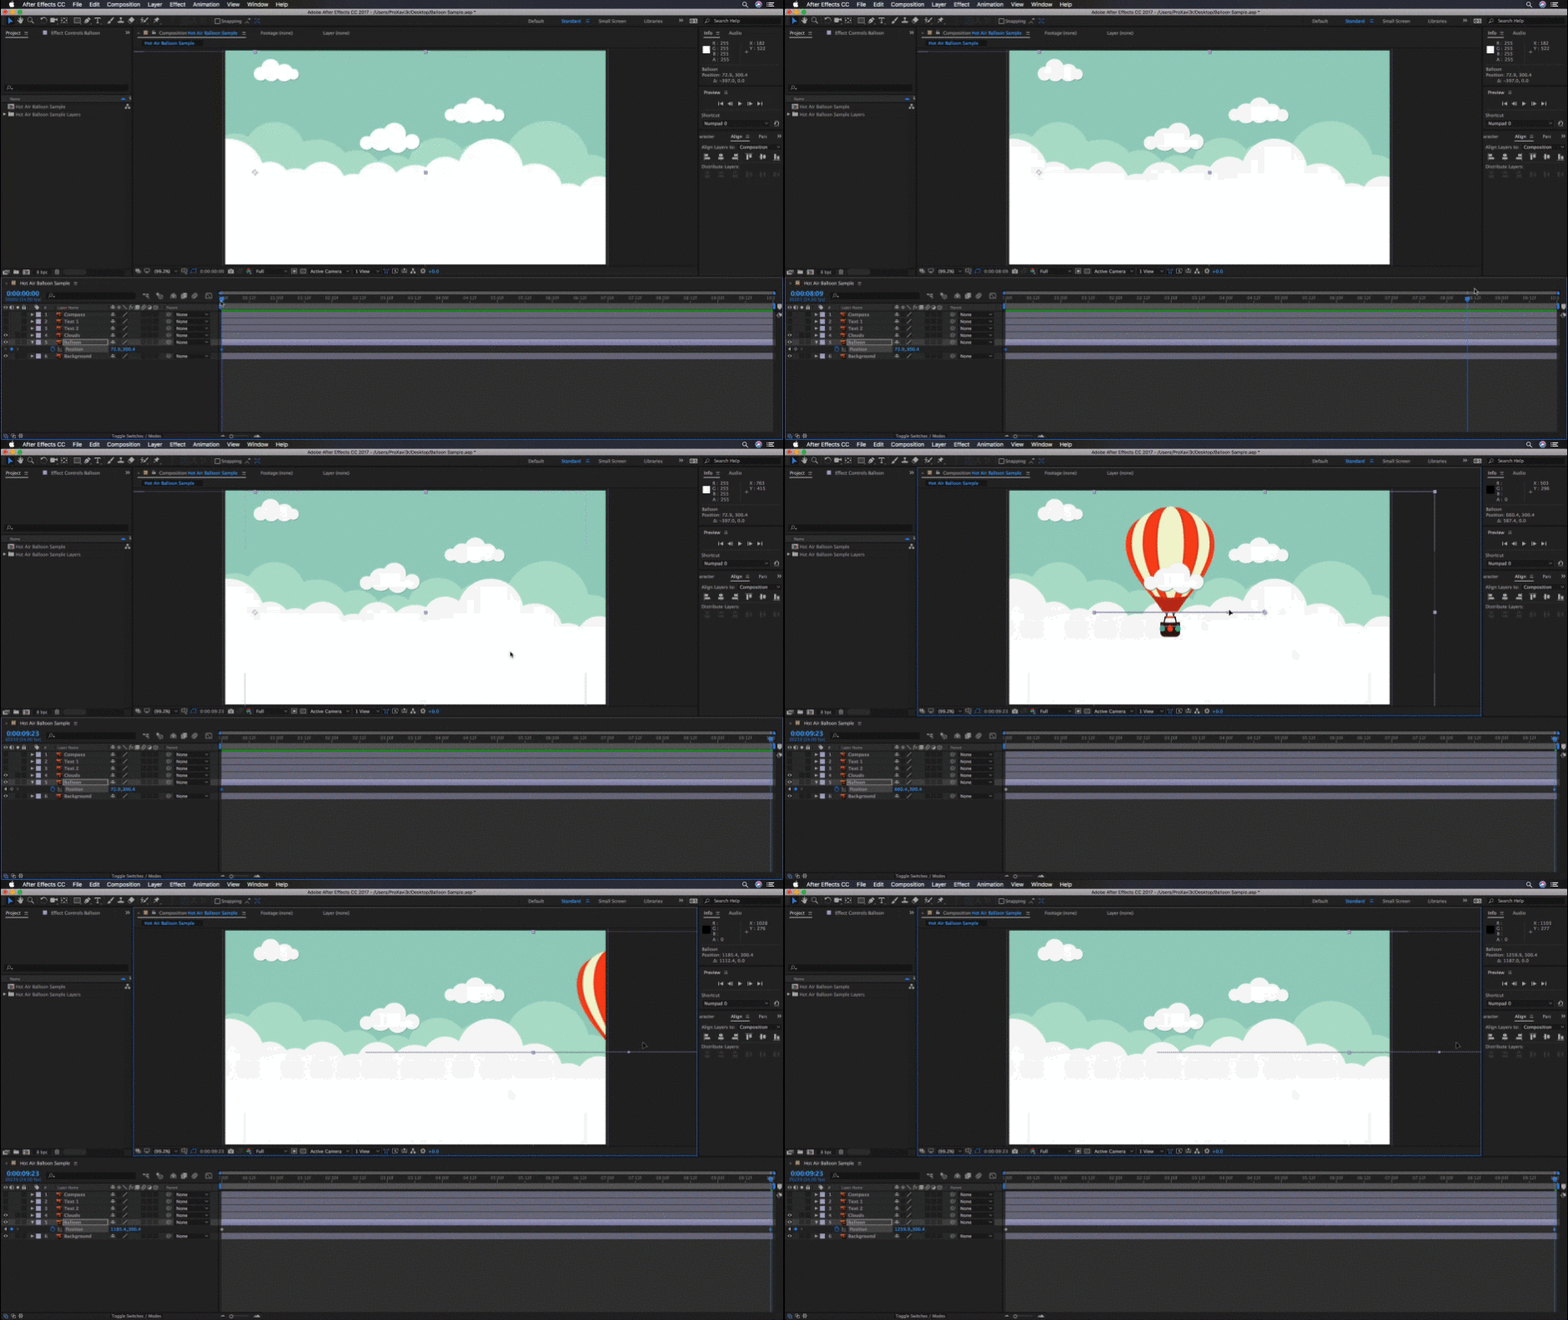
Okay, let’s get the clouds moving the in opposite direction. First we’ll set a keyframe clicking the stopwatch, this tells After Effects where we want the position of our clouds to start.
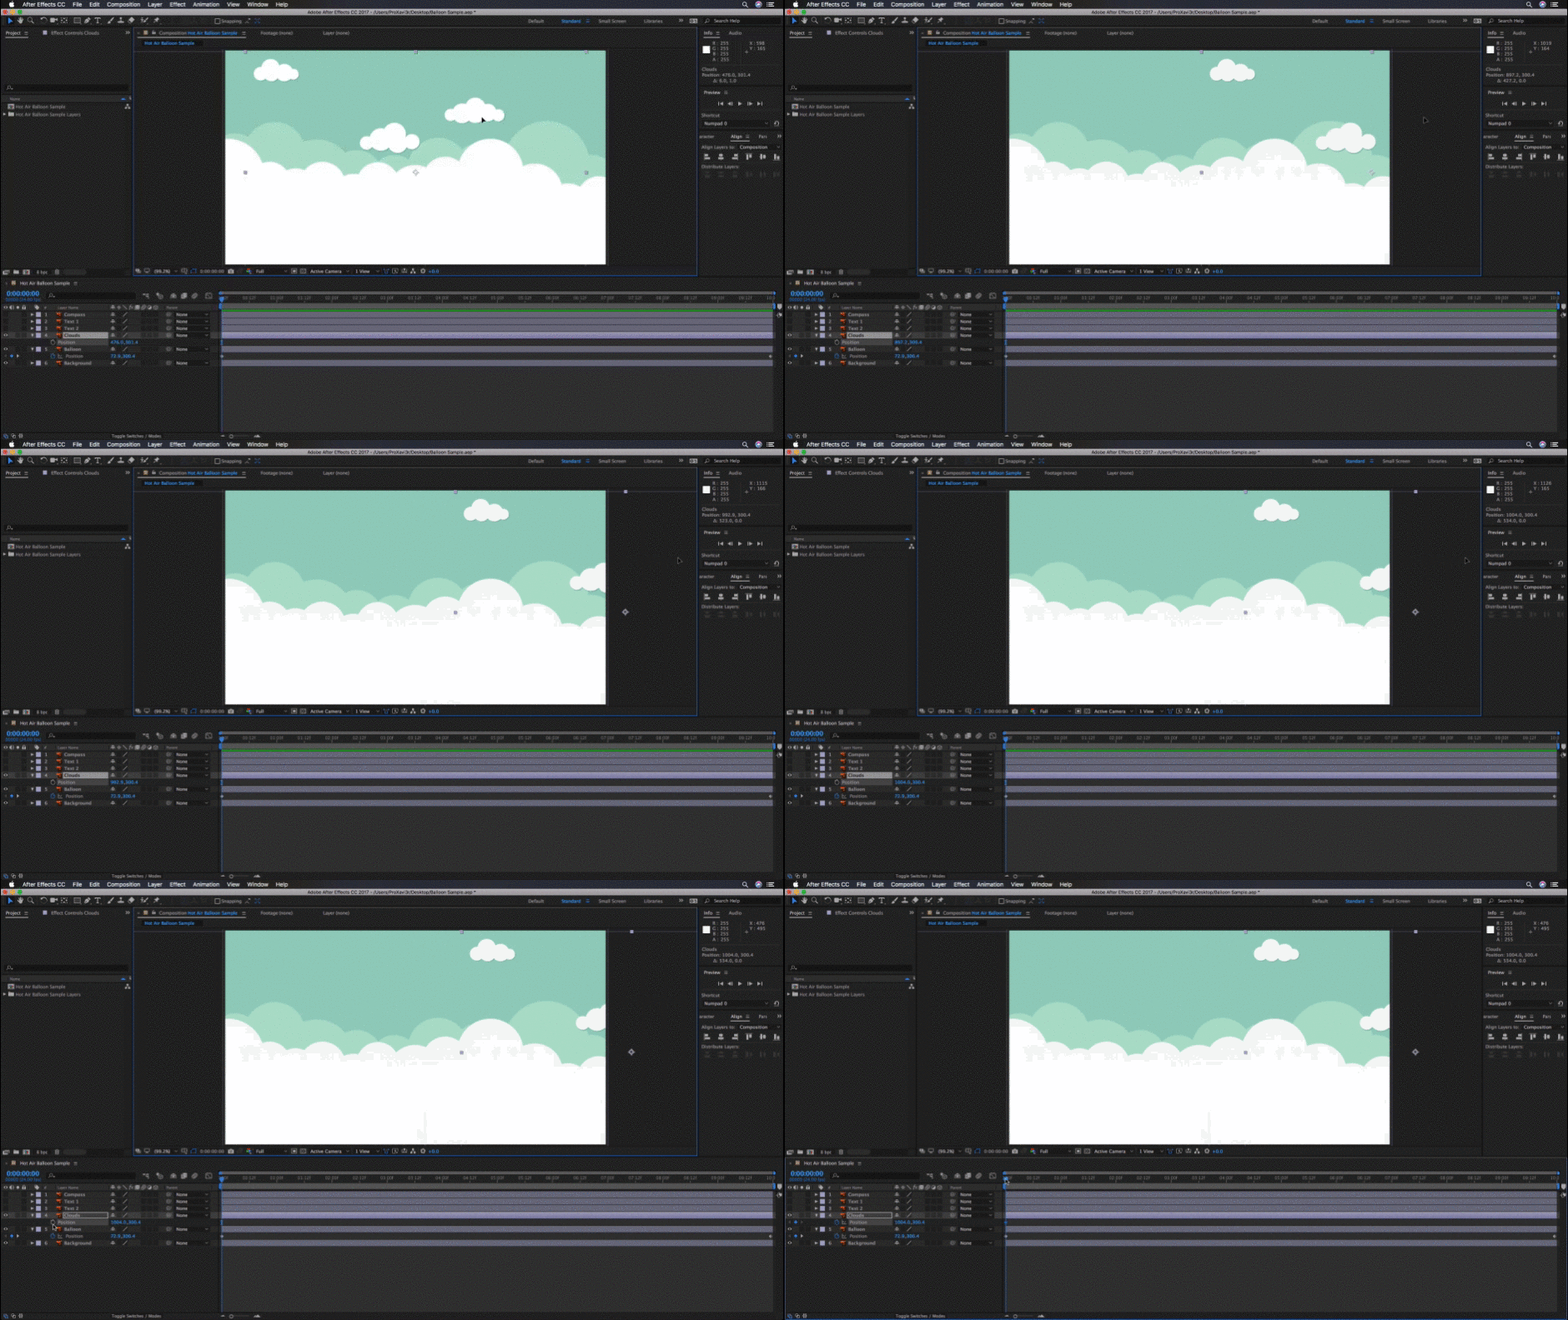
Now, we’ll move the time indicator to the end of the timeline ruler and then move our clouds slightly in the opposite direction that we moved the balloon.

Just like that we’ve created a simple parallaxing animation using just two keyframes for each element. Now, you can get more complex than this if you want, so let’s take a look at how to do that.
Animating Text with Keyframes
For this example we’re going to adjust the values for the position and opacity of our logo and two text layers that will appear over our balloon and clouds.
However, with this animation we need to tell After Effects where we want our elements to come from, then where we want it to stop for a duration of 3 secs, and finally where we want it to go to. With this said we’ll be using 4 keyframes instead of 2. Let’s get going!
*Note: Since I’m working with three elements that I want to all move together I’m going to select all three layers and hit the “P” key on the keyboard. This pulls up the position transform option. As long as I keep all layers selected keyframes I add will be added to all three. If you want to learn more about After Effects keyboard shortcuts check out this tutorial.
STEP 1: SET THE ENDING VALUE
First what I like to do is set the logo and text exactly where I want them to end up in the composition. Then I create my first keyframe by clicking the stopwatch. This may feel awkward, but animating in reverse is a great design-centric way of creating an animation.

STEP 2: SET THE STARTING VALUE
Next I tell After Effects where I want the elements to come from by moving my time indicator back 1 full second. Then I move the elements, you’ll notice again that when I move them AE creates a new set of keyframes.
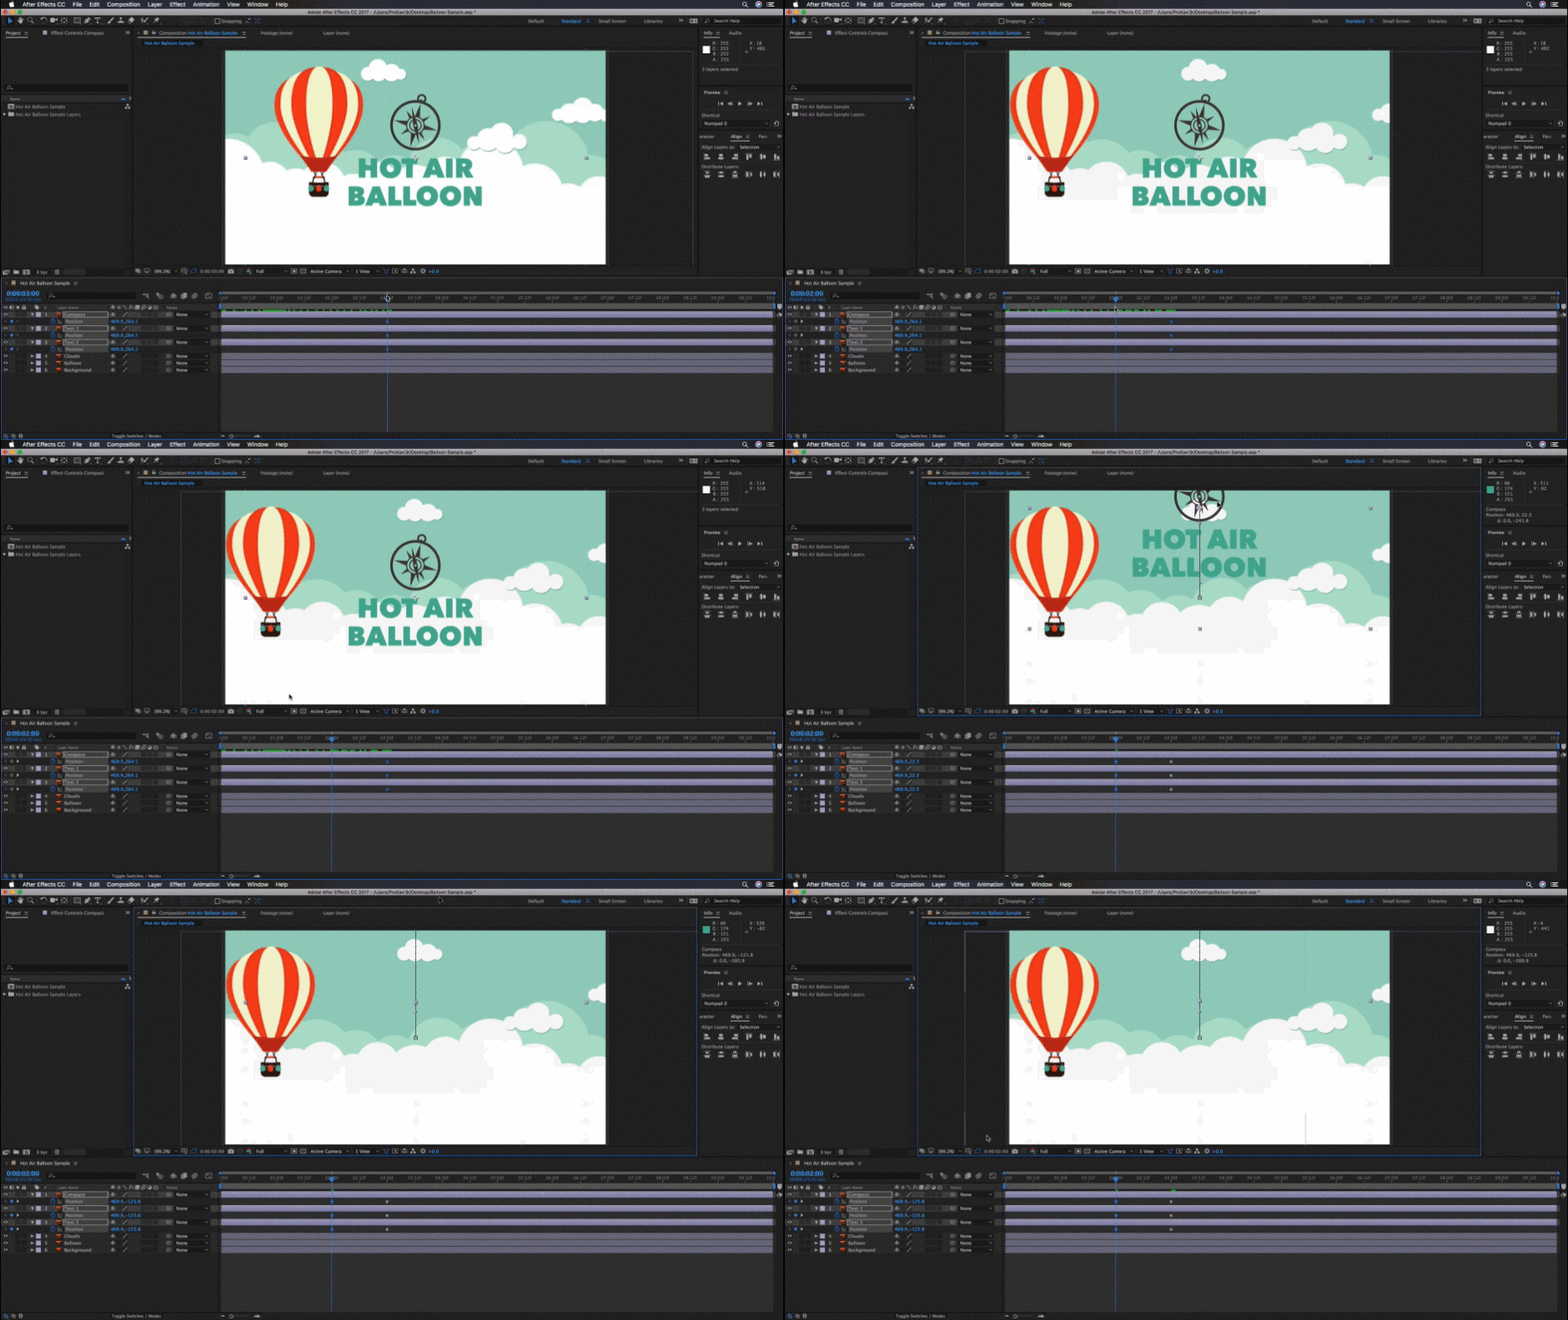
STEP 3: SET THE SECOND STATIC KEYFRAME
Now, I move the time indicator 3 seconds past the keyframe I created in step 1. Then without moving my elements I click the “add keyframe” icon to the left of the stopwatch. By doing this I’ve told After Effects that for 3 seconds I don’t want my elements to move.
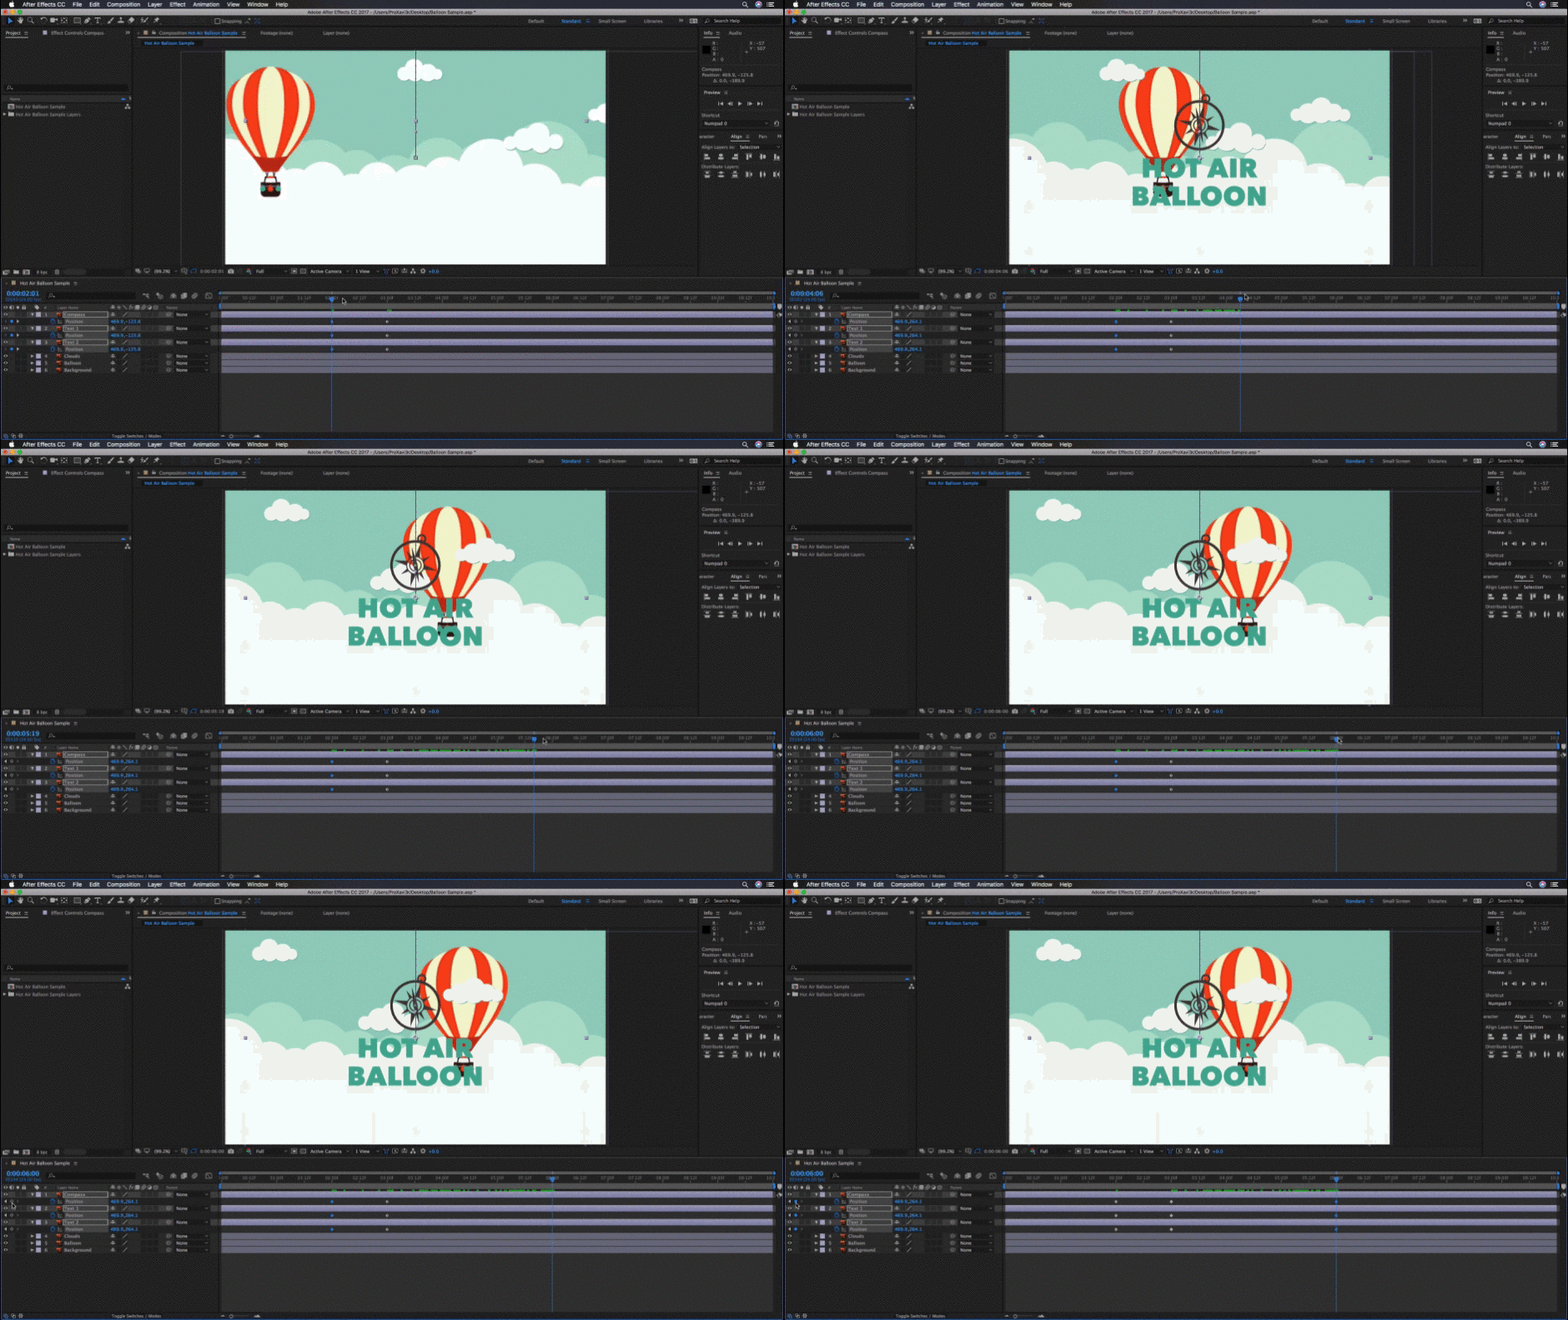
STEP 4: SET THE ANIMATE-OUT KEYFRAME
Finally, I move the time indicator ahead 1 second past the keyframe created in step 3. From here I can move the elements down and outside of the composition frame.
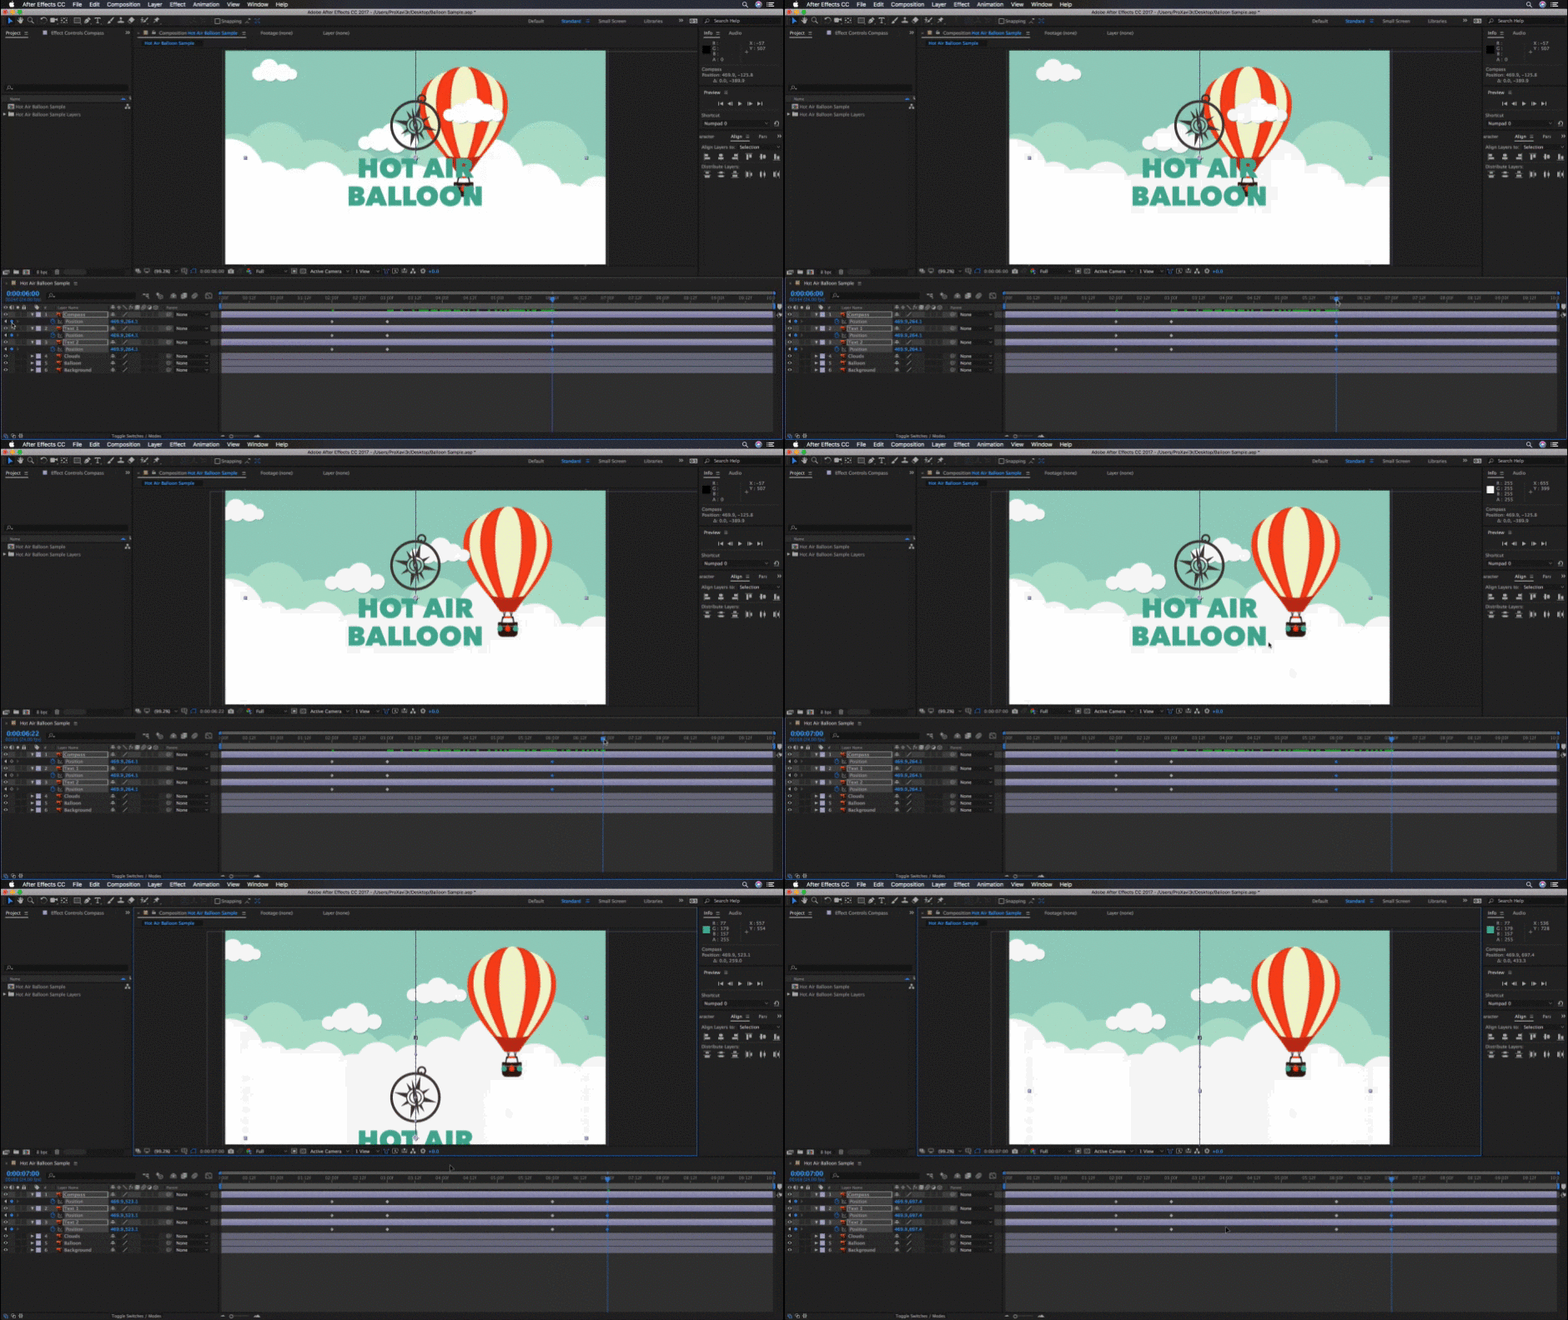
In just a few steps we've created a simple and easy animation that didn’t require a lot of work, plus we learned the fundamentals of how to set keyframes. Let’s take a look at the final result.

Is setting keyframes really that easy?
Yes, setting keyframes isn’t going to be the hardest thing you do in After Effects. Believe me, there are plenty of other confusing things to learn. But now that you know the basics, the best thing I can tell you is to get working and repeat the process over and over. The more you work with keyframes, the more comfortable you’ll be with working with them. You’ll even get to the point where setting keyframes becomes second nature.
If you want to learn about some advanced-level keyframe techniques go check out our intro to the graph editor tutorial. It's one of the most helpful tutorial's you'll ever see. Motion Mondays (our weekly newsletter) is also a great way to stay up-to-date on the latest Motion Design trends and sharpen your skills. Just signup by clicking that register button at the top of the page. Now go create!!
ENROLL NOW!
Acidbite ➔
50% off everything

ActionVFX ➔
30% off all plans and credit packs - starts 11/26

Adobe ➔
50% off all apps and plans through 11/29

aescripts ➔
25% off everything through 12/6
Affinity ➔
50% off all products

Battleaxe ➔
30% off from 11/29-12/7
Boom Library ➔
30% off Boom One, their 48,000+ file audio library
BorisFX ➔
25% off everything, 11/25-12/1

Cavalry ➔
33% off pro subscriptions (11/29 - 12/4)

FXFactory ➔
25% off with code BLACKFRIDAY until 12/3

Goodboyninja ➔
20% off everything

Happy Editing ➔
50% off with code BLACKFRIDAY

Huion ➔
Up to 50% off affordable, high-quality pen display tablets

Insydium ➔
50% off through 12/4
JangaFX ➔
30% off an indie annual license
Kitbash 3D ➔
$200 off Cargo Pro, their entire library
Knights of the Editing Table ➔
Up to 20% off Premiere Pro Extensions
Maxon ➔
25% off Maxon One, ZBrush, & Redshift - Annual Subscriptions (11/29 - 12/8)
Mode Designs ➔
Deals on premium keyboards and accessories
Motion Array ➔
10% off the Everything plan
Motion Hatch ➔
Perfect Your Pricing Toolkit - 50% off (11/29 - 12/2)

MotionVFX ➔
30% off Design/CineStudio, and PPro Resolve packs with code: BW30

Rocket Lasso ➔
50% off all plug-ins (11/29 - 12/2)

Rokoko ➔
45% off the indie creator bundle with code: RKK_SchoolOfMotion (revenue must be under $100K a year)

Shapefest ➔
80% off a Shapefest Pro annual subscription for life (11/29 - 12/2)

The Pixel Lab ➔
30% off everything
Toolfarm ➔
Various plugins and tools on sale

True Grit Texture ➔
50-70% off (starts Wednesday, runs for about a week)

Vincent Schwenk ➔
50% discount with code RENDERSALE

Wacom ➔
Up to $120 off new tablets + deals on refurbished items


