Separately, Photoshop and Procreate are powerful tools...but together they become a platform for portable, powerful design creation
Are you looking for a portable design solution? We've been working in Procreate for some time, and it has constantly proven to be a powerful platform for illustration and animation. With a seamless pipeline to Photoshop, we think this might be the killer app you need to take your MoGraph to go.
Today, I’m going to show you just how easy it is to start your process in Procreate, ways Procreate has made designing easier, and the benefits and ways it can sync with Adobe programs. To take full advantage, you’ll need an iPad with the Procreate app, an Apple Pencil, and Adobe Photoshop!
In this video, you’ll learn to:
- Utilize some of Procreate’s Benefits
- Sketch easily and block in color
- Bring photoshop brushes into the Procreate app
- Save your files as psd’s
- and add finishing touches in Photoshop
How to Use Procreate with Photoshop
{{lead-magnet}}
What exactly is Procreate?
Procreate is a portable design application. It has everything you need to sketch, paint, illustrate, and animate. Procreate is the complete art studio you can take anywhere, packed with unique features and intuitive creative tools.
And it’s super affordable at $9.99
For me, Procreate is a great place to begin my ideas. I can easily sketch using the intuitive interface, build up to a more polished design, and export to Photoshop if I want to apply any finishing touches.
Why Use Procreate as a Motion Designer?
Procreate is perfect for handling quick sketches, but it's robust enough to manage completed style frames. In their new update, the program can even handle light animation. For something that costs as much as a few cups of a coffee or a new skin in Fortnite, I'm able to do 50-60% of the work on my projects.
Nowadays, most of my work starts with a sketch in Procreate...and I'm not the only one. Here are a few examples of other professional artists using procreate to illustrate.
Art by Paulina Klime
Or this great animated jellyfish.
Animation by Alex Kunchevsky
What makes Procreate such a great program is how much it feels like drawing on paper. If you're not ready to splurge on a high-end tablet such as a Cintiq, an iPad and Procreate can accomplish almost everything you'd want to do.
Using the Apple Pencil is incredibly intuitive; it feels just like drawing, but more forgiving! I love that I can take my iPad anywhere: the couch, a coffee shop, a deep sea submersible. It’s super portable.
Now, that I’ve convinced you to give Apple more money, let’s actually get into the program and see how you can aid in your creative process.
Sketching and Illustrating in Procreate
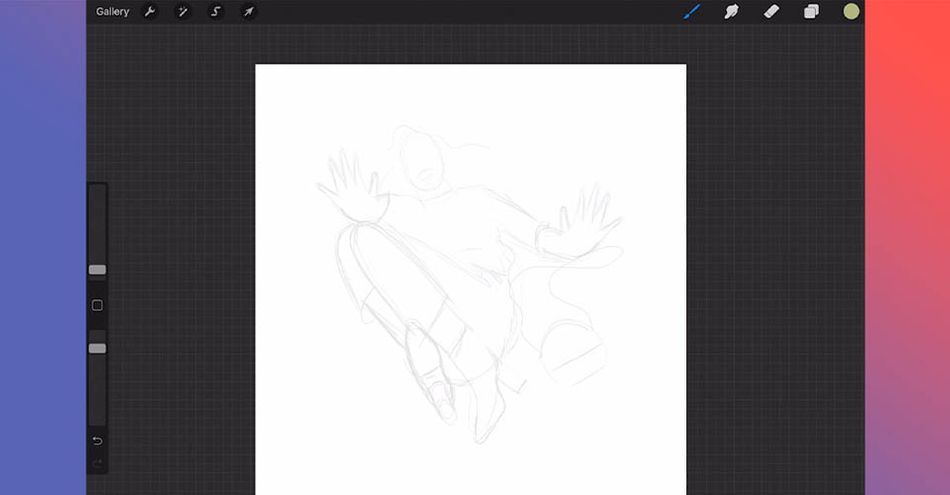
Let's get started so you can see how I use Procreate in my workflow. One of the first things I like to do is set up my brushes. Now, if you're importing brushes or creating your own (more on that later), you might notice that the pressure sensitivity feels off. You have to press REALLY hard to get anything.
Here's how to fix that:
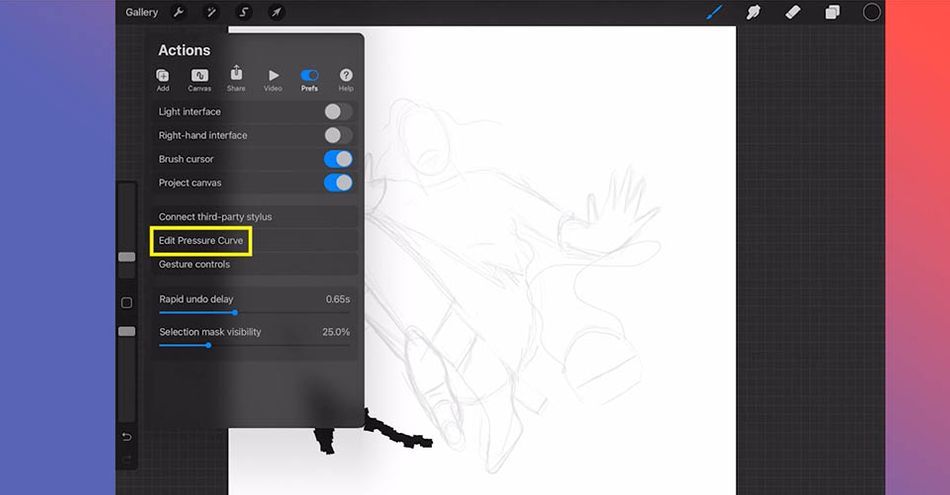
Click on the wrench icon, select preferences (pref) and click Edit Pressure Curve.
Adding Photoshop Brushes to Procreate
Procreate brushes are great, but adding .ABRs brings textures to a new level. If you've already made a pack of your personal favorites, it just makes sense to use them in both programs. This will also help when you're working with a team or preparing files for other clients, especially when you’re working with a team that’s primarily using Photoshop.
Here's how to upload your brushes in Procreate:

- Load the brush folder onto your iPad
- Open Procreate
- Click the Brush icon, then hit the + button
- Click Import, and upload brushes
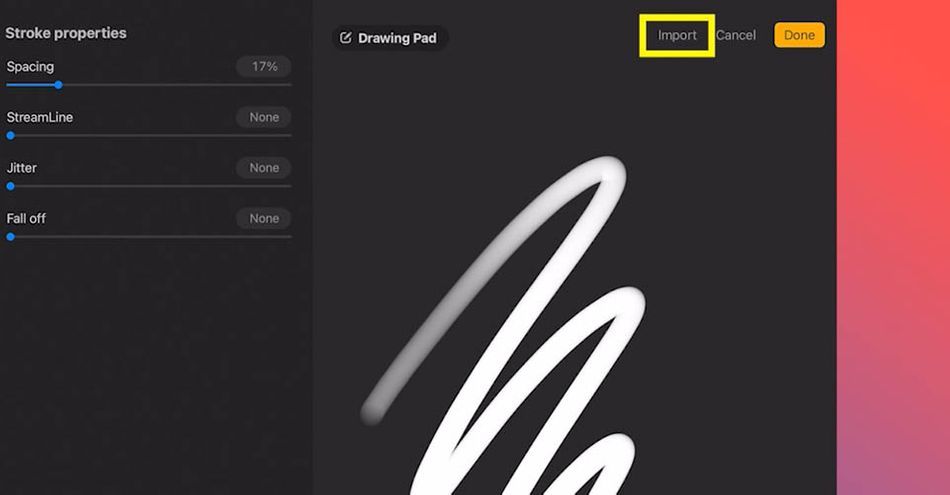
If that seems really easy...it's because it is. Just another great thing about this application. It wants to be easy for you.
Go from Sketch to Illustration in Procreate
Of course, Procreate is a drawing application, so how well can it handle going from a sketch to a functional illustration? Let me show you.
SKETCHING IN PROCREATE
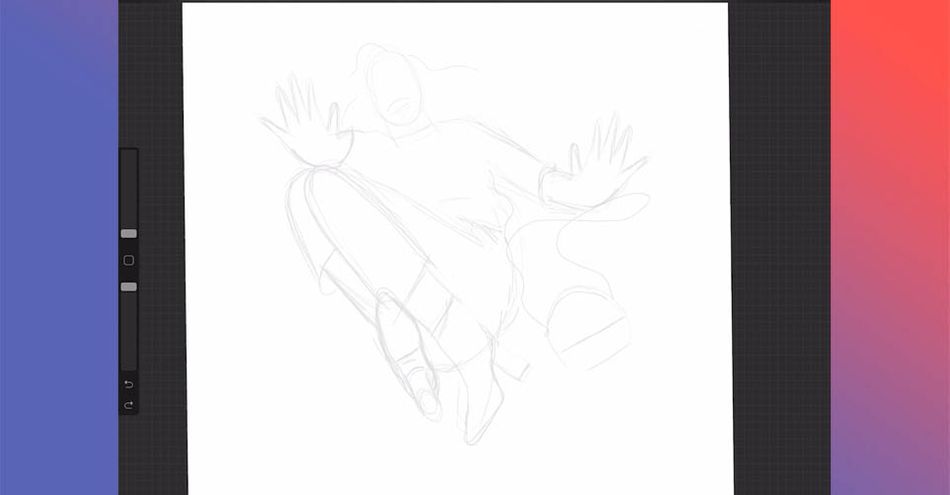
Now that I have my brushes prepped, I quickly sketch out the design until I'm happy with the overall shape.

During this part of the process, I'm less concerned about straight lines and jagged edges. Once I've found my shape, then I start redesigning with an eye for composition.
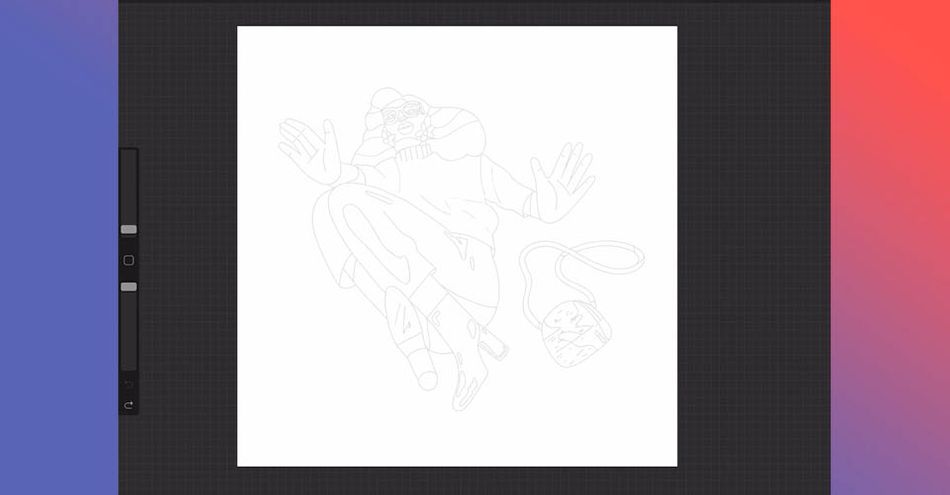
COLOR BLOCKING IN PROCREATE
Now that we're done refining our sketch, we want to do some color blocking. First, draw a circle.

Now drag a color from the Color Circle in the top right into the center of your circle, which will fill your shape. You can make another layer and convert that to a Clipping Mask so you can add texture and color to the circle in a non-destructive way.
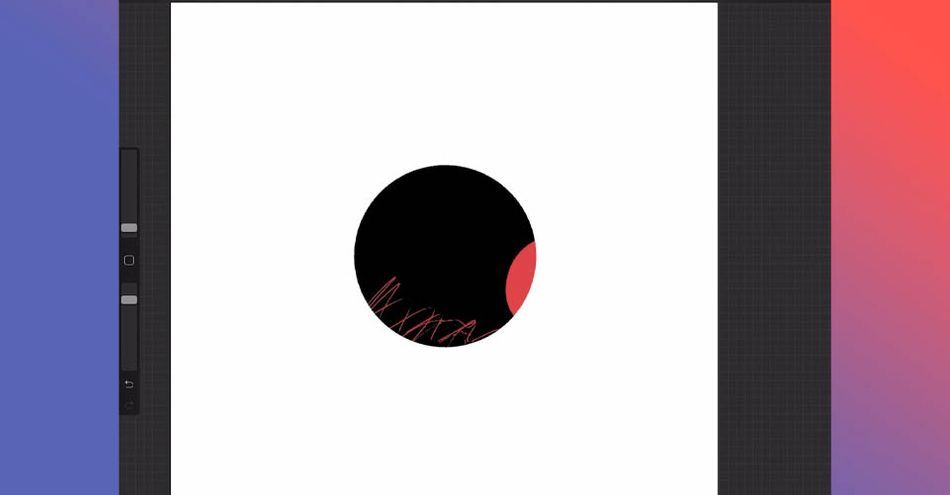
The other option is to click on your original layer and select Alpha Lock, which allows to you color onto the shape without going outside the border, though this will permanently change that layer.
COLORING SKETCHES IN PROCREATE
Before I start adding color, I want to make sure my sketch is detailed and refined. This part of the process can save future you time and stress, since all you'll need to worry about is coloring in the illustration. The more work you put into refining your sketch, the smoother things go in the next few steps.
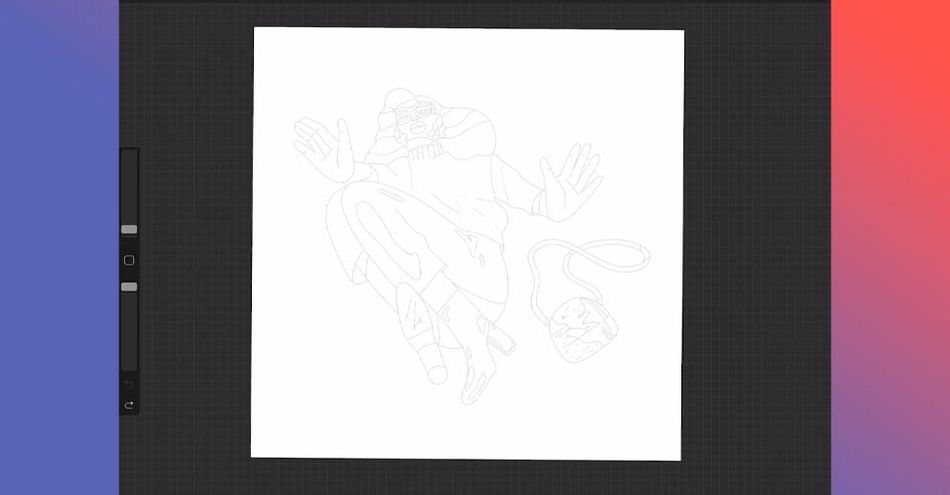
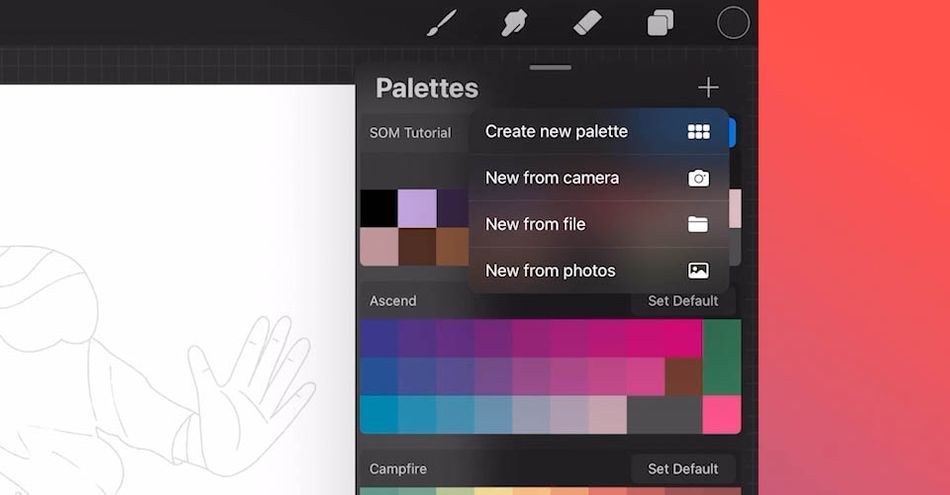
It's important to have your colors in mind before you start adding anything in. I prefer to have a color palette built ahead of time. In Procreate, there are a number of prebuilt palettes available. You can also add in new ones just as you did with brushes, or create a custom palette all your own.
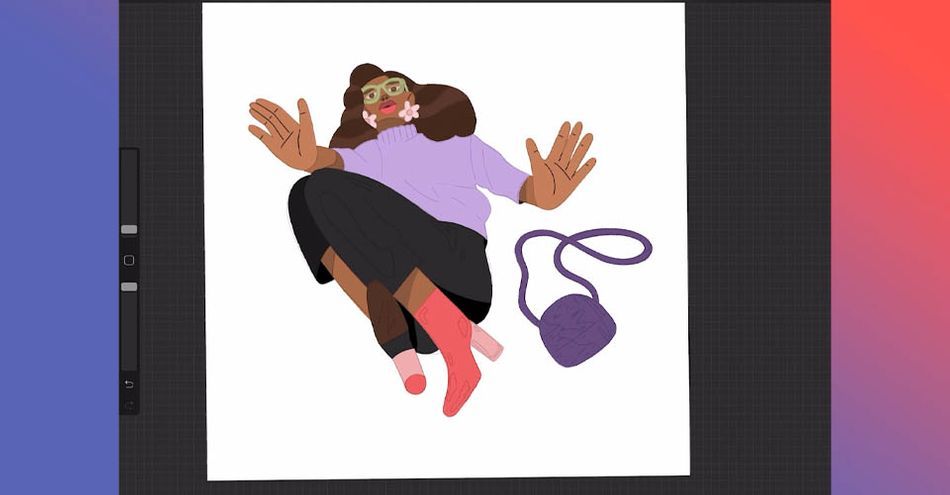
Make sure your sketch or outline is the top layer, otherwise you'll color over the lines and risk getting lost. By tracing your sketch and creating closed shapes, you can easily drag in colors from your palette (as we did with the circle above) and quickly fill in each area.
Moving Your Artwork from Procreate to Adobe
If Procreate is so great, why do you even need to export over to Photoshop? Well, even with all its advanced features, there are still a few tricks that Photoshop has over the mobile app. You also have to factor in your personal preferences for applying polish, and the overall goals of your project.
To transfer, simply go to your settings (the wrench), click on Share, and select your file type.
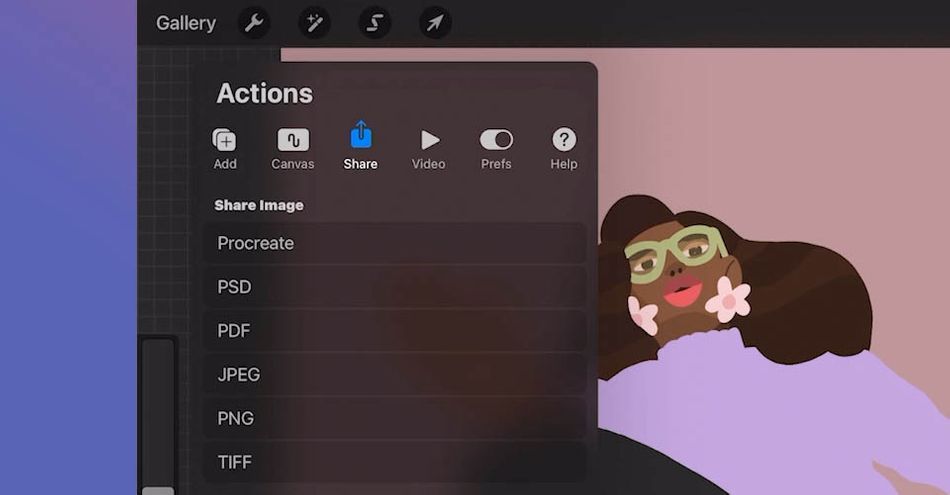
Then select where you would like to save or send this file.
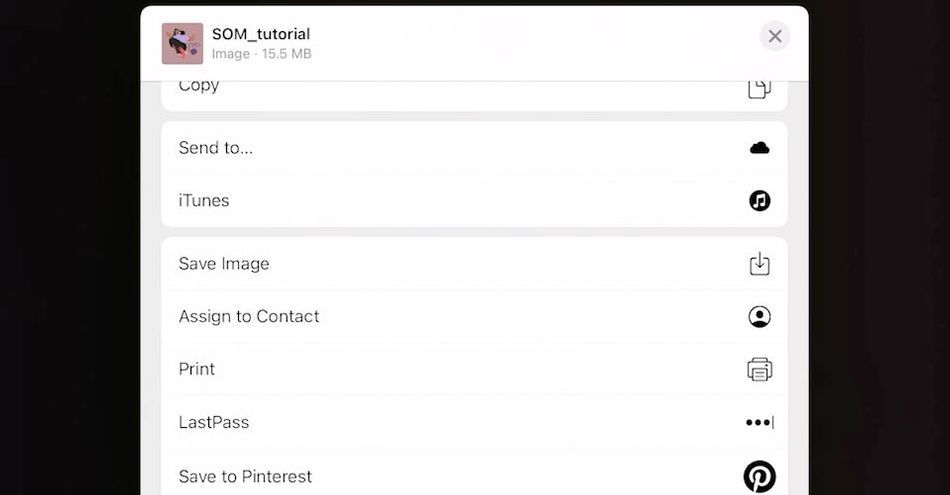
Now I can open the .PSD file in Photoshop and finish with textures and embellishments! If you want to see what I do, click on the video above.
Now you're a pro at creating!
That’s it! Procreate is a pretty simple yet powerful tool! I love that it’s inexpensive, easy to work with, and can scale so quickly for larger projects that may need the classic Adobe programs. If you grabbed a little inspiration and want to try it out, be sure to share your finished products with the hashtag #SOMawesomeProcreations!
If you want to unlock more advanced skills with Adobe’s core programs, check our Photoshop and Illustrator Unleashed! Almost every Motion Graphics project out there passes through these programs in one way or another.
This course makes learning Photoshop and Illustrator easy and fun. Starting on the very first day, you’ll create art based on real world jobs and get tons of experience working with the same tools that professional Motion Designers use everyday.
-----------------------------------------------------------------------------------------------------------------------------------
Tutorial Full Transcript Below 👇:
Marco Cheatham (00:00): Separately, Photoshop and Procreate are powerful tools, but together they become a platform for portable, powerful design creation. I'm going to show you how to seamlessly benefit from both in a smooth workflow.
Marco Cheatham (00:21): My name is Marco Cheatham. I'm a freelance art director and illustrator. I've been designing and illustrating for seven years. And one thing that's made being creative easier and increase. My productivity is using procreate to sketch design and illustrate frames. Today, I'm going to show you just how easy it is to start your process and procreate ways that's made designing easier and the benefits and ways it can sync with Adobe programs to take full advantage. You'll need an iPad with the procreate app and apple pencil and Adobe Photoshop. In this video, you'll learn to utilize some appropriates benefits sketch easily in block in color, bring Photoshop brushes into the procreate app. Save your files as PSDs and add finishing touches in Photoshop. Before we begin, make sure you download the project files in the link below so you can follow along
Marco Cheatham (01:11): Now we're inside procreate. So this is an illustration I did a little while ago. We're going to refine it and color, block it in, take it into Photoshop and put any final details on it in there. Let's get started. So I assume you guys are probably a little bit familiar with the program, so I won't go too far in depth with this, but essentially you have your brushes here. The brushes that have the little icons on it on the left are the brushes that come standard inside procreate and the brushes that are up farther that have the little like sketch or whatever you want to call it. Brush stroke. Those are the ones that have been installed or created by me. And they all have their own groups, have many brushes within them. When I get started on a project, I like to create a group and add the brushes in there that I'm working on, on the project.
Marco Cheatham (02:09): So with this one, I made a group, I sculled it SLM tutorial. And I added the brushes that I'm going to use on this project. So there's that? And here's the brush size right here. So you can control the size of your brush. Here is the past city. So that's good. All right. So I have this rough sketch here. You know, I like to try to start really loose. I like to break down my illustrations into progressions that way it's easier to digest and you know, it's less stressful. And I think that that's just a good way of doing things. You know, if you try to design everything at once, it just becomes a little bit more stressful in like convoluted. But as, as long as you like are breaking things down into the little sections, as much as you can, the easier it's going to be on you and your designs.
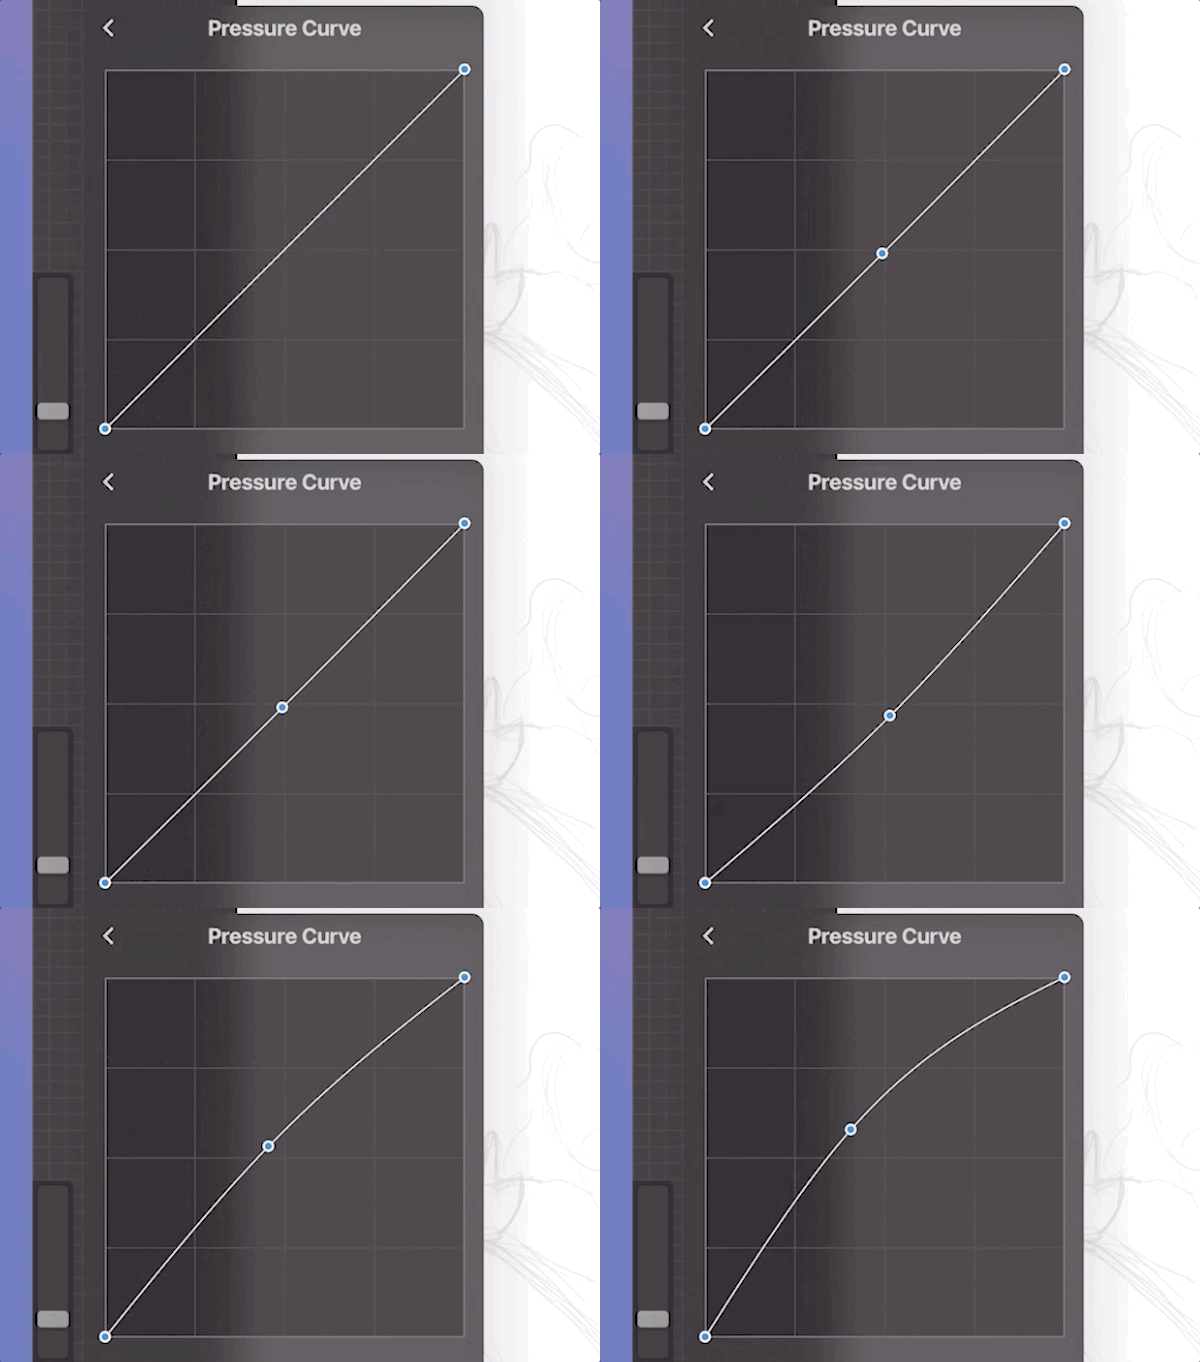
Marco Cheatham (02:57): Let's talk a little bit about the brush. So when you're first inside, procreate, by default with your brushes, your pressure sensitivity is probably going to be pretty low. So if I pick a brush, let's say that this one's pretty good. You're just going to have to press really hard to have your brush show up thicker, right? So if I'm pressing really light, it doesn't do anything. I have to press pretty hard to have that show up. So to fix that, you just go up to your settings, you go to preferences first, and then you want to go to edit pressure curve. And so you're going to have this curve. It's very linear and you want to add a point somewhere probably in the middle, and you're just gonna use that and make it a curve. I can show you just exaggerate this so you can see it.
Marco Cheatham (03:44): And so now I press lightly and it's really thick from the, from a jump. So that's a good way to not mess up your screen. So make sure that's that set properly. There's plenty of reasons why you might want to use Photoshop and procreate. For whatever reason, you might just be comfortable with Photoshop more or a different reason. There's some reasons why you might want to use procreate as well, as well as Photoshop. So like in my case, all the times I work with motion studios or people that are doing animation. And a lot of times they're using Photoshop to do the animation. If they're doing sale or whatever. And if I'm not using Photoshop brushes, they may not have access to, or be able to get close enough to the style that the brushes that I'm using have. So one way to do that is to import Photoshop brushes directly into procreate, which is really easy to do.
Marco Cheatham (04:39): And I'm going to show you how to do it right now. So if you go up to your brush tool right here, you can see that I already have a lot of brushes installed here, and there's a couple of ways to do this, but one of the easiest ways to do it is hit this plus sign right here, and you want to go to import and I've already saved this in here. So I just saved it into my procreate folder inside my iPad. So all I have to do is click on this and it imports automatically. And you can see that right there and you can see that it's a whole group of brushes. So I could use those instantly.
Marco Cheatham (05:23): Now I want to get more into refining this sketch. And when I'm just working with a rough sketch, I want to be really free with my lines. So I don't want to have any restrictions with them so I can, you know, really get in there and trying to find these shapes and stuff like that. But once I get like the sketches done and I start to refine things, I want to think less about keeping my lines straight and more about the composition and making sure everything looks good. So one thing that aids with that is smoothing. So the smoothing allows you. I think they have it. They have a similar thing in Photoshop. What it does is just allows you to smooth out your lines pretty much so you don't have to. So if you see now, you know, when I'm drawing my lines or, you know, it can get in there and get really rough. But if you navigate to your brush, you click on it and you see the streamline. You just need to pull that up. I usually keep it around 34, 35, but just so you can really see what it does, I'll show you that. So you say done, and now you can see that it really helps you keep those smooth lines.
Marco Cheatham (06:35): Cool. Another thing, when you want to move stuff around, a lot of times people want to NAB, you can't see this, but navigate within the box, but when something's really small and you try to do that, it's really hard. So the easy fix it, that, which is what you should be doing is just have your cursor outside of the box and move it around that way. And then you don't have a problem. It could be as small as you want it. So that was something that I struggle with a while. So hopefully that helps alleviate any problems with that. So, all right, well, let's get started with, actually we turn the smoothing down a little bit. So 35 let's get into actually refining this. So I'm going to go there this and start refining the sketch.
Marco Cheatham (07:38): So now that we're done and refining our sketch, what we want to start doing is doing some color blocking. Let's just make a circle. You know, you press your finger on the screen to create a perfect circle, go up to the color circle and just drag. So that's going to fill in your shape. And if you want to do any masking inside of that, what you're going to do is create a new layer. You're going to click on that and go to the clipping mask. And one that's going to do is allow you to draw HDInsight your layer like? So, and you can just draw on there, right? So that's like the non deconstructive way. If you're just illustrating, you don't need to retain your layers or anything like that. There's another way that you could do it. That is also really cool. I'm going to show you how to do that as well.
Marco Cheatham (08:29): So go to your main layer and you're going to want to click that and you want to hit alpha block, and that's going to allow you to draw with inside your layer. But again, doing this is not going to retain your layers. So anything you do to it is going to be destructive. So if you need layers, do the other method. Okay. So that's pretty much it. So let's get into the actual color blocking. Okay. So now that we have everything refined and everything, it's tying to start the color when I'm refining, I like to add as much detail as possible. That way when I get to the next phase, I have less to worry about. And it's all about that regression of like, try to make sure that your future self, the person that's doing the next step has less to worry about. So, you know, if I added, if I start adding the details, now I don't have to worry about that.
Marco Cheatham (09:24): Then I can focus more on the color and making sure all that stuff's good. So that's what we're going to do now with procreate, if you hit on the colors, the colors are up in this little color circle here. There's a few different ways you can view things, but you also can create color palettes. So in the color palettes, which is to the far right, you have your color palettes here. So these are some that came with the app. So you can delete those or keep those or whatever, and then you can make your own. So this one I've made for this particular illustration. And so how you make a color palette is just hit this plus sign right here and you go to create new palette. So there's a few of these in here where you can upload a photo. You know, you could save a photo to a file and then upload it or take a photo with your camera.
Marco Cheatham (10:11): And then procreate uses, uh, those colors that are from those photos. And it makes a color palette. It's pretty cool. You know, it's like instantly. So yeah, try that out. If you find that useful for this, we're going to create a new palette and all you have to do is find the colors that you want. So like, I'll say, I'll just pick this one and you just tap inside of there and it adds the color. And you could just keep doing that until you come up with the color palettes you want and yeah. Name and everything like that. So that's as easy as it, you know, pretty much get. So let's delete this and let's work with the color palette that I have here. So I'm going to start coloring in, make sure you're on a new layer as I'm coloring. I like to keep my sketch on the top layer because it's really hard to see what's going on.
Marco Cheatham (11:03): Once you start filling in the colors, if the layer is on underneath and you kind of, you want to make sure that you're keeping everything separated, you know, I'm separating this out that way. If you do, if you work with an animation, the animator can separate out your files easily. Um, just makes it a lot easier than doing like a flat illustration. So just make sure you're separating out your layers as you go. And of course, if you don't need to do that, then don't do it. It's not, not necessary. It'll just take up time, but just be aware of the process and what you're doing it for. So, you know, if they're doing like sale or something like that, you probably don't need it as much. Cause they're just gonna redraw your stuff, but never hurts to be safe. So, and I'm going to keep ongoing finishing this up.
Music (12:11): [uptempo music]
Marco Cheatham (12:50): Okay. So now that we have everything blocked in it's time to take this into Photoshop and finish up all the textures that I want to add to it. So it's really easy to do. All you need to do is go to your settings, go to share, and you'll have like a list of different exports. You know, you can export it, a gift. You can export it, animation, PNGs, differently, things like that. But I want to export the PSD. So I'll click that and I'll navigate to where I want to save it. Say file. I've made a folder for this and I'm going to save it in there. And now it's ready to be open in Photoshop.
Marco Cheatham (13:36): So now we are in Photoshop and as you can see, all of our layers are here and named. Yes, it's pretty cool. It's pretty seamless. The only thing you might need to worry about is any colors that you use, just make sure they don't sync like procreate doesn't sync the colors or the brushes. So just make sure you know, what colors you're using and make sure you have the brushes that you're using. Um, so you can use them inside of Photoshop. So now that everything is all here, I'm going to start adding all of my finishing textures in Photoshop here.
Music (14:22): [uptempo music]
Marco Cheatham (14:43): That's it, procreate is a pretty simple, yet powerful tool. I love that it's inexpensive, easy to work with. It can scale. So for large projects that may need that classic Adobe program. If you grab the little inspiration and want to try it out, be sure to share your finished products with the hashtag S O M awesome procreation. If you want to unlock more advanced skills with Adobe core programs, check out Photoshop and illustrator unleashed, almost every motion graphics project out there passes through these programs in one way or another. This course makes learning Photoshop and illustrator easy and fun. Starting on the very first day. You'll create art based on real world jobs and get tons of experience working with the same tools that professional motion designers use every day. Hit that subscribe. If you want more tips like this one and make sure you click that bell icon. So you'll be notified of any future videos. Thanks for watching
Music (15:37): [outro music].
ENROLL NOW!
Acidbite ➔
50% off everything

ActionVFX ➔
30% off all plans and credit packs - starts 11/26

Adobe ➔
50% off all apps and plans through 11/29

aescripts ➔
25% off everything through 12/6
Affinity ➔
50% off all products

Battleaxe ➔
30% off from 11/29-12/7
Boom Library ➔
30% off Boom One, their 48,000+ file audio library
BorisFX ➔
25% off everything, 11/25-12/1

Cavalry ➔
33% off pro subscriptions (11/29 - 12/4)

FXFactory ➔
25% off with code BLACKFRIDAY until 12/3

Goodboyninja ➔
20% off everything

Happy Editing ➔
50% off with code BLACKFRIDAY

Huion ➔
Up to 50% off affordable, high-quality pen display tablets

Insydium ➔
50% off through 12/4
JangaFX ➔
30% off an indie annual license
Kitbash 3D ➔
$200 off Cargo Pro, their entire library
Knights of the Editing Table ➔
Up to 20% off Premiere Pro Extensions
Maxon ➔
25% off Maxon One, ZBrush, & Redshift - Annual Subscriptions (11/29 - 12/8)
Mode Designs ➔
Deals on premium keyboards and accessories
Motion Array ➔
10% off the Everything plan
Motion Hatch ➔
Perfect Your Pricing Toolkit - 50% off (11/29 - 12/2)

MotionVFX ➔
30% off Design/CineStudio, and PPro Resolve packs with code: BW30

Rocket Lasso ➔
50% off all plug-ins (11/29 - 12/2)

Rokoko ➔
45% off the indie creator bundle with code: RKK_SchoolOfMotion (revenue must be under $100K a year)

Shapefest ➔
80% off a Shapefest Pro annual subscription for life (11/29 - 12/2)

The Pixel Lab ➔
30% off everything
Toolfarm ➔
Various plugins and tools on sale

True Grit Texture ➔
50-70% off (starts Wednesday, runs for about a week)

Vincent Schwenk ➔
50% discount with code RENDERSALE

Wacom ➔
Up to $120 off new tablets + deals on refurbished items


