All-Access Pass
Unlimited access to 50+ courses, unlimited critique, live events, and 24/7 community. Join School of Motion All-Access today.

Learn how to use the Track Mattes feature in After Effects to leverage still images, video clips, graphics, text and generated shapes to create variable transparencies in other layers within your motion graphic design.
Ever played around with Track Mattes in Adobe After Effects, only to find yourself lost and confused? Unaware Track Mattes even existed?
Track mattes represent an essential element of any motion designer's or visual effects artist's workflow.
No matter your level of knowledge or expertise, or lack there of, with this how-to guide you'll learn when and where to apply track mattes within your MoGraph project in After Effects — and how to choose among the four available track matte options.

What are Track Mattes in After Effects?
To put it simply, a track matte is a still image, video clip, graphic, piece of text or shape used to create a variable transparency in another layer within your motion graphic design. The track matte carves out a portion of a layer, exposing the layer beneath it.
Ideal for reveals, keying out, and generating shapes, what makes a track matte unique is that it remains independent of all other layers in your project.
With a track matte, you create a top layer that provides the alpha, or luminance, and a bottom later that contains the imagery that will be shown, allowing you to produce animations with far fewer steps and greater ease than using a traditional mask.

So, where in After Effects do I find the track matte options?
Finding the Track Matte Tool in After Effects
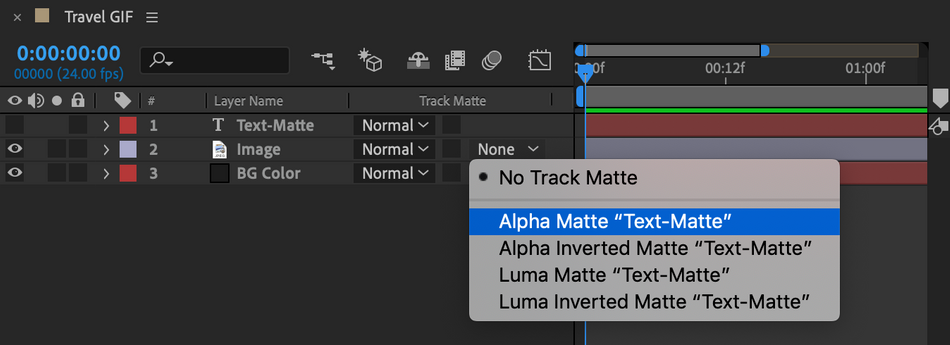
If the Track Mattes option is missing from your After Effects timeline panel, right-click the section above your layers, navigate to the Columns menu, and enable Modes, as seen below.

Blending Modes, Preserve Underlying Transparency, and Track Mattes (TrkMat) should now all be available.
Applying a Track Matte
To apply a track matte, you'll need two layers:
- The top layer will provide the alpha, or luminance, information
- The bottom layer below will act as a fill
You will only see the bottom layer content; the top layer will provide new borders for the bottom layer, as seen below.

So when should I use a track matte, instead of a mask?
When to Use Track Mattes in After Effects
Unless you like tedious work, use a track matte whenever you want to use a text (or other) layer as a controlled 'window' into an image (remember the "When In Rome" graphic above?).
With masking, you'd need a mask for each and every character in the text. Imagine animating a whole paragraph, and needing to mask every character of every word!
Instead, use the text layer's alpha channel as a track matte — and you can animate the text in its entirety. Plus, you can add effects to the text layer, or even change the font, while keeping your animation in tact.

So what about those four track matte options you referenced?
Understanding All Four Track Matte Options in After Effects
The four track matte options in After Effects are:
- Alpha Matte
- Alpha Inverted Matte
- Luma Matte
- Luma Inverted Matte

To determine which track matte to use, you'll need to know the difference between alpha and luma modes.
THE ALPHA TRACK MATTES IN AFTER EFFECTS
When you choose the Alpha Matte option, you're asking After Effects to use the alpha channel of the layer above as a mask for the layer below — and it will use any pixel above 0% opacity as the mask.
When you choose the Alpha Inverted Matte option, you're asking After Effects to use the negative space surrounding the alpha channel in the layer above — and the mask will treat any pixel at 0% as if it were at 100% opacity.

THE LUMA TRACK MATTES IN AFTER EFFECTS
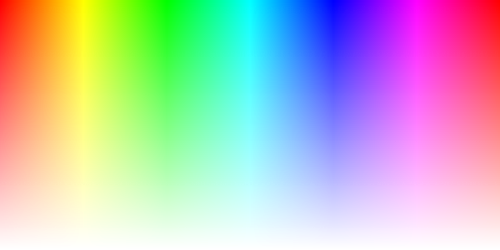
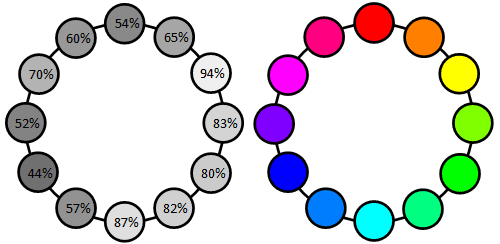
Choosing the Luma Matte option asks After Effects to use the brightness, or luminance, of the top layer as a mask for the bottom layer.
Playing around with this mode can yield some interesting effects that cannot be achieved with alpha matting, especially when compositing layers.
Choosing the Luma Inverted Matte option asks After Effects to do the opposite, using the top layer's low-luminance areas as a matte.

ADDITIONAL BACKGROUND ON ALPHA V. LUMA: WHEN TO USE EACH
ALPHA CHANNELS
With any MoGraph software, the alpha channel dictates how opaque, or transparent, the pixels in your motion graphic will be.
Alpha channels are usually used when a video or image is inserted above another video/image.

LUMA CHANNELS
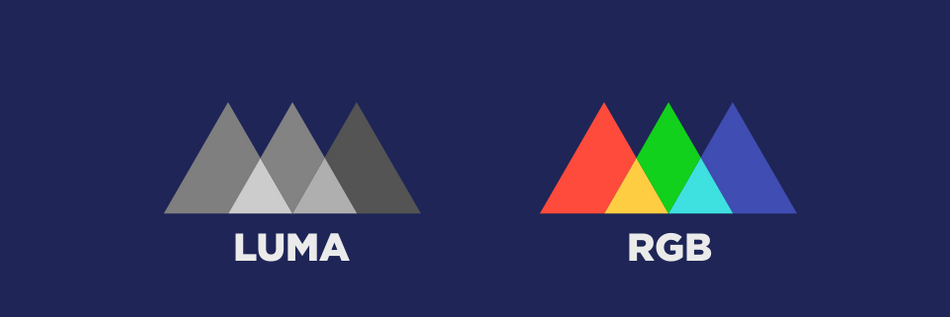
Color for video is divided into three color channels: red, green, and blue (RGB), with each color assigned a range of values from 0 to 255. The higher the value, the brighter the color.
If you want to increase brightness, you can raise the luminance value of each channel or a single channel. For example, if you have a square and strip away the red and green channels, setting them to 0, but you maintain the luminance value of the blue channel at 255, your square will remain at max brightness.
When using a luma matte, lowering your max value will make your matte less opaque.

Want to Fast Track Your After Effects Expertise?
No problem. Follow either or both of these paths:
- After Effects Kickstart. In this course taught by Nol Honig, founder of The Drawing Room, regular Motionographer contributor and award-winning professor at Parsons School of Design, you'll learn how to use After Effects through real-world projects and feedback from our staff and a network of motion design students.
- 30 Days of After Effects. Through this free series of After Effects tutorials, you'll learn the skills and knowledge necessary to become a motion design master.
Take Your Skills Further with VFX for Motion
Want to go deeper? Check out VFX for Motion, available with School of Motion All-Access.
ENROLL NOW!
Acidbite ➔
50% off everything

ActionVFX ➔
30% off all plans and credit packs - starts 11/26

Adobe ➔
50% off all apps and plans through 11/29

aescripts ➔
25% off everything through 12/6
Affinity ➔
50% off all products

Battleaxe ➔
30% off from 11/29-12/7
Boom Library ➔
30% off Boom One, their 48,000+ file audio library
BorisFX ➔
25% off everything, 11/25-12/1

Cavalry ➔
33% off pro subscriptions (11/29 - 12/4)

FXFactory ➔
25% off with code BLACKFRIDAY until 12/3

Goodboyninja ➔
20% off everything

Happy Editing ➔
50% off with code BLACKFRIDAY

Huion ➔
Up to 50% off affordable, high-quality pen display tablets

Insydium ➔
50% off through 12/4
JangaFX ➔
30% off an indie annual license
Kitbash 3D ➔
$200 off Cargo Pro, their entire library
Knights of the Editing Table ➔
Up to 20% off Premiere Pro Extensions
Maxon ➔
25% off Maxon One, ZBrush, & Redshift - Annual Subscriptions (11/29 - 12/8)
Mode Designs ➔
Deals on premium keyboards and accessories
Motion Array ➔
10% off the Everything plan
Motion Hatch ➔
Perfect Your Pricing Toolkit - 50% off (11/29 - 12/2)

MotionVFX ➔
30% off Design/CineStudio, and PPro Resolve packs with code: BW30

Rocket Lasso ➔
50% off all plug-ins (11/29 - 12/2)

Rokoko ➔
45% off the indie creator bundle with code: RKK_SchoolOfMotion (revenue must be under $100K a year)

Shapefest ➔
80% off a Shapefest Pro annual subscription for life (11/29 - 12/2)

The Pixel Lab ➔
30% off everything
Toolfarm ➔
Various plugins and tools on sale

True Grit Texture ➔
50-70% off (starts Wednesday, runs for about a week)

Vincent Schwenk ➔
50% discount with code RENDERSALE

Wacom ➔
Up to $120 off new tablets + deals on refurbished items


All-Access Pass

Unlimited access to 50+ courses, unlimited critique, live events, and 24/7 community. Join School of Motion All-Access today.
