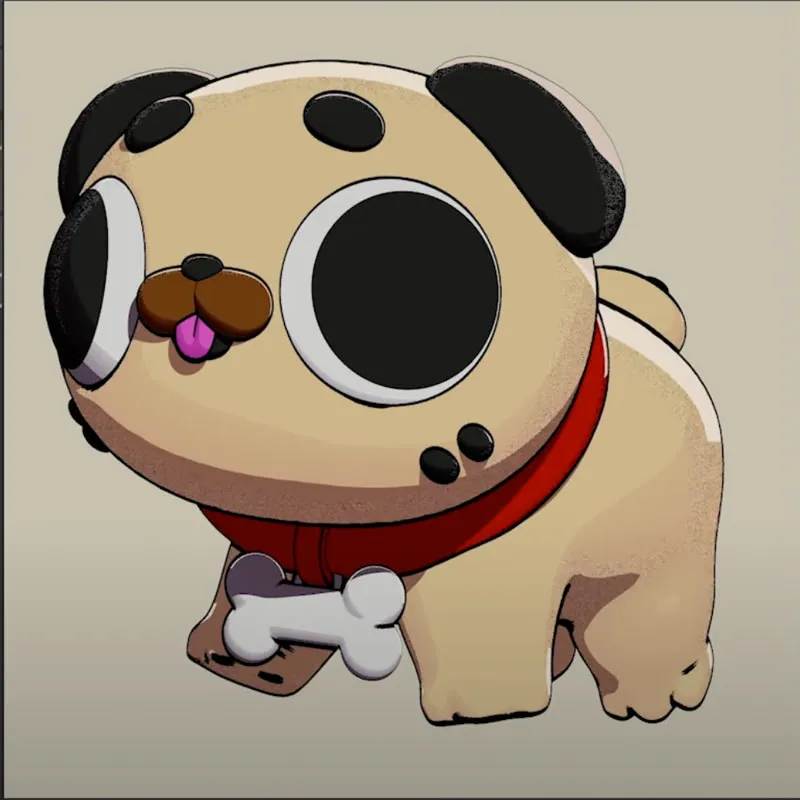
Maxon just released a new version of Cinema 4D (v. 2024.4), which includes big updates to Redshift. A longtime request, Toon Shading has finally made its debut in Redshift version 3.6!
In this tutorial, EJ will cover all the key features of the new Toon system in and provide a deep dive into the Toon Shading system. You'll also learn how to enhance the effect and create stylized cartoon looks in Cinema 4D!
Whether you're just starting out or you're a seasoned pro, you're going to learn some cool stuff about creating eye-catching cartoony designs in Cinema 4D using the Redshift Toon Shader.
Don’t forget to grab the project files so you can follow along RIGHT HERE!
ENROLL NOW!
Acidbite ➔
50% off everything

ActionVFX ➔
30% off all plans and credit packs - starts 11/26

Adobe ➔
50% off all apps and plans through 11/29

aescripts ➔
25% off everything through 12/6
Affinity ➔
50% off all products

Battleaxe ➔
30% off from 11/29-12/7
Boom Library ➔
30% off Boom One, their 48,000+ file audio library
BorisFX ➔
25% off everything, 11/25-12/1

Cavalry ➔
33% off pro subscriptions (11/29 - 12/4)

FXFactory ➔
25% off with code BLACKFRIDAY until 12/3

Goodboyninja ➔
20% off everything

Happy Editing ➔
50% off with code BLACKFRIDAY

Huion ➔
Up to 50% off affordable, high-quality pen display tablets

Insydium ➔
50% off through 12/4
JangaFX ➔
30% off an indie annual license
Kitbash 3D ➔
$200 off Cargo Pro, their entire library
Knights of the Editing Table ➔
Up to 20% off Premiere Pro Extensions
Maxon ➔
25% off Maxon One, ZBrush, & Redshift - Annual Subscriptions (11/29 - 12/8)
Mode Designs ➔
Deals on premium keyboards and accessories
Motion Array ➔
10% off the Everything plan
Motion Hatch ➔
Perfect Your Pricing Toolkit - 50% off (11/29 - 12/2)

MotionVFX ➔
30% off Design/CineStudio, and PPro Resolve packs with code: BW30

Rocket Lasso ➔
50% off all plug-ins (11/29 - 12/2)

Rokoko ➔
45% off the indie creator bundle with code: RKK_SchoolOfMotion (revenue must be under $100K a year)

Shapefest ➔
80% off a Shapefest Pro annual subscription for life (11/29 - 12/2)

The Pixel Lab ➔
30% off everything
Toolfarm ➔
Various plugins and tools on sale

True Grit Texture ➔
50-70% off (starts Wednesday, runs for about a week)

Vincent Schwenk ➔
50% discount with code RENDERSALE

Wacom ➔
Up to $120 off new tablets + deals on refurbished items


Download Cinema 4D Files and Follow Along
Toon Material Basics
Let's begin by breaking down what makes up a Redshift Toon Material. You have your Toon Material node that controls the quantized toon shading through a couple of Ramp Nodes. To adjust the toon shading, you can modify the Ramp Gradient Knots and control the color by adjusting the Toon Material Color Chip. The default light source comes from the camera view, so be sure to add additional lights to the scene for further control over how the toon shading affects your models.
🚀 Actionable Tip: The best types of lights to use alongside toon shading are Point Lights or Infinite Lights! Remember, the Infinite Light is a directional light, so control it by rotating it. Also, note that the lights are underpowered, so be sure to increase the Intensity!

Make It Pop with a Rim
Anime shading often features appealing rim lighting, which you can add to your toon material by increasing the Rim intensity. You can also plug a Ramp into the Tonemap input of the Toon Material node to quantize the rim shading.
🚀 Actionable Tip: To control where the rim effect occurs on your model, insert a Point light into the Light list field in the Toon Material node. This allows the light to control where the Rim effect is applied to your model.
Toon Outlines
No cartoon effect is complete without a cartoon outline! In Redshift, toon outlines are called Contours. The contour node has two options that allow you to add Internal and External contours. Internal contours apply outlines to creases and folds on your geometry, and External contours apply outlines to the edges of your model.
🚀 Actionable Tip: You can gain more control over the internal outlines by adjusting the Angle and Depth options. Angle determines the Phong Angle threshold at which the outlines appear, and Depth controls where outlines appear based on displacement depths.
Stylized Toon Looks
Now that you know all about the basics of Toon Shading, you can learn how to enhance the effects and make them more stylized. To do so, you can plug a Maxon Noise into the Thickness Modifier of the Contour node to add varying stroke thickness along your model, and even achieve dotted line effects by plugging in a Tile Shader node instead. You can also break up the uniformity of your toon shading by plugging in a Maxon Noise node into the Toon Material's Bump input.
🚀 Actionable Tip: Don’t just paint with the color from the paint tube, so be sure to stylize your toon shading by using these tips!
Halftone It Down
Lastly, Redshift Toon has a brand-new Tonemap Pattern Node that allows you to achieve fun halftone effects. While limited with the type of options you can use, it's an easy way to get cool, stylized effects.
🚀 Actionable Tip: Use a Color Layer node to layer multiple Tonemap Pattern nodes on top of one another to achieve split RGB effects!
These new features in Redshift 3.6 open up a whole new world of possibilities for creating stylized, cartoon-like effects in Cinema 4D. By understanding the basics of Toon Shading and how to enhance these effects, you can create unique and eye-catching designs. Don't forget to experiment with different settings and layers to achieve the desired result. Happy shading!
Want to step up your Cinema 4D game? Check out our popular C4D courses.


