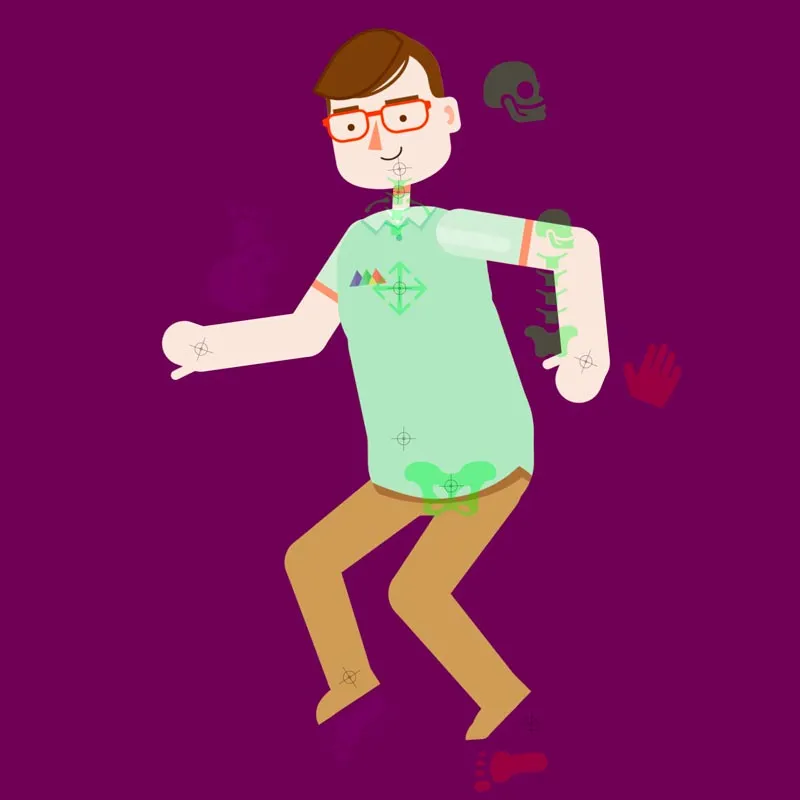
Learn how to rig a basic character with Duik Bassel in After Effects with this video tutorial from Morgan Williams.
Creating a great animated character is no easy task. Professional animated characters require a mix of fantastic design, an understanding of movement, thoughtful rigging, clever keyframing, and the right tools.
One of the most important character rigging tools for After Effects recently received an overhaul that can't be ignored. Duik Bassel is the long-awaited update to Duik, a free character animation tool for After Effects. Duik Bassel is full of helpful features that make it easier than ever to animate characters in After Effects.
To help get you up to speed with Duik Bassel I've created a video tutorial all about using this incredible tool. It was a really fun video to put together and I hope you learn something new along the way.
DUIK Bassel Intro Tutorial for After Effects
In the following tutorial we'll learn how to get up and running with Duik Bassel in After Effects. The tutorial covers all of the Duik Bassel basics you need to know and we even give you a free character project file so you can follow along. Remember, Duik Bassel is not included with After Effects. You will need to download and install Duik from the Rainbox website. Did I mention that the tool is completely free?!
Download the rig practice files below
ENROLL NOW!
Acidbite ➔
50% off everything
ActionVFX ➔
30% off all plans and credit packs - starts 11/26
Adobe ➔
50% off all apps and plans through 11/29
aescripts ➔
25% off everything through 12/6
Affinity ➔
50% off all products
Battleaxe ➔
30% off from 11/29-12/7
Boom Library ➔
30% off Boom One, their 48,000+ file audio library
BorisFX ➔
25% off everything, 11/25-12/1
Cavalry ➔
33% off pro subscriptions (11/29 - 12/4)
FXFactory ➔
25% off with code BLACKFRIDAY until 12/3
Goodboyninja ➔
20% off everything
Happy Editing ➔
50% off with code BLACKFRIDAY
Huion ➔
Up to 50% off affordable, high-quality pen display tablets
Insydium ➔
50% off through 12/4
JangaFX ➔
30% off an indie annual license
Kitbash 3D ➔
$200 off Cargo Pro, their entire library
Knights of the Editing Table ➔
Up to 20% off Premiere Pro Extensions
Maxon ➔
25% off Maxon One, ZBrush, & Redshift - Annual Subscriptions (11/29 - 12/8)
Mode Designs ➔
Deals on premium keyboards and accessories
Motion Array ➔
10% off the Everything plan
Motion Hatch ➔
Perfect Your Pricing Toolkit - 50% off (11/29 - 12/2)
MotionVFX ➔
30% off Design/CineStudio, and PPro Resolve packs with code: BW30
Rocket Lasso ➔
50% off all plug-ins (11/29 - 12/2)
Rokoko ➔
45% off the indie creator bundle with code: RKK_SchoolOfMotion (revenue must be under $100K a year)
Shapefest ➔
80% off a Shapefest Pro annual subscription for life (11/29 - 12/2)
The Pixel Lab ➔
30% off everything
Toolfarm ➔
Various plugins and tools on sale
True Grit Texture ➔
50-70% off (starts Wednesday, runs for about a week)
Vincent Schwenk ➔
50% discount with code RENDERSALE
Wacom ➔
Up to $120 off new tablets + deals on refurbished items
Practice Rigging with this FREE After Effects Project
Want to create professional character animation?
This was definitely just an introduction to the wide world of character animation in After Effects. If you're interested in creating animated characters like a pro I highly recommend that you check out Character Animation Bootcamp. The course is a deep-dive into the world of character animation. You'll learn the ins-and-outs of posing, timing, storytelling and more.
If you want to focus more on rigging, check out Rigging Academy. The self-paced course is a great way to master character rigging in After Effects using Duik Bassel.
Tutorial Full Transcript Below 👇:
Music (00:02): [intro music]
Morgan Williams (00:11): Hey everyone, Morgan here from school of motion. And in this tutorial, we're going to take a quick look at doing a very basic character rig using the new DUIK facile. Now do it's been around for quite some time, but this latest update to DUIK Bassel is really amazing and provides a whole new set of tools and a whole new procedure for rigging characters in after effects. And it's really a game changer in a lot of ways. Now we're going to do a very basic straightforward rig here, but if you're interested in learning a lot more about rigging characters and after-effects please check out my rigging academy course at school of motion. So let's take a look at the character we have to rig here. This is Mo Gran, whose name sounds suspiciously like mine and who looks suspiciously like me designed by the amazing Alex Pope.
Morgan Williams (01:04): Now let's take a look at the way this character is broken up. The arms are broken up into upper arm for arm and hand pieces and note that the upper and lower arm and the hand, they all overlap each other with perfectly circular overlaps. And those overlaps are indicated by these marker guides here that we're going to be using as part of the rigging process in rigging academy, we talk a lot about prepping artwork, but the basic idea is especially for limbs knees, ankles wrists, you want to try to have perfectly circular overlaps between the artwork whenever possible. This is going to give you the greatest range of motion. It's also a good idea to create these markers, to mark, where those circular overlaps are. And you'll see why. Once we get a little farther in here, the legs are divided with a thigh, a calf, a foot, which is basically the ankle, the heel up to the ball of the foot, and then a total layer sticking off the end there.
Morgan Williams (02:19): And once again, all of these have the circular overlaps that we talked about. Now, in this case, we're using a jointed torso. In other words, we've separated the torso into separate pieces. Now the truth is that I don't generally recommend this. It's often not really very possible, especially if you have complicated or textured artwork, and it's usually better to use the puppet tool when you're rigging torsos. But for this simple lesson, we've created a very simple torso with separate pieces. We have a pelvis piece, a belly peace in the middle there, and then a chest piece sitting on top and then a separate little neck piece right there. We also of course have the head, which in this case is just one layer. If we were going to be creating facial rigging, we'd actually want separate layers for all the different facial features and then pre composed together.
Morgan Williams (03:21): But for this simple rig, we just have a single head layer as before we've created circular overlaps for these torso pieces. And this is one of the reasons why I generally recommend using the puppet tool because it's often very difficult to get these kinds of circular overlaps depending on the design and artwork style of your character. Now, in order to rig up this character, we first need to create a structure for the character. Now doing basil structures are one of the most exciting innovations of this new update structures are basically bones and skeletons that we can rig and then attach our character artwork to this emulates. The way 3d rigging works, where you create a skeleton and then connect the mesh of the character to that skeleton in doing basil, these bones or skeletons are called structures in the DUIK basil window. The structures tab is this very first icon here, this little sort of jointed arm icon.
Morgan Williams (04:26): And you can see that you have a lot of different options here and do it allows you to create any kind of custom skeleton. You want four animals or monsters with three legs and foreheads or whatever crazy thing you want. But since so often, you're just going to be creating a basic hominoid character. There's a great single button click here that will just create a full skeleton for a hominoid with one click. So for our character here, that's all we need. So let's just go ahead and click hominoid. You'll need to be a little patient as do basil creates the structure.
Morgan Williams (05:07): Okay. And you can see our simple skeletal structure here with two arms, two legs, and then a spinal column right through the middle. And what we want to do now is organize our layers a little bit so we can align our structure to our artwork. Now there's a lot of different ways you can organize your layers. If you want, you can leave all of your structure elements all together on top of your artwork elements. But I like to actually bring the structures closer to their artwork, layers in the layer, stack and color code them to match the color coding I have for each body part. Like I always say it doesn't really matter how you organize your compositions and your projects. It just matters that you do organize your projects and your compositions. So to start with, we have the structure elements that will be the left leg. So I'm going to click and drag those down above the left leg artwork pieces, and we'll color code those green to match those. Then we have the structure elements for the right leg. I'm going to click and drag those down, put those on top and color code them. You get the idea. I'll fast forward through the rest here, just to save some time.
Morgan Williams (06:27): The next thing we need to do is align our structure, layers to our artwork layers. And this is where those markers come in. So let's start with the right arm. I'm going to solo just the structures for the left arm and the markers for the left arm. Now, remember, again, these are showing us where our circular overlaps are for our arm pieces, and we want our structure layers to pivot right in the middle of those circular overlaps. So we have nice clean joints with a wide range of motion. So I'm going to zoom in a little bit here. And what we're going to do is hold down the command key to toggle snapping on, and we're going to snap the anchor points of these structures to these markers.
Morgan Williams (07:23): You'll note that there's an additional layer at the end of the arm structure called the arm tip. And we want to position this at the end of the hand. So we're going to turn the hand layer on just temporarily. And we're just going to click and drag that arm tip to the end of the hand now, just to keep things nice and neat. I'm going to zero out the X value in the position here, just to keep that aligned along with the other structure elements. Now we can go ahead and turn off those markers and let's take a look at aligning a leg because it's a little different than doing the arm. It's a little more complicated. So let's look at the right leg here. And once again, we're going to solo the structures. Whoops, I mix these up here. Let's just change those really quick.
Morgan Williams (08:17): I accidentally put the right leg pieces with the left leg. So let me just swap those out, turn those green. And we'll put these up on top and turn these yellow. Okay. So once again, we're going to solo those right leg structure elements, and we're going to solo the markers. Now you'll note that there's an extra piece here. We have the, the tip of the toe, which is like the arm tip we looked at with the arm, but there's this additional piece, which is the heel. And those have be put in a very specific place in order to create the foot roll controls that are auto rigging is going to give us. But initially we can just snap our pieces to our markers, just like we did with the arm.
Morgan Williams (09:31): Now that we've snapped these main pieces to our markers, we're ready to snap the tip toe and the heel elements. We're going to start with the tiptoe. And what we need to do is turn on the toe artwork. And we want to zoom in here and align this anchor point to the very tip of the toes, right there at the very tip. Then we want to align the heel to the back part of the heel artwork, right where it meets the ground. And once we get this rigged up, you'll see why it's so important to place that tiptoe in that heel in those exact places. Okay. So now we've seen how to align arms and legs to save a little time. I'm going to fast forward through the other arm and the other leg, and we'll just get those lined up real fast.
Morgan Williams (11:11): Okay. Now we're ready to align the spinal column to our artwork. Now let's take a look at the spine structure really quick and make sure we understand how it relates to the artwork. The hip structure will control our pelvis. The first spine structure will control our belly artwork piece spine too will control our chest. The neck of course will control the neck, the head, the head, and then the spine tip is just going to be placed at the top of the head. Just like we place the arm tip at the end of the hands. So let's solo those structure elements, and let's turn on the marker guides. Now we have a marker guide for the joint between the pelvis and the belly and between the belly and the chest and the neck and the head, but we don't have anywhere to snap. The hips to the hips are going to again, control the pelvis, but they're also going to control the thighs of the legs.
Morgan Williams (12:13): So what we want to do is we want to place those hips in between the thighs. So we're also going to turn on our two thigh structures here. Now, in order to keep as much of our spine, relatively straight as possible, I'm going to grab the hips and I'm going to first snap it to the pelvis marker here, just to get it centered. And then I'm going to hold down the shift key and I'm gonna click and drag it down. And then I'm going to position it in between the two thigh pieces. Now I don't have to be like super scientific or measure this out or anything. I can just eyeball it, but by snapping it to the pelvis, marker, first I at least know it's going to be in line with the pelvis and the chest and the belly. Then the rest of these spine pieces can just be snapped into place. So grab spine one here and snap that to the center of the pelvis. Marker. We'll grab spine two and we'll snap that to the chest marker. Then the neck, of course we will snap to the neck, marker the head structure to the head marker. And then we can just turn the head artwork on and just make sure that the spine tip is positioned here at the top of the head. And it honestly doesn't really matter very much exactly where that sits just as long as it's near the top of the head.
Morgan Williams (13:42): Okay, we can turn off those markers and unsold our layers now, and now we've got all of our structures aligned to our character. Now, before we actually rig the structure, we can go ahead and parent our artwork to the structure. So when the structure elements move, they move the correct pieces of artwork. So let's start down at the bottom here, and this will all be fairly straightforward. The left arm, we parent to the left arm structure, the left forearm to the left forearm structure. And the hand to the hand structure. Now a really quick note about right and left here. You'll notice in this case, this is not the character's left. It's the left side for the viewer. Now that's honestly, because I flipped this character right before importing it. I usually name a characters limbs, right? And left based on the characters, right. And the characters left, but I've worked with plenty of character designers and animators who prefer the opposite.
Morgan Williams (14:43): Ultimately, it doesn't really matter because you're very likely to flip a character within a scene anyway, and you'll notice that duel Bassel doesn't deal with writer left at all. They just have thigh and thigh two arm and arm two and so on. So it doesn't really matter. You can really name things how you want to just as long as it's organized and it makes some sense, okay, let's parent up the left leg. So we're going to take the left toes to the left toe structure, the foot to the foot, the calf, to the calf and the thigh to the thigh. Pretty obvious. We'll do the same with the right side here. We'll fast forward a little bit. Now when we get to the torso here, we want to be a little careful because the layering of the artwork is by necessity, a little different than the layering of the structures.
Morgan Williams (15:34): So the neck to the next structure, the head to the head structure, remember that the belly is going to go to the first spine structure. The pelvis goes to the hips structure and the chest to spine too. And then we can speed through the right arm here. All right, now our artwork is connected to our structure. Now we're ready to rig the structure. Now, one of the most powerful aspects of doing basle is the auto rigging system. The auto rig is capable of looking at almost any combination of structures, whether they're heavily customized, or very basic and creating an effective rig for those structures with a single click. Now, as we talk about in rigging academy, there are some drawbacks to certain aspects of auto rigging. And so we look at both auto and manual rigging so that you can really, truly customize a rig to exactly what your needs are.
Morgan Williams (16:33): But in most cases, the auto rig works great. And it's particularly good for very fast turnaround projects where you need to get a rig put together very, very quickly. Now the auto rigging is so powerful that we can actually rig this entire figure with a single click. So the first thing we need to do is select all of our structure layers, and we can do that with this handy select structures button here. So now all of our structures are selected. And then we just need to go to the links and constraints tab in [inaudible] basil and simply click right at the top auto rig. And that's it. We've rigged our character. Now we still need to take a few steps here to make this rig a little easier to work with. So I'm going to start by just closing up these layers here.
Morgan Williams (17:27): And you'll notice we have this whole set of green controllers here up at the top. Your default color might end up being a little different. Now these controllers allow us to drive the rig, but they can also be customized to make the rig a little easier to work with. So I'm going to start with this first hand or arm controller here and note that when I click on it, I get this whole set of controls in the effects controls here. If I tab open icon, you can see, I can change its color, its position size and orientation and opacity. Now, even though you can change the color right here, I actually prefer to use a slightly different method for changing the color of controller icons. And that's because I like to use a color coding system for my controllers. And I recommend you do the same.
Morgan Williams (18:17): I like to have one color for the left or right side one color for the opposite side, and then a third color for centrally located icons. So before we adjust some of these other settings, let's get our color coding in place. So I'm going to select the hand and the foot on this side of the character. And it really doesn't matter whether it's right or left. I just want all of the controls on this side of the body. And I'm going to go to the create controllers tab in DUIK Bassel and I'm going to go down and choose edit. You'll notice I have a color option here, and I'm going to click on the color option. And that brings me to the system color picker. And the reason I like to use this is because then I can create swatches that I can just quickly click on to grab specific colors
Morgan Williams (19:10): So let's put red on this side of the rig and notice it changes both controller, icons red. Let's do the same with the other side. I'm going to select those choose color. And on this side, I'm going to choose purple and then we'll leave the centrally located controllers green. Now I'm also going to color code the layers themselves. So these are purple controllers. So I'm going to color the layers purple. And I'm also going to move those down to the bottom of the controller stack because they're at the bottom of the stack of the character. If we think of these limbs being closest to us, the torso and head in the middle and then the leg and arm in the back, they're the furthest away from us. And again, this is just the way I like to organize things. You can organize them the way they make the most sense to you.
Morgan Williams (20:05): Just as long as you have some kind of organizational system in place, then these two on top, which are red, we're going to color those red and we'll leave the others green. Now let's also arrange these. So they're a little easier to work with as we're animating. So I'm going to start with the hand controller here, and I'm going to move this away from the figure just a little bit. Now you notice that as I move this away, the anchor point stays in the same place. So I'm still controlling the arm from that same anchor point. This position control is basically an offset to simply offset the icon itself. And this is again, very much a personal preference, like to get the icons a little bit away from the figure. So I can focus on the artwork of the figure without having icons sitting over the top of everything.
Morgan Williams (20:57): I'm going around this number up to four 50 here. I think the size is all right. You want the size to be something that's going to be easy to click and drag on. But then I also like to turn the opacity of controllers down a little, just so they're a little more subtle. And again, our focus then can be a little more on the artwork of the character itself. Finally, we have this option down here for display. You'll notice this little kind of string we can see here and here that's indicating R I K connection for our inverse kinematics, but it's really not necessary. It also slows down the performance of the rig. Just a little. So I like to uncheck that and remove that little guide. That's again, up to you now, while we're here, we should also test this out really quick. I'm going to pick up this little arm and whoops, look at this.
Morgan Williams (21:49): Notice that the elbow is bending the opposite direction of what we want. So I just need to come under here under Ika hand and click reverse, and now the orientation will reverse the other direction. That's what we want. Make sure you use command Z to undo. If you move a controller until we've zeroed out these position values, we don't want to lose our neutral values before we begin working with the rig. So you can see how easy it is to create a custom position, size color. What have you for your controllers? I'm going to go ahead and speed through the other arm and the leg controllers feel free to set yours up. However, it makes the most sense to you
Morgan Williams (22:49): Now with our torso controls, I like to move the head and the body control, which controls the whole upper part of the body off the figure and to the back of the character, kind of like the handles of a tea cup. So you grab the handle from behind to manipulate that body part. This is again a personal preference, but allows us again to have fewer icons on the figure itself. I usually leave the shoulder and neck controller and the hip controller over the character because they're a little smaller and don't interfere quite so much. So let's start with the head here. I'm going to also make the head controller a little bit larger. Let's do a thousand percent and I'm going to move it off away from the head and up a little bit as well. And then I'm just going to round these numbers off and we'll turn that opacity down again. And now we can see the face of our character, the artwork isn't covered up by this icon, the shoulder and neck controller. I'm just going to lower a little bit again, to kind of keep it off the face just a little bit more.
Morgan Williams (24:06): Well, maybe make it just a little bit larger. So again, it's easy to click and drag on and turn that opacity down. The spine curve allows us to add a little band in the middle of the torso. I'm going to just blow this up a little bit. So it's a little bit larger, again, easier to click and drag on. Now, maybe even a little larger than that, and we'll turn that opacity down. We'll also uncheck drug guides that will also clean up our interface just a little bit on that spine curve control. The spine root is really not necessary for control of the character it's necessary for the rigging itself, but we don't need to use this as a click and drag controller. So I usually just turn the visibility of the spine route off. Then before we adjust the hips, let's grab the body, which again, controls the whole upper part of the body. And let's again, move this off the figure in that tea cup or a coffee cup handle style. And we'll move that up a little bit. So it's kind of sitting roughly centered in the middle of his back, and let's also make this quite a bit larger, easier to click and drag on.
Morgan Williams (25:36): And then finally our hip controller, which I'm just going to move up a little bit and we'll increase the size a little as well. So it's sitting right over that pelvis area and we'll turn that opacity down. Now we can also turn off the visibility of our structures. Now we don't need to look at those structures anymore. So I'm going to go to the create structures, tab, select structures, and show hide, and that's going to hide all those structures away. We don't need to see those anymore. Now we also want to clean up our layers a little bit here. So we're focusing on the controllers and not all this other stuff that goes into creating the rig. So I'm going to toggle to my switches here and I'm going to start just after the controllers and I'm going to shy away all of the layers aside from my controller layers.
Morgan Williams (26:45): And we can also shy away that spine route because that again is not one of our click and drag controls that we need. And then I also want to make sure that when I'm manipulating the character, that I can only click on the controllers and I don't accidentally move any artwork layers. So I'm also going to lock all of the layers aside from the controller layers. So we're going to lock all of those up. Now when I hit the shy button here, all those layers disappear. And now the only layers I can click and drag on are our controller layers. Now, before we start manipulating this character, it's really important that we capture these neutral values because right now, if I was just to look at the position value of this hand, it's just too complex X and Y values. That would be impossible to remember.
Morgan Williams (27:43): Plus it makes it hard when creating animations to essentially start from such a crazy value here. So what we want to do is we want to zero out the position values of all of our controllers. So I'm going to go to the links and constraints tab here, and let's just see how this works. I'm going to open that position value again. And notice we have the add zero button here. I'm going to go ahead and click that. And you'll see that what happens is the position value becomes zero, but it doesn't move the position. What happens is do it basle creates a null object with the same position value as this actual layer, and then parents this layer to it, allowing us to zero out the position that null object is hidden and shy. We can see it down below here. There it is zero hand so that when we have shied our layers, it disappears.
Morgan Williams (28:43): And this allows us to have that nice zero position value rotation values default to zero, of course. So our neutral position for this hand is all zeros. It's very, very important to an efficient animation process. So let's go ahead and do that with all of these controllers and you want to make sure and do this before you start manipulating the controllers. So you don't lose those neutral values. Okay. And our rig is all ready to go. One last thing that I recommend you do is hide the parent and link column. That'll just give you a little more screen real estate in your timeline. Okay? So let's just really quickly walk through our controls here and let's just make one small layering adjustment. Let's put the head on top of the shoulders and neck. That's just a little bit more intuitive. Okay. So the head control allows us to rotate and control the, the shoulder and neck control controls the upper part of the body from the shoulders to the neck and up into the head.
Morgan Williams (29:51): The spine curve allows us to create a little curvature within the torso. The hips allow us to position and also to rotate the hips of the character. And then the body control allows us to control the entire upper part of the body from the hips upward. The hand and foot controls obviously control the arms and the legs, and you can rotate the control of the hand in order to control the rotation of the hand or the foot controls have some additional controls added to them. Let's close these up a little and take a look at those. You can see these foot roll controls have been added, and these are really neat. Let's zoom in here a little bit and see how these work, the toe rotation allows us to rotate the little toes there. The tip toe rotation allows us to raise the foot on its tiptoe.
Morgan Williams (31:00): The heel allows us to roll the foot back and down. If we want on the back of the heel and the foot roll. This is the really powerful one here, which is great for walks and runs and dancing and other complex movements that allows you to roll back on the heel, but then roll forward on the ball of the foot to tilt up on the ball of the foot. So it rolls the foot back and forth. And again, this is very, very important for animating walks and other complicated foot movements. I can, of course also just pick up and move the foot and I can rotate the foot off the end of the calf, but the foot roll controls allow us to control the foot when it's sitting on the ground. And this is very important to maintain the sense of gravity with the foot sitting solidly on the ground and rolling on the toes or the heel or both while the weight of the character is still down on that foot.
Morgan Williams (32:07): So this gives us very robust control over our character. Now, just FYI, I'm not going to bother with it in this tutorial, but if you want, you can change the names of these controllers to make them a little more simple, to indicate right, and left or whatever you want. So you're not stuck with these names. These controllers can be renamed if you wish. Now, if you have auto rigged, your figure, the way we have here, you also get the wonderful advantage of the procedural walk tool, which is a terrific feature here in DUIK. Bassel now as a long time character animator, the procedural walk cycle leaves a little bit to be desired. If you want to really high quality, very expressive walk, but again, for a quick turnaround where you don't have time to set a lot of key frames, this is a very powerful tool. So let's take a look at how that works. I basically just select my controllers and just click walk cycle
Morgan Williams (33:09): And now if I do a Ram preview here of just a second or so, you can see that my character is walking pretty amazing. It's quite honestly a fairly stiff walk. There's not a lot of feeling of weight to it, but there's a tremendous number of parameters you can adjust in order to change the feeling and tone of the walk. I'm going to move the icon for the walk controller, just off the figure there just a little bit. Now, again, as an old time character animator, I would personally want a little more control over a walk, but if you're in a fast turnaround situation, this is super cool. And let's take a look just really quick at just some of the parameters. And there's a lot of them. You can really customize these walks cut quite a bit under main parameters here. You can adjust the feeling of weight of the character, the energy of the character, which will kind of change the amount of sort of stiffness in the walk. So let's take a look right now. We've got our energy at 10%. If we increase that to 25%, you can see we've got a, quite a bit looser and bouncier walk. The softness will make the character more loose. And then under a walk cycle here, you have a walk speed and you can also change the type from realistic to a kind of bouncier dancing walk here. It's essentially a Mickey mouse, double bounce walk for you. Animation aficionados. There we go.
Morgan Williams (34:59): Now there's also a ton of secondary controls that allow you to control the amount of movement and the neck, the softness, you can adjust how much the hip swing or the body swings. You can change how much the arms swing or don't swing, how high the feet pick up and how much they rotate lots and lots of parameters to customize this walk, to get it as close to what you're looking for as possible. And again, it's very, very quick and easy to use. The general motion allows you to start and stop the cycle slowing into and slowing out of a walk. Really very powerful and very quick again for those fast turnaround projects. So I hope you've gotten a good overview of how to rig a character with DUIK Bassel. Now, if you want to learn more about animating a rigged character like this, I recommend you sign up for my character animation bootcamp at school of motion, which is a very intense course that will give you a terrific background in the fundamentals of character animation, specifically using rigged puppets in after effects.
Morgan Williams (36:13): And if you want to learn more about rigging, as I said, try my rigging academy course, which will go much deeper into the rigging process, preparing the artwork, building rigs from scratch, as well as auto rigging and customizing rigs to do all kinds of amazing stuff. Now for a little sneak peek at the kind of more advanced and customized rigs you can learn about in rigging. Cademy, here's just one of the many rigs you can learn to create in the course, this is another character designed by Alex Pope, and there's quite a few additional features to this rig, starting with the hands here. If we select the hand, you can see there's a lot of additional controls for the hand, including a hand selector that allows us to select different hand poses there off the end of the arm. And we also have the ability to turn props on with this character so he can hold a variety of props. And when we pick up and move the hand around, he picks up and moves those props as well. And he can hold a few different props. We have a prop selector as well, so he can hold a guitar and he can hold a little bottle of beer there.
Morgan Williams (37:31): We even have some prop offset controls, so we can move the props in his hand and pose them in different ways. And these arms can also move in front of and behind his body. So if his arm is in front here like this, and I want him to say, hide the skateboard behind his back, I can check this little box here and the arm and the skateboard goes behind his back. And this works with, or without the props. This opens up a lot of additional posing options for this character when both hands can be behind the back or in front, so he can hold his tummy, if he's hungry or whatever. Now we also have some facial rigging here, although he doesn't have a mouth does have eyes obviously. And so we have this eye aim control that allows him to look around and he can also wink or blink with these sliders here. So he can open and close both eyes or have an I halfway opened or closed.
Morgan Williams (38:41): And he can even squash and stretch his eyes. So his eyes can squash and they can stretch to create more expressive movements. And the blinks all work with that squash and stretch control. He even has individual pupil controls. So if you want to create like cross-eyed looks or like crazy eyed looks, you can get that with the individual pupil controls. So a lot of expressive capabilities in his face here. Now, one of the things about auto rigging that I don't entirely love is the way the torsos are rigged with the auto rigger. So this character has a manually rig torso that set up just a little bit different. Some of the things are the same. We can rotate the head here. I've also got the ability which doesn't happen automatically with the auto rig to also move the position of the head manually in rigging academy.
Morgan Williams (39:42): We'll look at how to do that. Both with auto rigs and with manually rigged torsos, but it's a nice additional level of control. Have a body control, which I call the cog for center of gravity. That's following the general naming convention for 3d rigs. And that again, controls the upper part of the body from the waist upwards. The pelvis control is the same as the hip control, and that allows us to rotate the hips and also move them around in position. But where things get a little different is here in the upper part of the body where it, rather than having a neck and shoulder control, which I find a little restrictive and not entirely anatomically, correct. Instead with this rig, we have a chest control and that chest control essentially controls the rib cage of the character. So when you bend that, you're bending basically the rib cage and having control over the rib cage or the chest and the pelvis separately, give you a lot more posing possibilities for the torso.
Morgan Williams (40:47): The mid-level control here controls the curvature in the middle of the body, basically where the belly is. And then the neck is controlled separately by this little rotation control here, which allows you to bend the neck. And again, this gives you a greater level of control over the torso, neck, and head. And it's also a little more anatomically, correct. Now this is still just scratching the surface of what you can learn in rigging academy. We'll look at lots of different ways to prep and manipulate the artwork, both using jointed pieces and the puppet tool. We'll look at creating lots of different types of facial rigging, hand rigging and the rigging of quadruplets. And you'll learn a lot more about the rigging tools DUIK Bassel. So you can really get the most out of this amazing free tool for after effects. So I hope you've gotten a lot out of this tutorial and I hope to see you in character animation bootcamp or rigging academy in the future.