Unlocking the Power of Expressions in Adobe After Effects
Expressions are a motion designer's secret weapon. They can automate repetitive tasks, build flexible rigs, and extend your capabilities far past what is possible with keyframes alone. If you've been looking to add this powerful skill to your MoGraph tool kit, your search is over.
Our Expression Session course, taught by Zack Lovatt and Nol Honig, will show you when, why and how to use Expressions in your work; and this article will break down the top Expressions for expediting your workflow — whether you enroll in Expression Session or not.
Never used Expressions before? No problem. Read on, and you'll be ready.
In this article, we'll explain Expressions, and why they're important to learn; share an Expressions project file so you can practice; and guide you, step by step, through six must-know Expressions we compiled after informally surveying some After Effects experts.
WHAT ARE AFTER EFFECTS EXPRESSIONS?
Expressions are snippets of code, using the Extendscript or Javascript language, to alter After Effects layer properties.
When you write an Expression on a property you can start establishing relationships between that property and other layers, the given time, and Expression Controllers found in the Effects & Presets window.
The beauty of Expressions is that you don't need to be proficient in coding to start using them; most of the time you can get away with using a single word to make major changes.
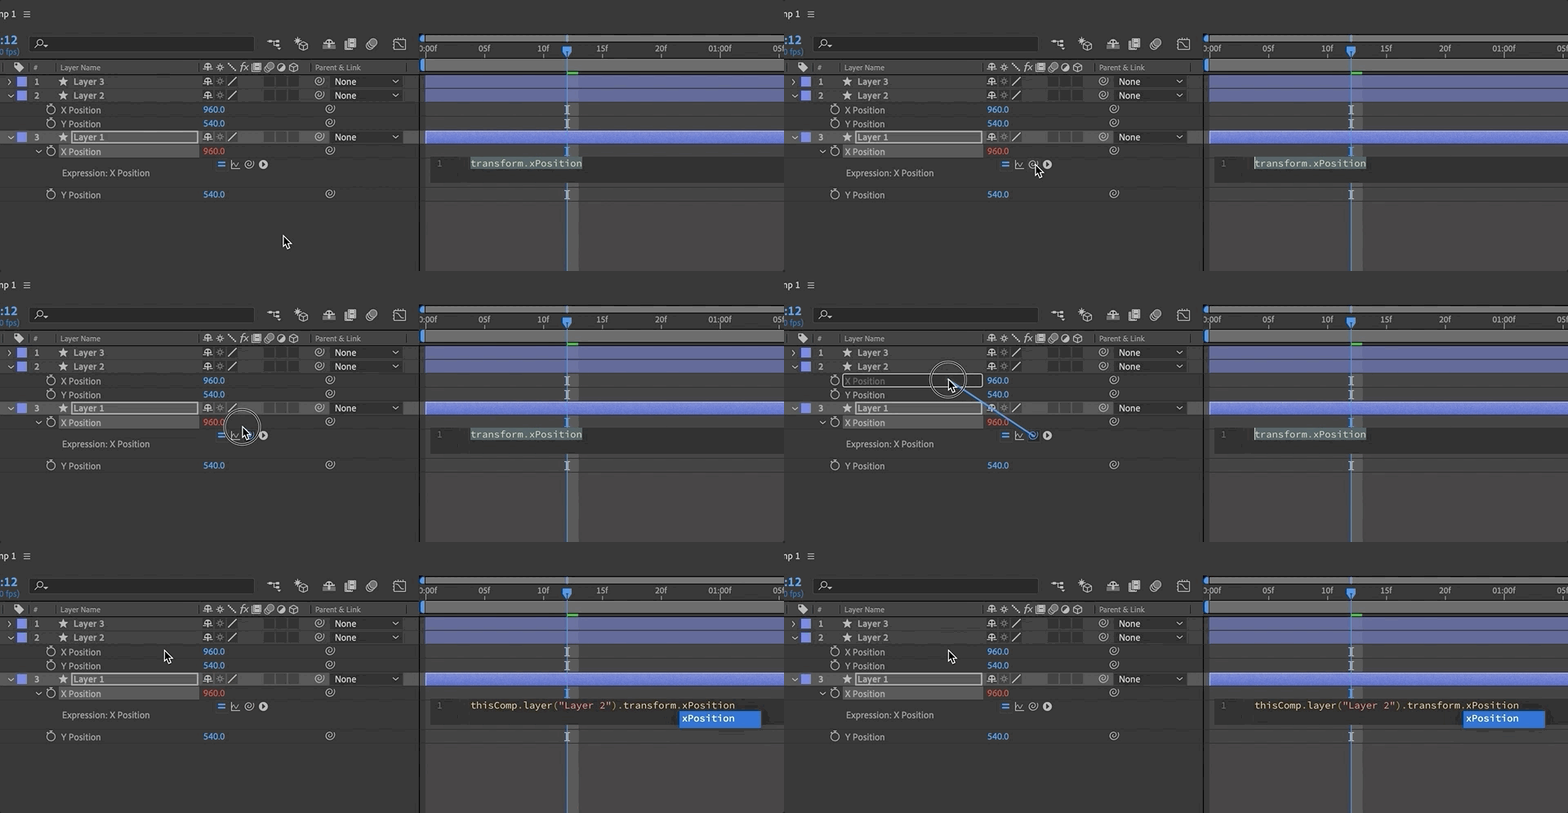
Plus, After Effects also comes equipped the pick-whip functionality, allowing you to automatically generate code to define relationships.
WHY ARE EXPRESSIONS IMPORTANT TO LEARN?
Expressions are easy to start using, automate simple tasks, and offer immediate and high return with minimal effort.
Each Expression you know is a time-saving, work-simplifying tool. The more Expressions in your tool kit, the better suited you are for After Effects projects — and especially those with tight deadlines.

HOW DO I PRACTICE WORKING WITH EXPRESSIONS?
If you want to experiment with the code linked to the artwork in this article, download the project files. We've left several notes throughout to serve as a guide.
Pro Tip: When we open up another motion designer's project folder, we click every layer and press E twice to view any Expression the artist/creative coder may have written into the layer. This allows us to understand the creator's logic, and reverse engineer their project.
{{lead-magnet}}
SO, WHICH EXPRESSIONS SHOULD YOU LEARN FIRST?
We informally surveyed our motion designer friends, and compiled this list of six must-know After Effects Expressions:
- The Rotation Expression
- The Wiggle Expression
- The Random Expression
- The Time Expression
- The Anchor Point Expression
- The Bounce Expression
THE ROTATION EXPRESSION
By using an Expression on the rotation property, we can instruct a layer to rotate by itself, as well as dictate the speed at which it rotates.
To use the Rotation Expression:
- Select the layer you want to rotate and press R on your keyboard
- Hold ALT and click the stopwatch icon to the right of the word "rotation"
- Insert code time*300; in the space that appeared to the bottom right of your layer
- Click off the layer
The layer should now be spinning, quickly (if the layer isn't spinning and you received an error, make sure that the "t" in time is not capitalized).

To adjust the speed, simply change the number after time*.
To learn more:
- Read this article dedicated to the Time Expression in After Effects
- Read this article dedicated to the Rotation Expression in After Effects, which includes a more advanced Rotation Expression that rotates a layer based on its position

THE WIGGLE EXPRESSION
The Wiggle Expression is used to drive random movement based on user-defined constraints; the complexity of the constraints determine the difficulty of coding the Expression.
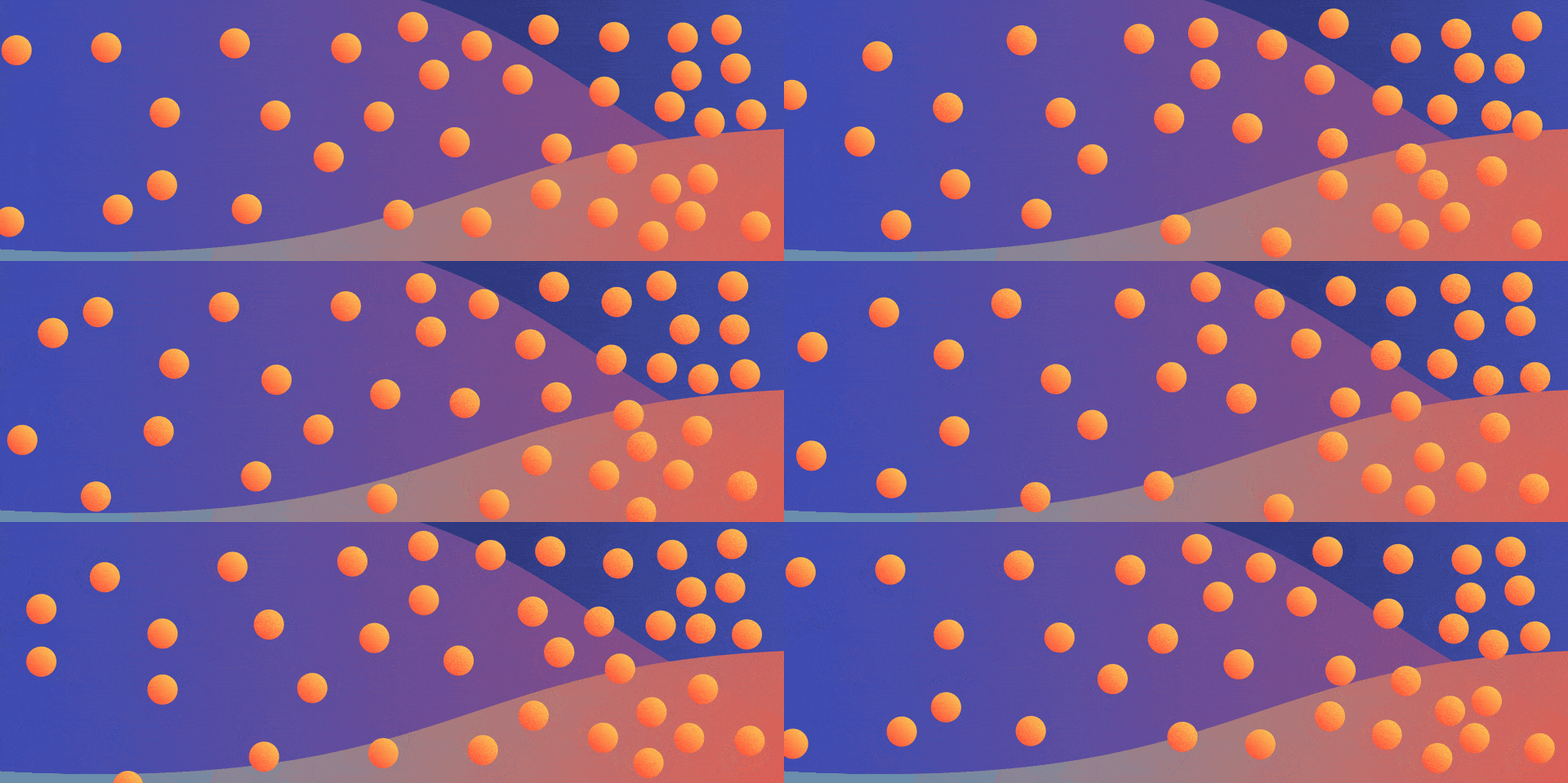
To write the most basic Wiggle Expression code, you'll merely need to define two parameters:
- The frequency (freq), to define how often you want your value (number) to move per second
- The amplitude (amp), to define the extent to which your value is allowed to change above or below the starting value
In layman's terms, the frequency controls how many wiggles we'll see each second, and the amplitude controls how far the object (layer) will move from its original position.
Written out, without values, the code is: wiggle(freq,amp);
To test it out, plug in the number 50 for the frequency, and the number 30 for the amplitude, to create code: wiggle(50,30);
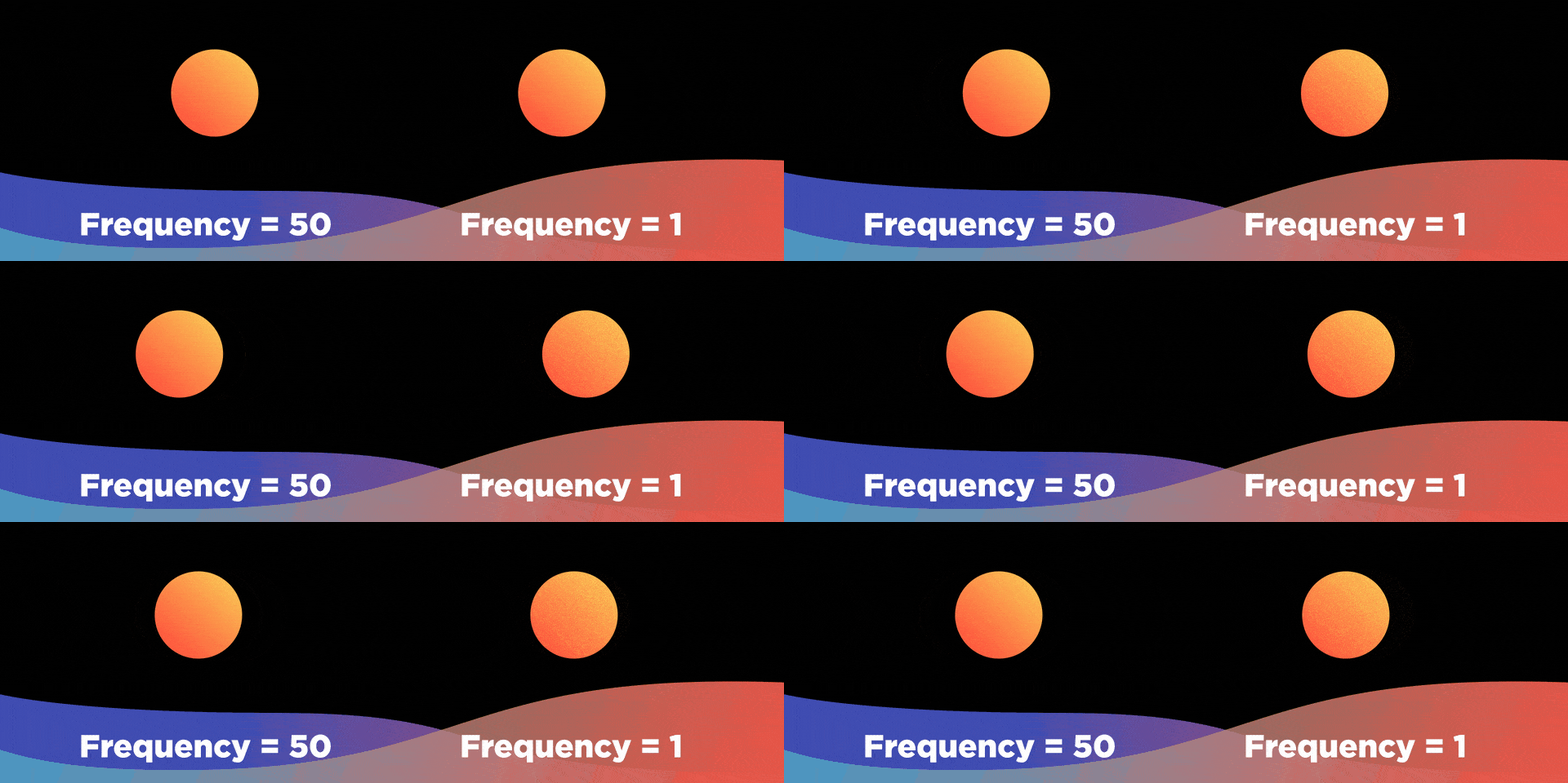
To learn more, read this article on the Wiggle Expression in After Effects. It features more visual examples, as well as a more advanced Expression that loops the wiggle.
THE RANDOM EXPRESSION
The Random Expression is used in After Effects to generate random values for the property to which it's applied.
By adding the Random Expression to a layer property, you instruct After Effects to choose a random number between 0 and the value defined in the Random Expression.
The most basic form of the Expression is written: random();
If, for example, you wanted to apply a Random Expression between 0 and 50 to a scale layer, you would select the layer and then type in the code random(50);

But that's not all. There are actually a variety of Random Expressions in After Effects, including:
- random(maxValOrArray);
- random(minValOrArray, maxValOrArray);
- gaussRandom(minValOrArray, maxValOrArray);
- seedRandom(seed, timeless = false);
You can even use the Random Expression to let After Effects offset and choose when the animation of individual layers should start:

THE TIME EXPRESSION
The Time Expression in After Effects returns a composition's current time in seconds. The values generated by this expression can then be used to drive movement by connecting a property value to the Expression.
If you doubled the Time Expression, the code would be: time*2;, and, for example, eight seconds would pass in a four-second composition:

To learn more, read this article about the Time Expression. It includes lots of gifs to help clarify any confusion, as well as an explanation of valueAtTIme(); for the index of a layer, which you can use to duplicate repeatedly, with a unique delay for each layer.
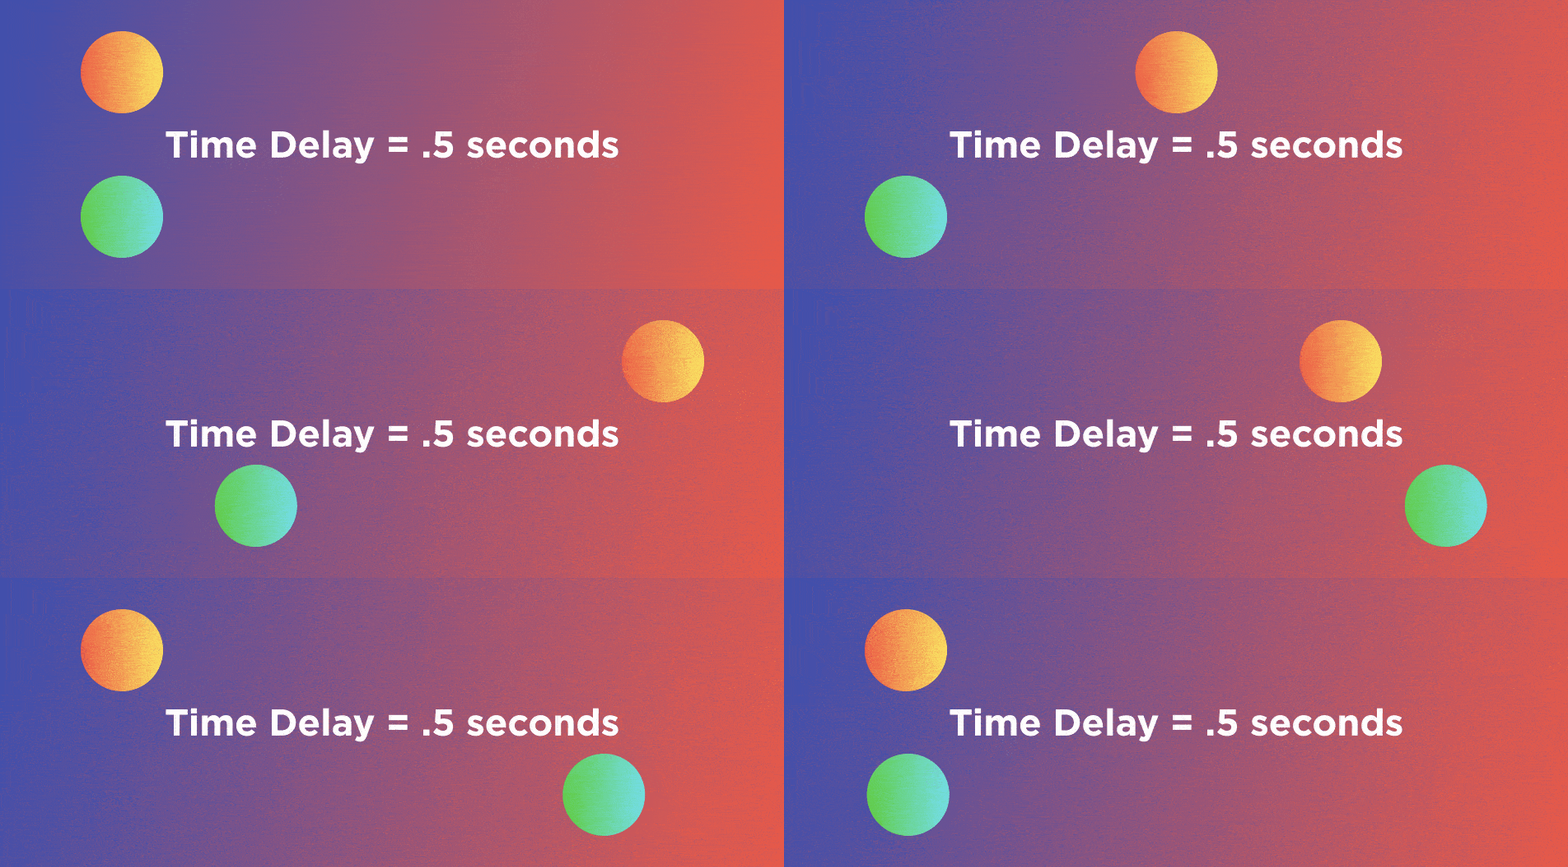
THE ANCHOR POINT EXPRESSION

The anchor point in After Effects is the point from which all transformations are manipulated — the point at which your layer will scale, and around which it will rotate.
Using the Anchor Point Expression, you can lock your anchor point to the:
- Top Left
- Top Right
- Bottom Left
- Bottom Right
- Center
- Offset X or Y with a Slider Controller
Using Expressions to control the anchor point is especially useful when building title templates and lower thirds in creating .MOGRT files
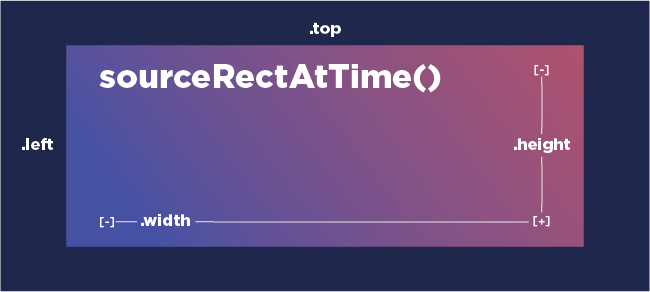
If you want to lock the anchor point to a layer's corner or keep it centered, you can place the Expression on the anchor point, as follows:
a = thisComp.layer("Text1").sourceRectAtTime();
height = a.height;
width = a.width;
top = a.top;
left = a.left;
x = left + width/2; y = top + height/2; [x,y];
This defines the top, left, width and height of the layer, and then uses addition and division to pinpoint the center of the layer.
To learn more about all the ways this Expression can be used, along with the reasoning behind the math, read this article. (It also explains how to pre-compose your layers for further effect.)

THE BOUNCE EXPRESSION
While the Bounce Expression is much more complex, it only takes two keyframes to create a bounce.
After Effects interpolates the velocity of your layer's movement to help determine how the bounce will work.
Here's the full Bounce Expression for you to copy and paste:
e = .7; //elasticity
g = 5000; //gravity
nMax = 9; //number of bounces allowed
n = 0;
if (numKeys > 0){
n = nearestKey(time).index;
if (key(n).time > time) n--;
}
if (n > 0){
t = time - key(n).time;
v = -velocityAtTime(key(n).time - .001)*e;
vl = length(v);
if (value instanceof Array){
vu = (vl > 0) ? normalize(v) : [0,0,0];
}else{
vu = (v < 0) ? -1 : 1;
}
tCur = 0;
segDur = 2*vl/g;
tNext = segDur;
nb = 1; // number of bounces
while (tNext < t && nb <= nMax){
vl *= e;
segDur *= e;
tCur = tNext;
tNext += segDur;
nb++
}
if(nb <= nMax){
delta = t - tCur;
value + vu*delta*(vl - g*delta/2);
}else{
value
}
}else
value
After copying and pasting in After Effects, you'll need to customize three parts:
- Variable e, which controls the elasticity of the bounce
- Variable g, which controls the gravity acting on your object
- Variable nMax, which sets the maximum number of bounces
If you set these variable as follows...

You'll create the following bounce, with high elasticity and low gravity:

To learn more about elasticity, control gravity and more, read this comprehensive article on the Bounce Expression.
Even More Expressions
Interest piqued? Then dig deeper with our Amazing After Effects Expressions tutorial.
Master the Art and Science of After Effects Expressions
Do Expressions still feel like an impossible second language you just can't seem to conquer?
Expression Session, a beginner's course on extend-script and javascript in After Effects, is your answer.
Taught by programming master Zack Lovatt and award-winning teacher Nol Honig, Expression Session builds the foundation you need, using exercises designed for visual learners to decipher the technicalities of code.
In eight weeks you'll be dreaming in script and impressing all your friends with your coding wizardry. Plus, After Effects will feel like a totally new program, with endless possibilities.
Learn more about Expression Session >>>
ENROLL NOW!
Acidbite ➔
50% off everything

ActionVFX ➔
30% off all plans and credit packs - starts 11/26

Adobe ➔
50% off all apps and plans through 11/29

aescripts ➔
25% off everything through 12/6
Affinity ➔
50% off all products

Battleaxe ➔
30% off from 11/29-12/7
Boom Library ➔
30% off Boom One, their 48,000+ file audio library
BorisFX ➔
25% off everything, 11/25-12/1

Cavalry ➔
33% off pro subscriptions (11/29 - 12/4)

FXFactory ➔
25% off with code BLACKFRIDAY until 12/3

Goodboyninja ➔
20% off everything

Happy Editing ➔
50% off with code BLACKFRIDAY

Huion ➔
Up to 50% off affordable, high-quality pen display tablets

Insydium ➔
50% off through 12/4
JangaFX ➔
30% off an indie annual license
Kitbash 3D ➔
$200 off Cargo Pro, their entire library
Knights of the Editing Table ➔
Up to 20% off Premiere Pro Extensions
Maxon ➔
25% off Maxon One, ZBrush, & Redshift - Annual Subscriptions (11/29 - 12/8)
Mode Designs ➔
Deals on premium keyboards and accessories
Motion Array ➔
10% off the Everything plan
Motion Hatch ➔
Perfect Your Pricing Toolkit - 50% off (11/29 - 12/2)

MotionVFX ➔
30% off Design/CineStudio, and PPro Resolve packs with code: BW30

Rocket Lasso ➔
50% off all plug-ins (11/29 - 12/2)

Rokoko ➔
45% off the indie creator bundle with code: RKK_SchoolOfMotion (revenue must be under $100K a year)

Shapefest ➔
80% off a Shapefest Pro annual subscription for life (11/29 - 12/2)

The Pixel Lab ➔
30% off everything
Toolfarm ➔
Various plugins and tools on sale

True Grit Texture ➔
50-70% off (starts Wednesday, runs for about a week)

Vincent Schwenk ➔
50% discount with code RENDERSALE

Wacom ➔
Up to $120 off new tablets + deals on refurbished items


