Unlock Your Motion Design Potential
Get unlimited access to 50+ courses, workshops, and resources from the best instructors in motion design. Join School of Motion All-Access today.

Adobe Illustrator is the premiere program for graphic and motion designers, and there's more to the menus than you may think.
Navigating an Illustrator document seems like a trivial task, but it can be surprisingly difficult if you’re not familiar with all of the available tools. That’s why we’re dedicating an entire article to Illustrator’s View menu.

The View menu has a lot of really great features for switching up how you view and work with vector paths in Illustrator. We’re going to take a look at these three valuable additions:
- Outline View
- Pixel Preview
- Smart Guides
Using Outline in Adobe Illustrator
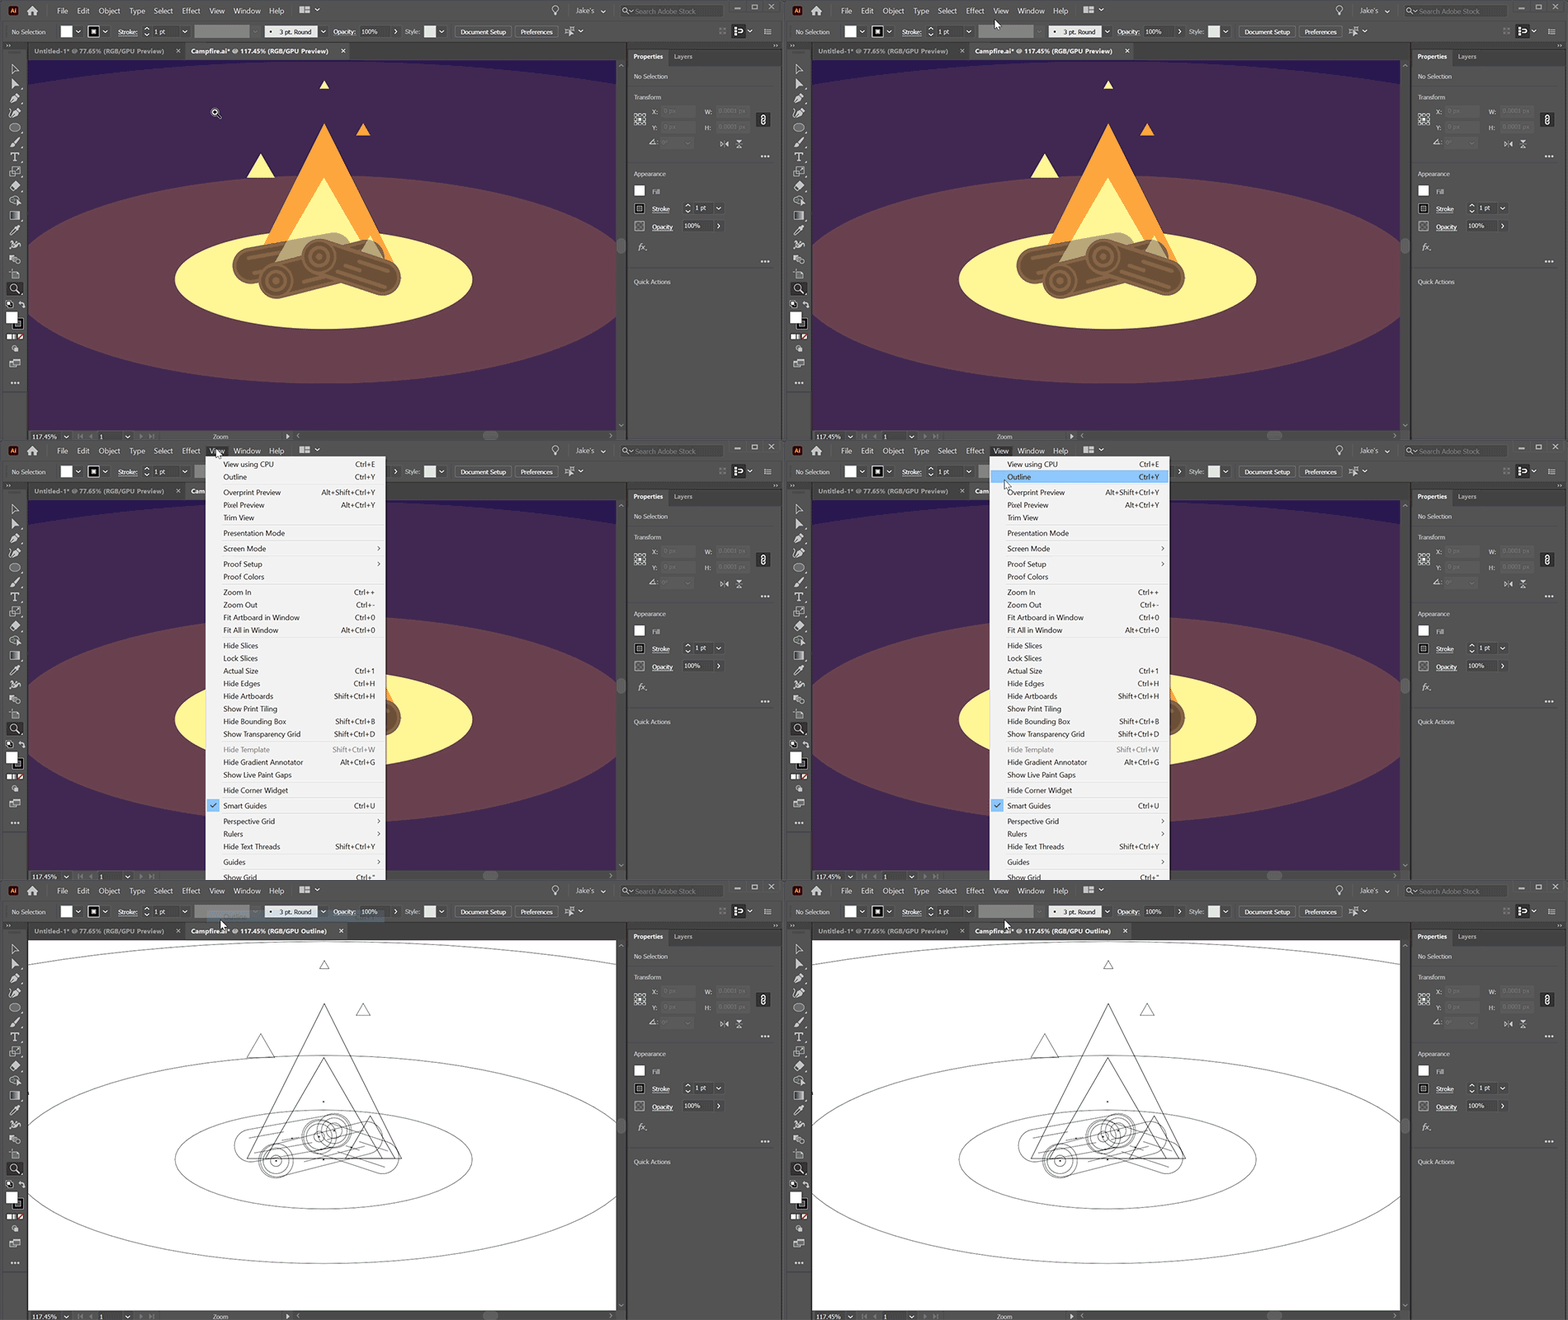
With stacks and stacks of overlapping objects, editing those vector paths can be a pain. Switch to Outline Mode by going up to View > Outline to view unstyled vector paths, making it a lot easier to see the structure of your assets.

This x-ray view can give you a good perspective on how complex or simple an illustration really is, and it makes it easy to adjust paths that would normally be hidden by other objects in the standard view.
Pixel Preview in Adobe Illustrator
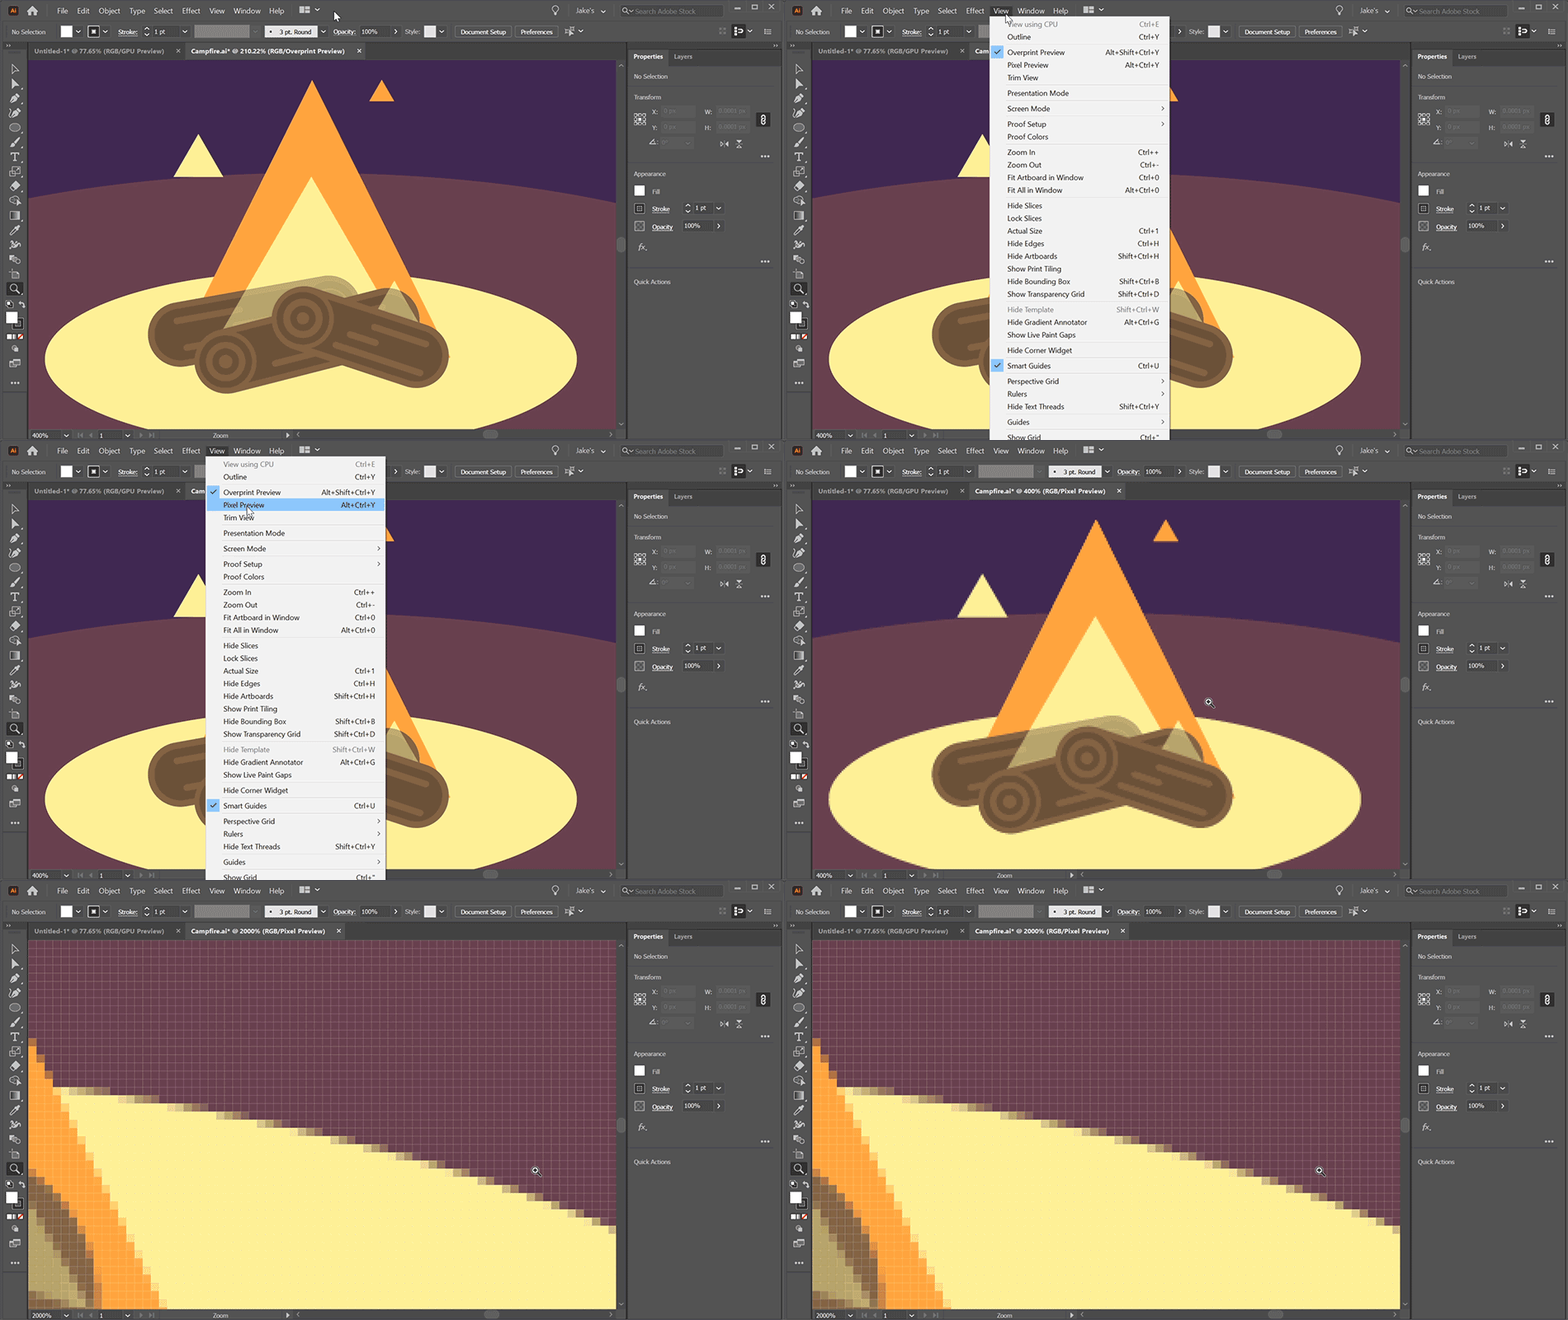
Another super helpful preview mode is the View > Pixel Preview mode. While Illustrator is a vector design environment, everything on your screen has to be rasterized to view it, and any assets that’s exported out of the program will also have to be rasterized. Switching to the Pixel Preview mode will give you a live rasterized view of your document so you can know exactly how it’ll look in any raster program.

Smart Guides in Adobe Illustrator
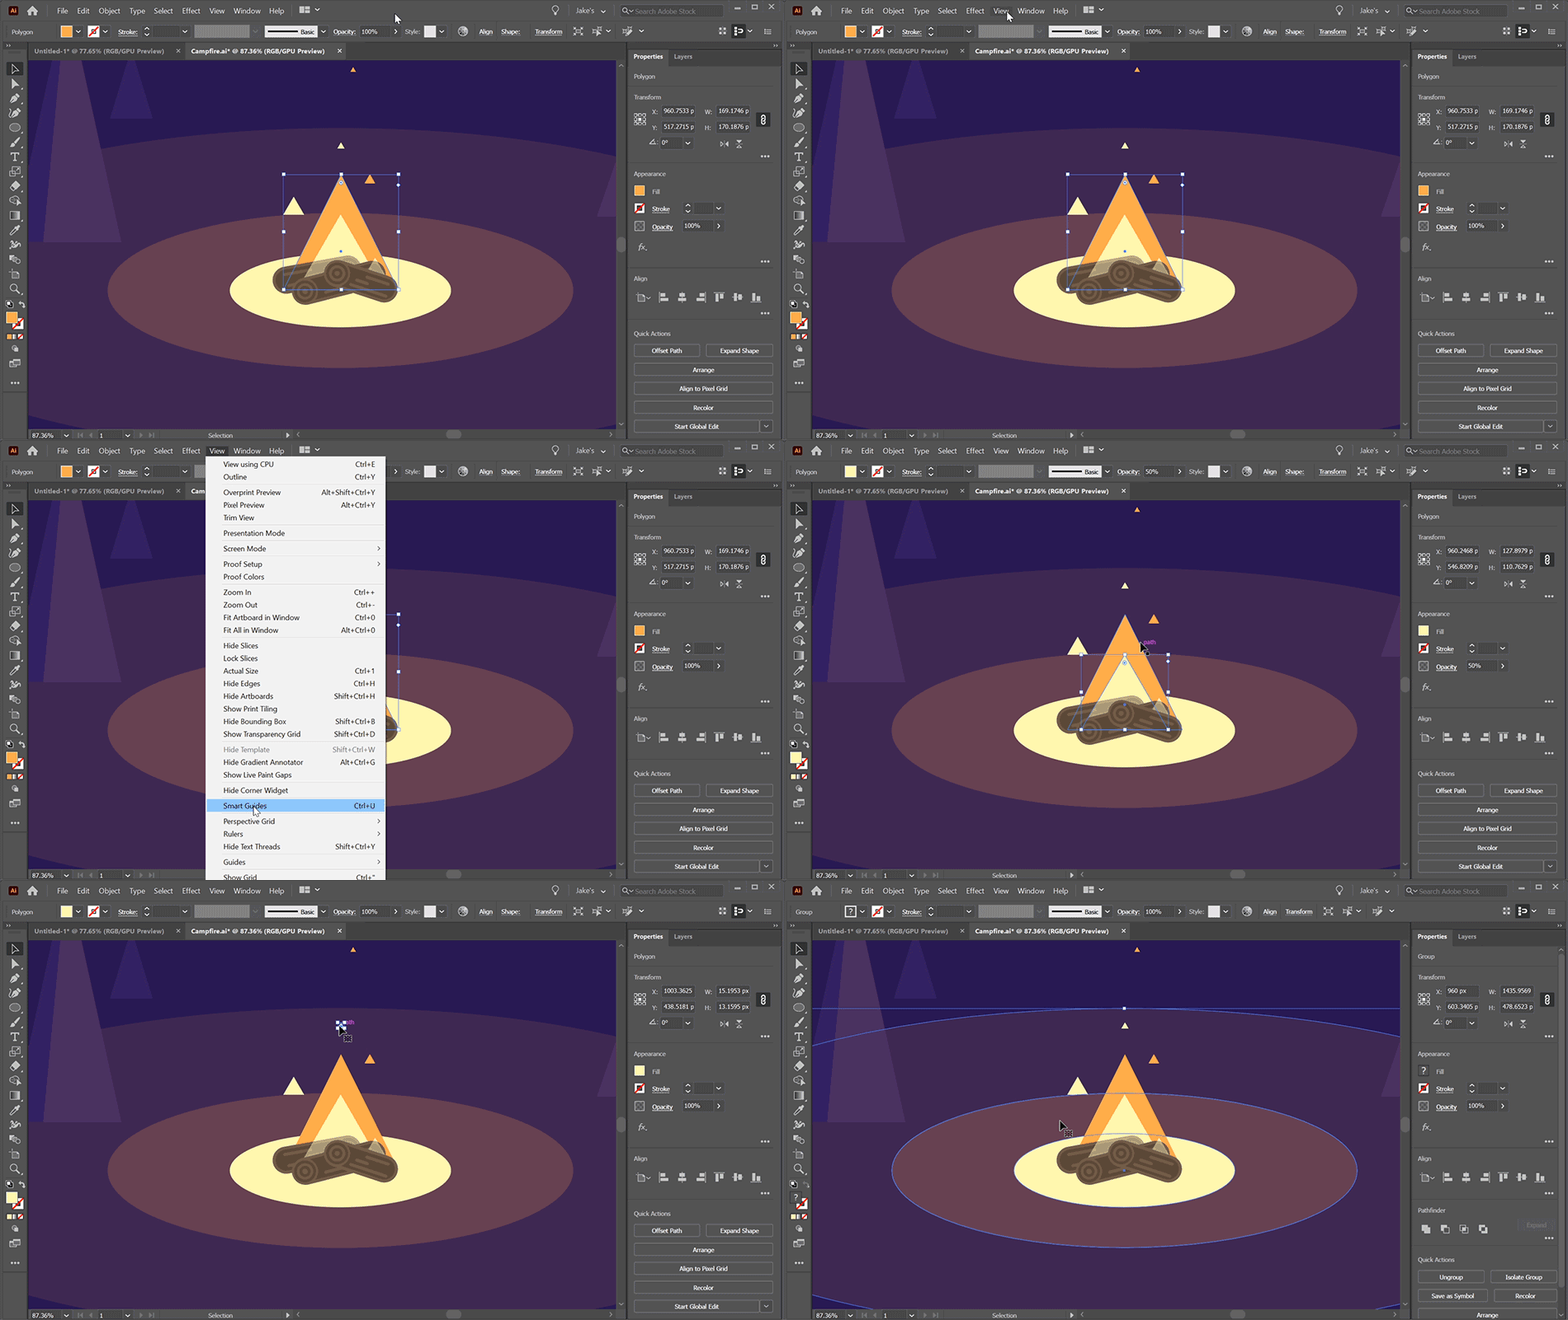
If you’re not using Smart Guides, you’re gonna have a bad time. Head up to View > Smart Guides, and work live you’ve never worked before. Paths now snap to each other, objects align easier, drawing paths have helpful guides. You’ll never turn back.

The ability to switch to a less-detailed view of your vectors can sometimes make paths a lot easier to look at while editing. Working in a vector environment, it’s important to realize that your illustrations are going to look different once you’ve exported them into a raster format, which is why the Pixel Preview is so helpful. And smart guides is something I couldn’t even imagine not having access to when creating things in Illustrator. Take these three tools from the View menu and keep making awesome work!
Take Your Skills Further with Photoshop & Illustrator Unleashed
Check out Photoshop & Illustrator Unleashed, available with School of Motion All-Access.
ENROLL NOW!
Acidbite ➔
50% off everything

ActionVFX ➔
30% off all plans and credit packs - starts 11/26

Adobe ➔
50% off all apps and plans through 11/29

aescripts ➔
25% off everything through 12/6
Affinity ➔
50% off all products

Battleaxe ➔
30% off from 11/29-12/7
Boom Library ➔
30% off Boom One, their 48,000+ file audio library
BorisFX ➔
25% off everything, 11/25-12/1

Cavalry ➔
33% off pro subscriptions (11/29 - 12/4)

FXFactory ➔
25% off with code BLACKFRIDAY until 12/3

Goodboyninja ➔
20% off everything

Happy Editing ➔
50% off with code BLACKFRIDAY

Huion ➔
Up to 50% off affordable, high-quality pen display tablets

Insydium ➔
50% off through 12/4
JangaFX ➔
30% off an indie annual license
Kitbash 3D ➔
$200 off Cargo Pro, their entire library
Knights of the Editing Table ➔
Up to 20% off Premiere Pro Extensions
Maxon ➔
25% off Maxon One, ZBrush, & Redshift - Annual Subscriptions (11/29 - 12/8)
Mode Designs ➔
Deals on premium keyboards and accessories
Motion Array ➔
10% off the Everything plan
Motion Hatch ➔
Perfect Your Pricing Toolkit - 50% off (11/29 - 12/2)

MotionVFX ➔
30% off Design/CineStudio, and PPro Resolve packs with code: BW30

Rocket Lasso ➔
50% off all plug-ins (11/29 - 12/2)

Rokoko ➔
45% off the indie creator bundle with code: RKK_SchoolOfMotion (revenue must be under $100K a year)

Shapefest ➔
80% off a Shapefest Pro annual subscription for life (11/29 - 12/2)

The Pixel Lab ➔
30% off everything
Toolfarm ➔
Various plugins and tools on sale

True Grit Texture ➔
50-70% off (starts Wednesday, runs for about a week)

Vincent Schwenk ➔
50% discount with code RENDERSALE

Wacom ➔
Up to $120 off new tablets + deals on refurbished items


Unlock Your Motion Design Potential

Get unlimited access to 50+ courses, workshops, and resources from the best instructors in motion design. Join School of Motion All-Access today.
